Tutorials
Session Manager API
- HOD Hex Client also supports specialized APIs, called Session Manager APIs. These JavaScript-based APIs help application developers manage host sessions and text-based interactions with host sessions.
- Refer to Session Manager API for configuration details and list of API's supported.
Function update HTMLParameters()
- This function is to modify the session properties dynamically. This function is called before the create connection is established. The overridden values take precedence over the initial session properties setup by the administrator. The overridden property is locked so the user cannot change it.
Steps to set the parameters:
Option-1:
-
Create json array and pass it to the below method.
Var hod_applet = new hod_session();
Var json_object = {“host”:”host_address”,”port”:”23”}
hod_applet.setHTMLParametersToOverride(json_object);
Option-2:
- Create json array repetitively calling below function
-
Pass a json object to HOD Hex Client using below api
Var hod_applet = new hod_session();
hod_applet.setHTMLParametersToOverride(“HOST”,”HOST ADDRESS”);
hod_applet.setHTMLParametersToOverride (“port”,”12175”); etc
hod_applet.setHTMLParametersToOverride(); //finally this to call set method
Dynamically modifying session properties:
- By default the session definitions are defined by the administrator. By Overriding HTML parameters, can modify the session properties in the client side. Only a particular session properties can be override. They are Host, Port , Code page, LUName, Workstation ID and Screensize.
- The overridden values takes precedence over both the initial session properties setup by the administrator.
- The overridden property is locked so the user cannot change it.
Add Parameters in Deployment wizard:
-
Need to include an HTML parameter
EnableHTMLOverridesand set it to true (In Deployment Wizard, Advanced options à HTML parameters). -
Need to include an HTML parameter
TargetedSessionList, having a value of exact name of the session to accept overrides (In Deployment Wizard, Advanced options à HTML parameters).
The list of session properties that can be overridden is given below:
| Parameter name | Description | Valid Values |
| Host | Host name or IP address of the target server. Appears as "Destination address" on property panels. Applies to all session types | Host Name or IP address |
| HostBackup1 | Host name or IP address of the backup1 server. Appears as "Destination address" of backup1on property panels. Applies to all session types. | Host Name or IP address |
| HostBackup2 | Host name or IP address of the backup2 server. Appears as "Destination address" of backup2on property panels. Applies to all session types. | Host Name or IP address |
| Port | The port number on which the target server is listening. Appears as "Destination port" on property panels. Applies to all session types. | Any valid TCP/IP port number. |
| PortBackup1 | The port number on which the backup1 server is listening. Appears as "Destination port" of backup1 on property panels. Applies to all session types. | Any valid TCP/IP port number. |
| PortBackup2 | The port number on which the backup2 server is listening. Appears as "Destination port" of backup2 on property panels. Applies to all session types. | Any valid TCP/IP port number. |
| CodePage | The codepage of the server to which the session will connect. Appears as "Host Code-Page" on property panels. Applies to all session types except FTP. | The numeric portion (for example, 037) of the supported host codepage listed in the session property panel. |
| LUName | The name of the LU or LU Pool, defined at the target server, to which you want this session to connect. Appears as "LU or Pool Name" on property panels. Applies to 3270 Display and 3270 Printer session types. | The name of an LU or LU Pool. |
| LUNameBackup1 | The name of the LU or LU Pool, defined at the backup1 server, to which you want this session to connect. Appears as "LU or Pool Name" of backup1 on property panels. Applies to 3270 Display and 3270 Printer session types. | The name of an LU or LU Pool. |
| LUNameBackup2 | The name of the LU or LU Pool, defined at the backup2 server, to which you want this session to connect. Appears as "LU or Pool Name" of backup2 on property panels. Applies to 3270 Display and 3270 Printer session types. | The name of an LU or LU Pool. |
| WorkstationID | The name of this workstation. Appears as "Workstation ID" on property panels. Applies to 5250 Display and 5250 Print session types. | A unique name for this workstation. |
| ScreenSize | Defines the number of rows and columns on the screen. Appears as "Screen Size" on property panels. Applies to 3270 Display, 5250 Display, and VT Display session types. |
|
An administrator can set the custom parameters using 1 of the following methods.
- By Setting all the parameters in the Deployment Wizard;
-
OR, By Using custom JSP code (feature delivered as part of custom UX). In template file update hHod_AppletParams variable with all the custom parameters.
For Example:hHod_AppletParams[“host”] = “host_address”; hHod_AppletParams[“port”] = “port_number”; - OR, By Setting parameters via Session managers API using one of the below
ways.
- Option-1:
-
Create json array and pass it to the below method.
Var hod_applet = new hod_session();
Var json_object = {“host”:”host_address”, ”port”:”23”}
hod_applet.setHTMLParametersToOverride(json_object);
-
- Option-2:
- Step 1: create json array repetitively calling below function.
- Step 2: pass json object to HOD Hex Client
using below api.
Var hod_applet = new hod_session();
hod_applet.setHTMLParametersToOverride(“HOST”,”HOST ADDRESS”);
hod_applet.setHTMLParametersToOverride (“port”,”12175”); etc
hod_applet.setHTMLParametersToOverride(); //finally this to call set method
- Option-1:
FTP_VT Document on non windows
Pre-requites
- FTP/VT Build
- Node JS for Non-Windows-Installing IBM Open Enterprise SDK for Node.js on z/OS or other machines should provide node capabilities on non-Windows
- Link: IBM Open Enterprise SDK for Node.js
Step :1 Node JS deployment and configuration with FTP/VT build
1. Once Node.js is deployed on a non-Windows
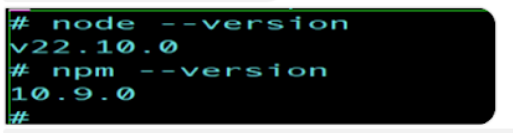
Use the command below to check the node version
node –version
npm –version
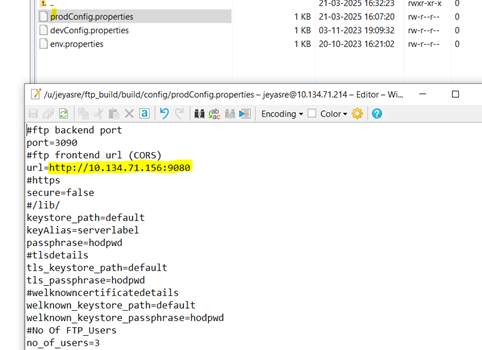
For FTP Connection
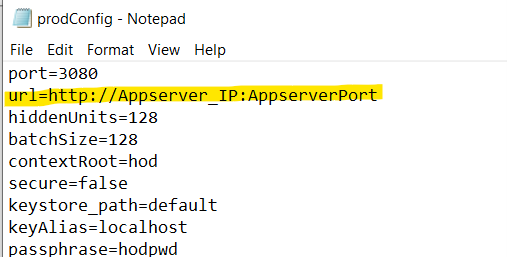
Navigate to /node/ftp_build/config/prodconfig.properties and update the url property to point to the machine where the HEX Client is running.
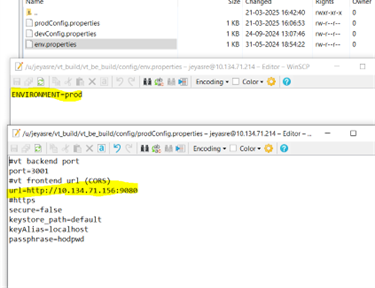
For VT connection
Similarly, navigate to /node/vt_build/config/prodconfig.properties and update the url property to point to the machine where the HEX Client is running.
Start the FTP/VT node server using command below
Step 4: After completing all the configurations, start the Node server for FTP/VT.
Step 5: To start the Node service, open the Command Prompt in the folder where the node directory is located, and type the following command to start the server: “node server.js”
FTPà Navigate till ftp_build folder (<HOD-distribution-folder>/lib/node/ftp_build )
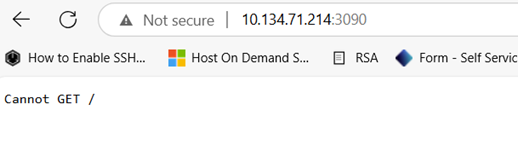
Command to run: node ./build/server.js
output:
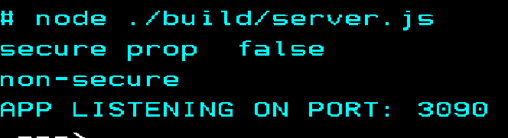
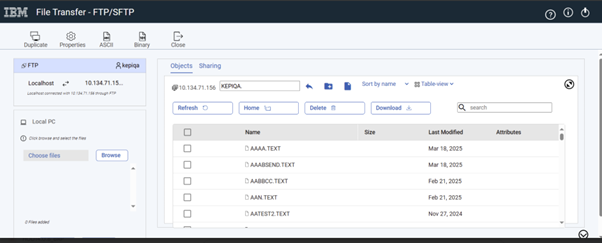
Run on client browser : eg:http://10.134.71.214:3090/
You should get page below
VTà Navigate till ftp_build folder (<HOD-distribution-folder>/lib/node/vt_build )
below command
Cmd : node ./vt_build/server.js
Output:
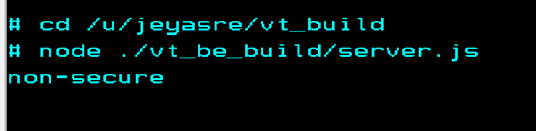
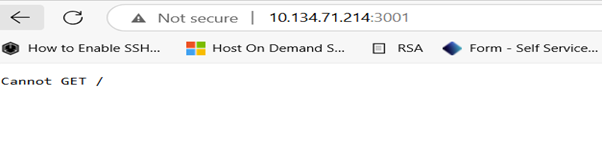
Run on client browser : eg: http://10.134.71.214:3001/
You should get below page
Note: If the user wants to run both the node server. We need to run as a Job in the mainframe.
Step 2 : HOD configuration
Make sure that the HOD is configured properly.
Next step:
1.Stop the HOD server
2. Open NSMprop under the private directory of the HOD installed location and check whether the following parameters are set to NO and save
VTBACKEND_AUTOSTART = NO
FTPBACKEND_AUTOSTART = NO
3. Edit the web.properties file under the private folder of HOD and save
EnableFTPsession=true (only for FTP session)
Restart the HOD service.
Step 3: HOD HEX Client configuration
Make sure that HACPEE is configured with HOD and is working properly.
Next Step:
1. Stop the Application server.
2. Open war/ear using 7-Zip on the client machine and edit the web.xml file
- Check the HOD configuration once in web.xml
- Edit the below para values; these need to point to the vt/ftp server that is running, and save the file
<context-param>
<param-name>ftpBackend</param-name>
<param-value>http://<ipaddress>:3090</param-value>
</context-param>
<context-param>
<param-name>vtBackend</param-name>
<param-value>http://<ipaddress>:3001</param-value>
</context-param>
3.File transfer the war/ear file to App server and start the App server service.
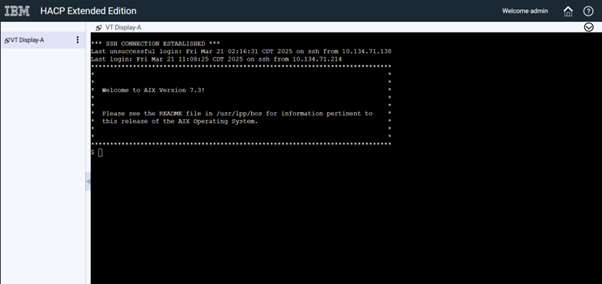
Access the HOD Hex Client page and launch VT/FTP session created
Intelligent Typing Assistance Configuration in Non-Windows
This feature suggests complete commands (e.g., ACTIVATE, CANCEL, CHNGDUMP) in the presentation window of the green screen, based on the first 3–4 characters typed by the user, using a Deep Neural Network (RNN – Recurrent Neural Network).
Examples:
- Input (3 chars): "ACT" → Output: "ACTIVATE"
- Input (4 chars): "CANC" → Output: "CANCEL"
This feature works on Windows, Linux, and macOS without any additional effort. To use this feature on operating systems other than those mentioned, follow the procedure given below.
Pre- requisites:
Step 1: Copy the node folder from <HOD-distribution-folder>/lib/node to the supported operating system.
This folder contains the required pre-installed packages: ai_build, ftp_build, and vt_build.

Step 3: Navigate to /node/ai_build/config/prodconfig.properties and update the url property to point to the machine where the HEX Client is running.
Step 4: After completing all the configurations, start the Node server for Intelli Assistant.
Step 5: To start the Node service for Intelli Server, open the Command Prompt in the folder where the node directory is located, and type the following command to start the server: “node server.js”
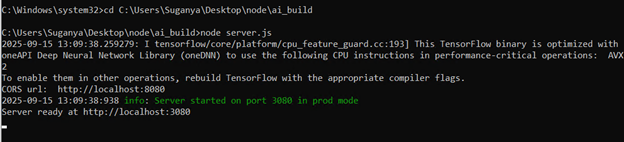
Note: Make sure the port on which you are starting the Node server is available.
To use the feature “Intelligent Typing Assistance” on the HEX client:
Step 1: Launch the HTML/config/combined page and enable auto-suggestion.
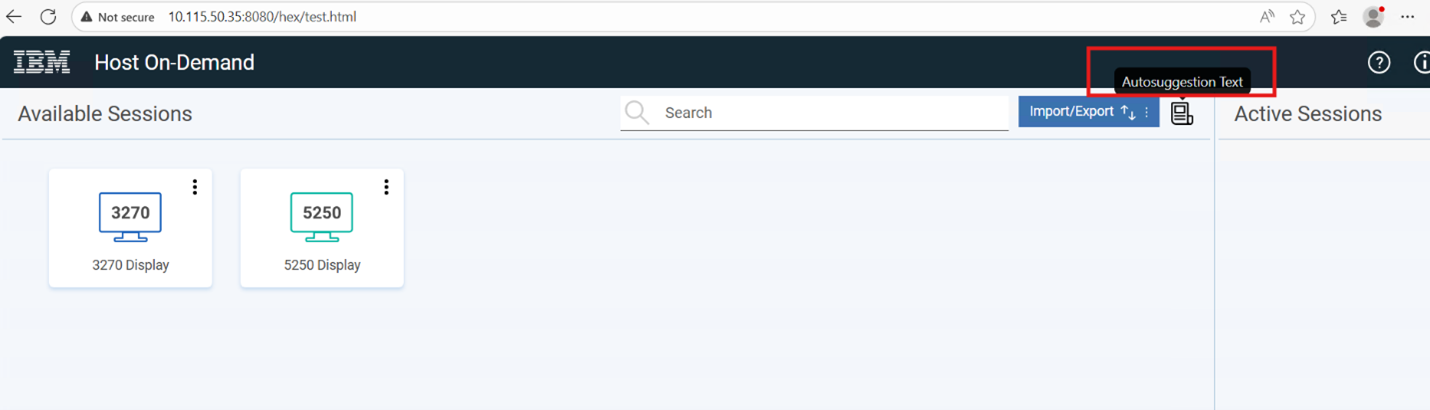
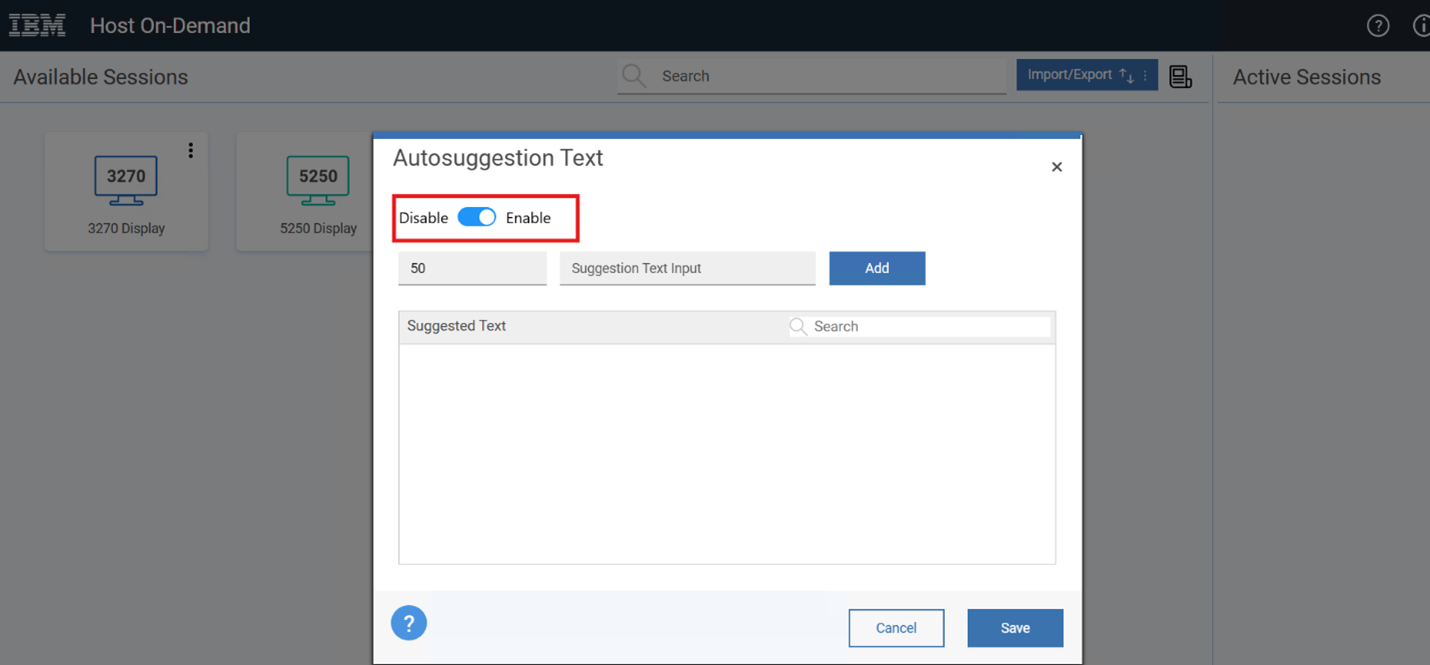
Step 2: Launch a 3270/5250 session. On the terminal screen, when the user starts typing, the model will begin providing suggestions after three characters. As the number of characters increases, the suggestions will update accordingly. The user can choose whether or not to select a suggested command.
Training the model to work with customized commands:
Step 1: Add customized commands as per your requirements in the <HOD-distribution-location>/hod/AIResources/traindata.txt file located inside the HOD directory.
(Each command should not exceed 12 characters in length.)
Step 2: Navigate to the Admin Console → Intelli Configuration and click the Train button. While training is in progress, the Train and Fetch buttons will be disabled.
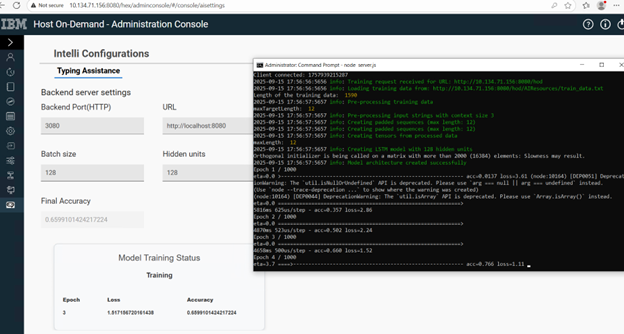
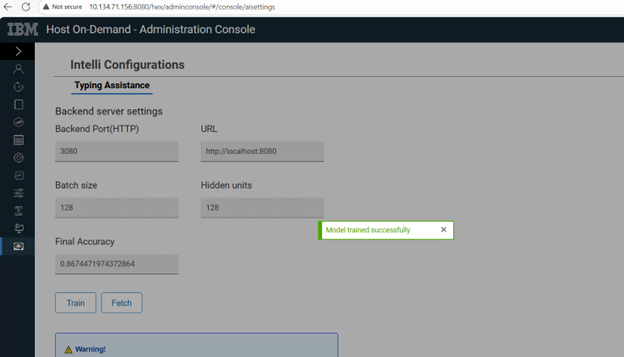
Step 3: Once the training is completed, a success message will appear, and the trained model files will be saved at the specified location. You can check the location in the /node/ai_build/logs/all.logs file.
Step 4: Copy the latest trained files (model.json and weights.bin) from that location to the machine where HOD is installed, into the <HOD-distribution-location>/hod/AIResources/ folder.
After this, the user can use the feature on the client side with the updated/trained model files.