Administrator Console
The Admin Console is a web-based solution for managing various user and session configurations. Administrators can manage and configure the User and Session Properties.
Sample Path: http://<IPAddress>:<port>/<contextpath>/adminconsole
Users
This Tab contains information about Groups and Users. All the groups and user
configurations can be done here.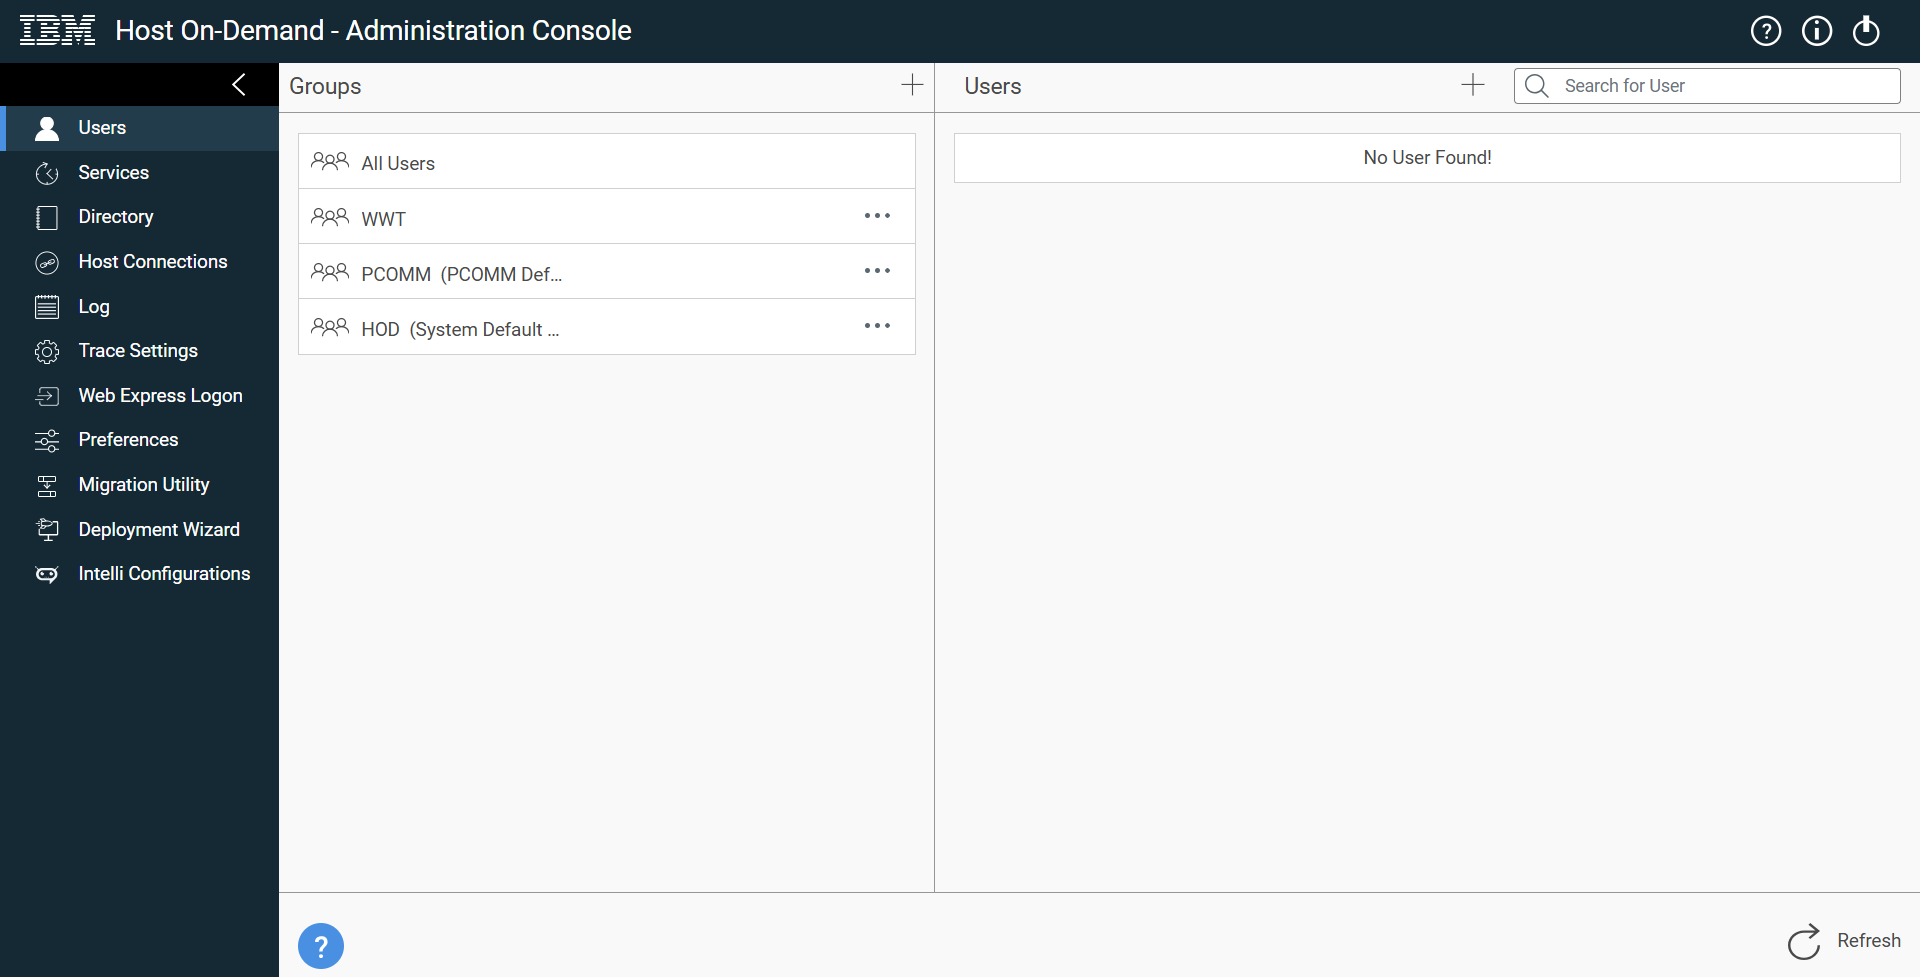
Following are the operations:
- Create, Update, Delete Group
- Create, Update, Delete User
- Copy/Cut & Paste a User from one Group to other.
- Manage Disable Functions of Group/User.
- Trace Facility option is available for User.
- Create, Update, Delete Sessions for User/Group.
Services
This Tab allows to manage services like OS/400 and redirector.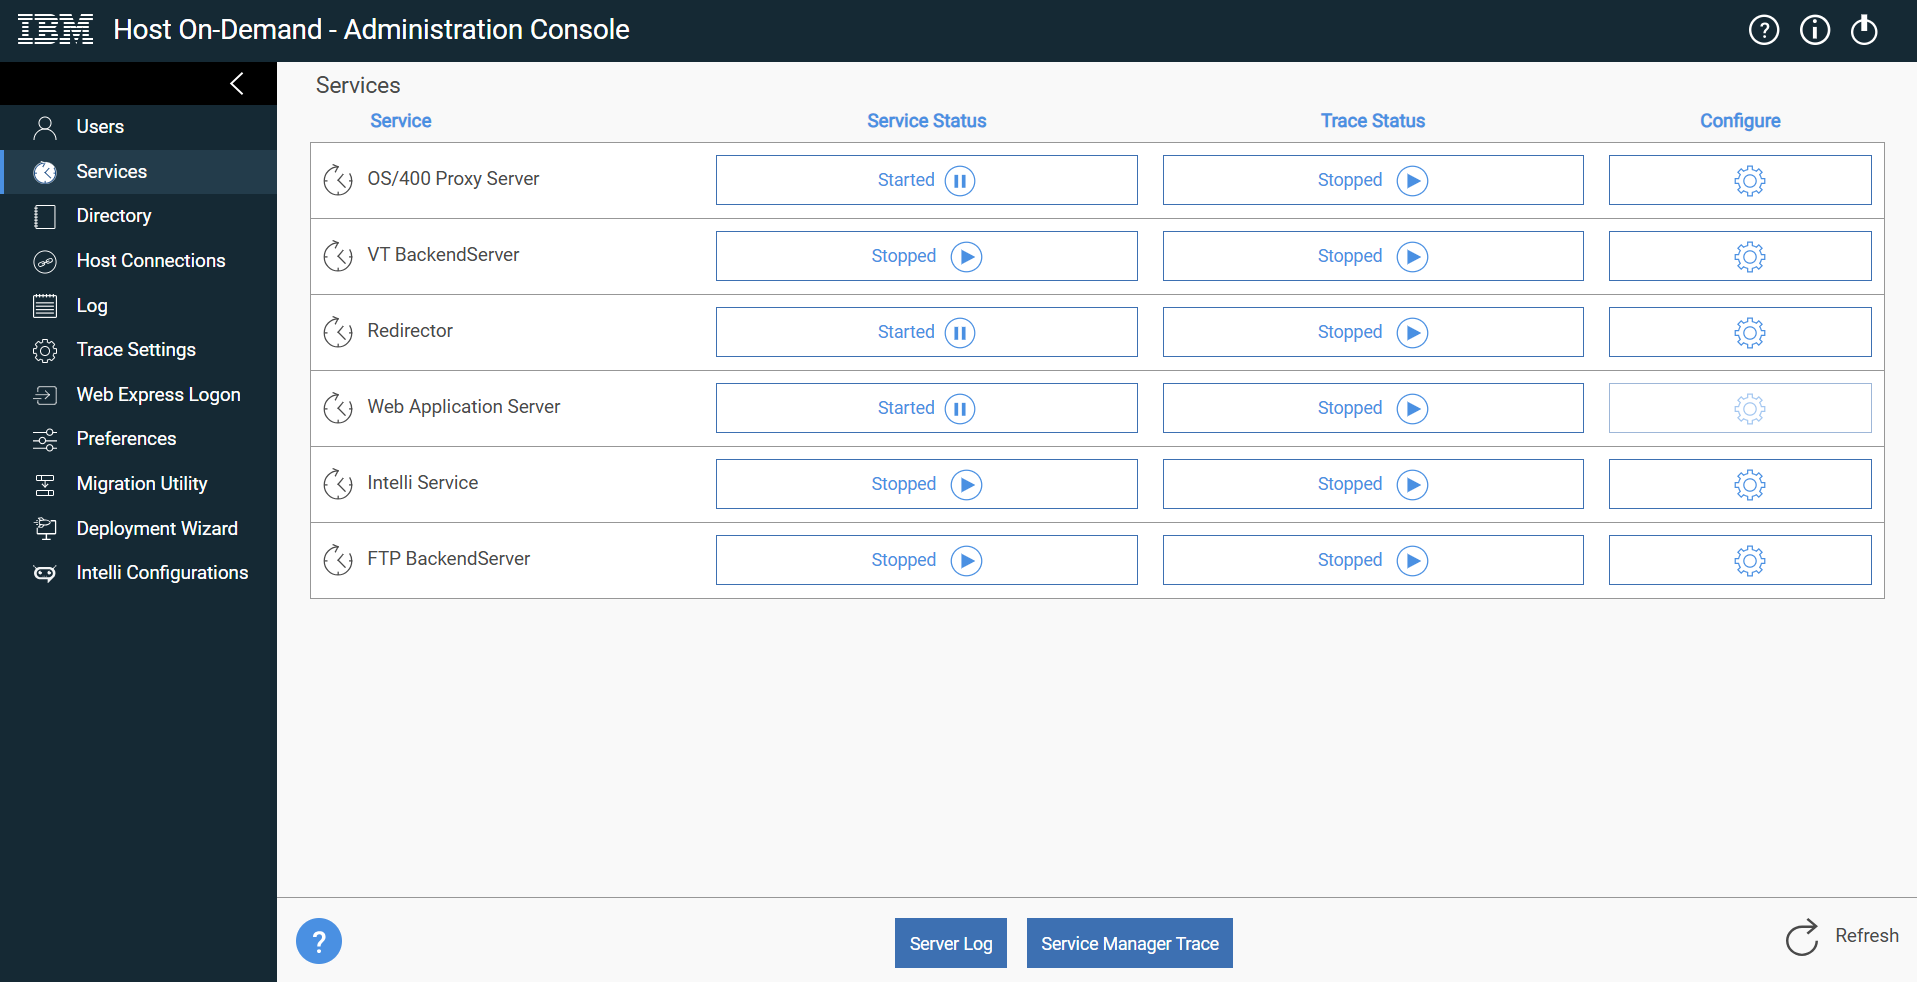
- Start/Stop the Service
- Start/Stop Trace
- Configure Service
- Update Service Trace Manager Properties (Common for all services)
- Server Log (Common for all services)
Redirector: creating, updating, deleting of a redirector can done by clicking on configure icon.
OS/400: configuration like port and connections information can be updated on clicking of configure icon.
Directory
This tab allows to Configure LDAP information and have option to migrate from files to LDAP and vice versa.
If LDAP is configured, all the User information will be populated from LDAP Directory. there will be changes in User Tab as well.
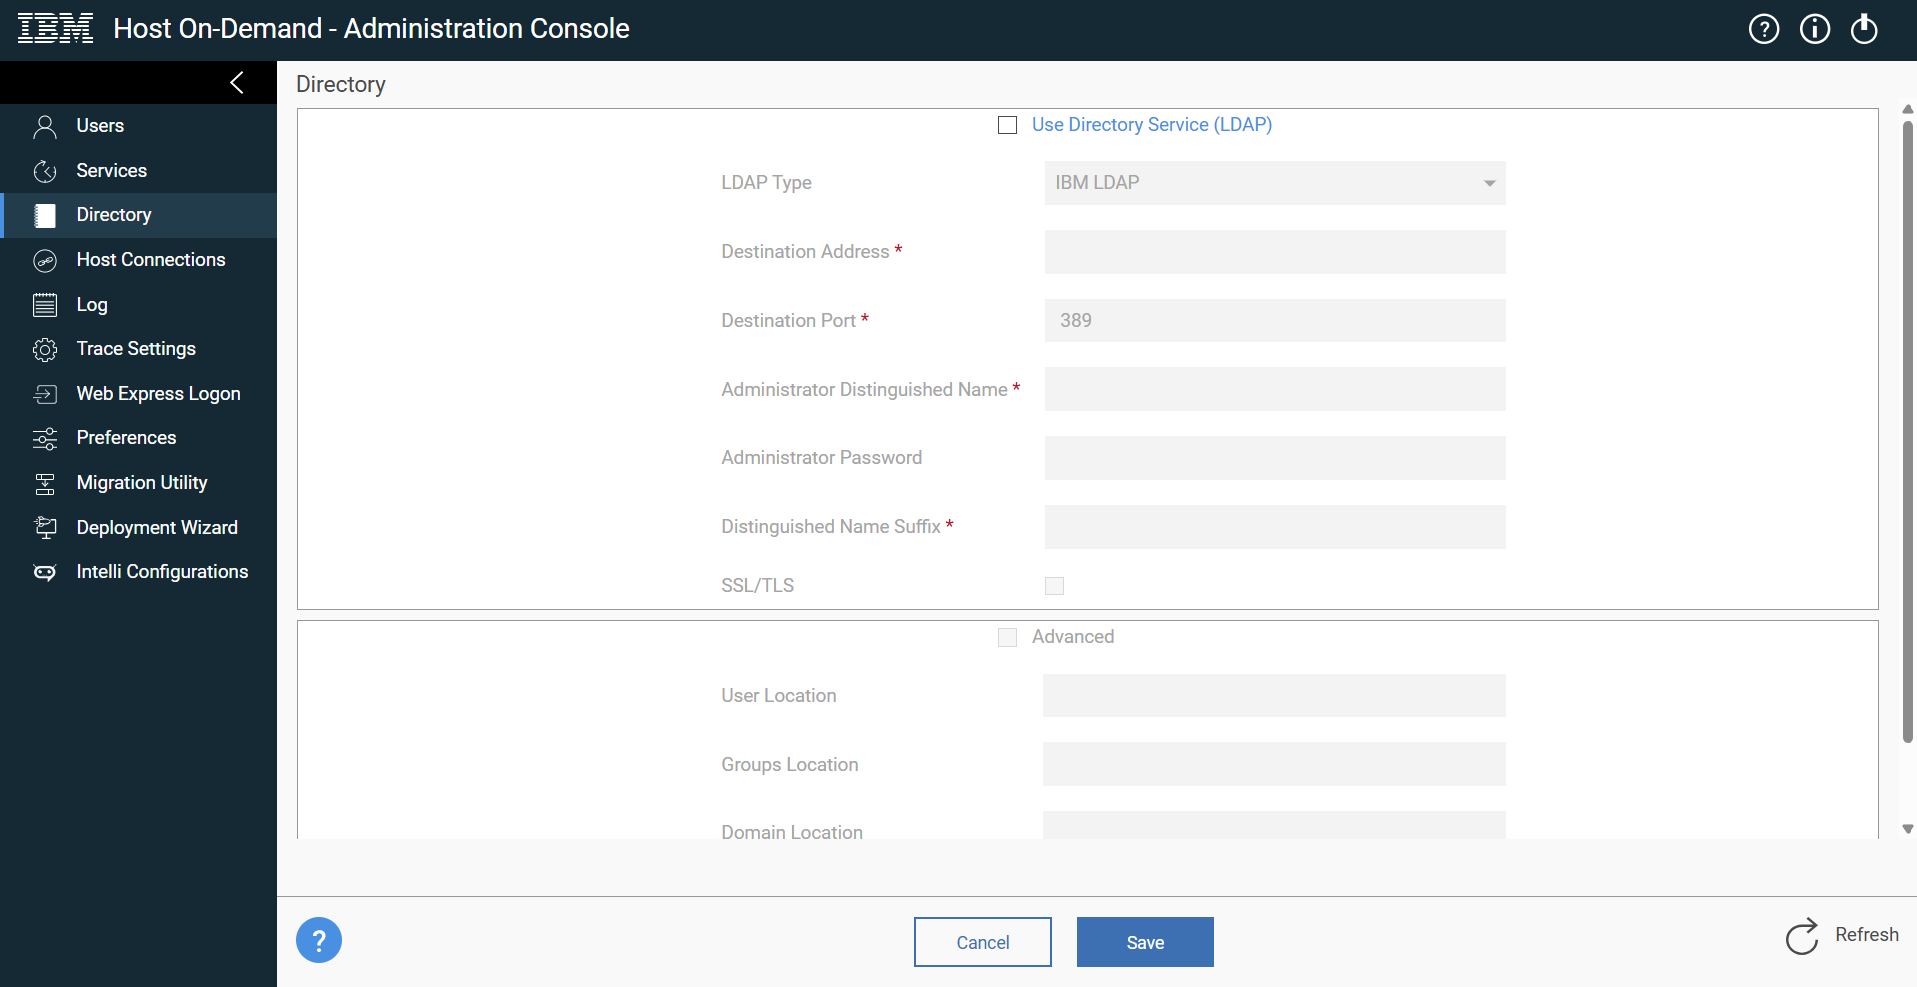
Following are the changes.
- Groups will be shown in Hierarchy manner. One group can be created under Existing Group.
- Until delete of all subgroups parent group will not be deleted.
Host Connections
This tab allows to manage all host connections or sessions which are connected to
host.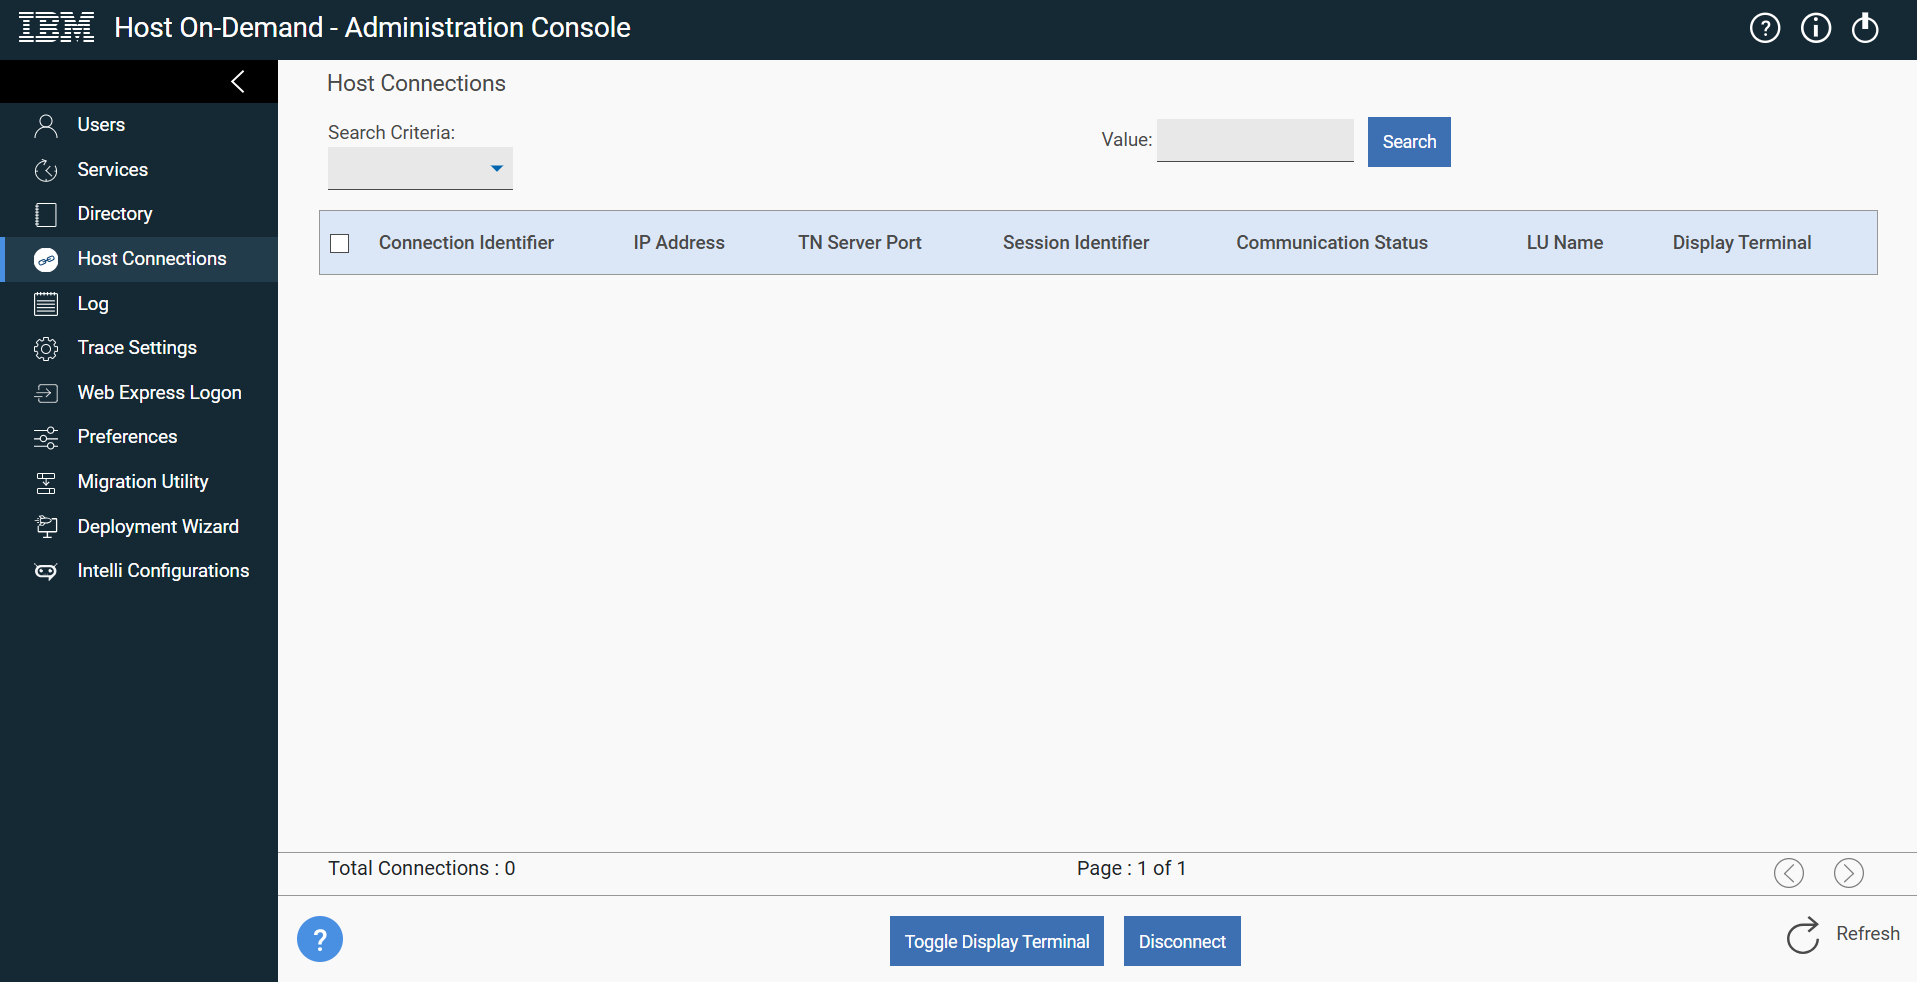
Admin can disconnect and toggle display terminal by selecting particular session. Also, provides filer options to filter host connections.
Log
Displays all the logs of session. History of log files can be selected and view the logs of selected file.
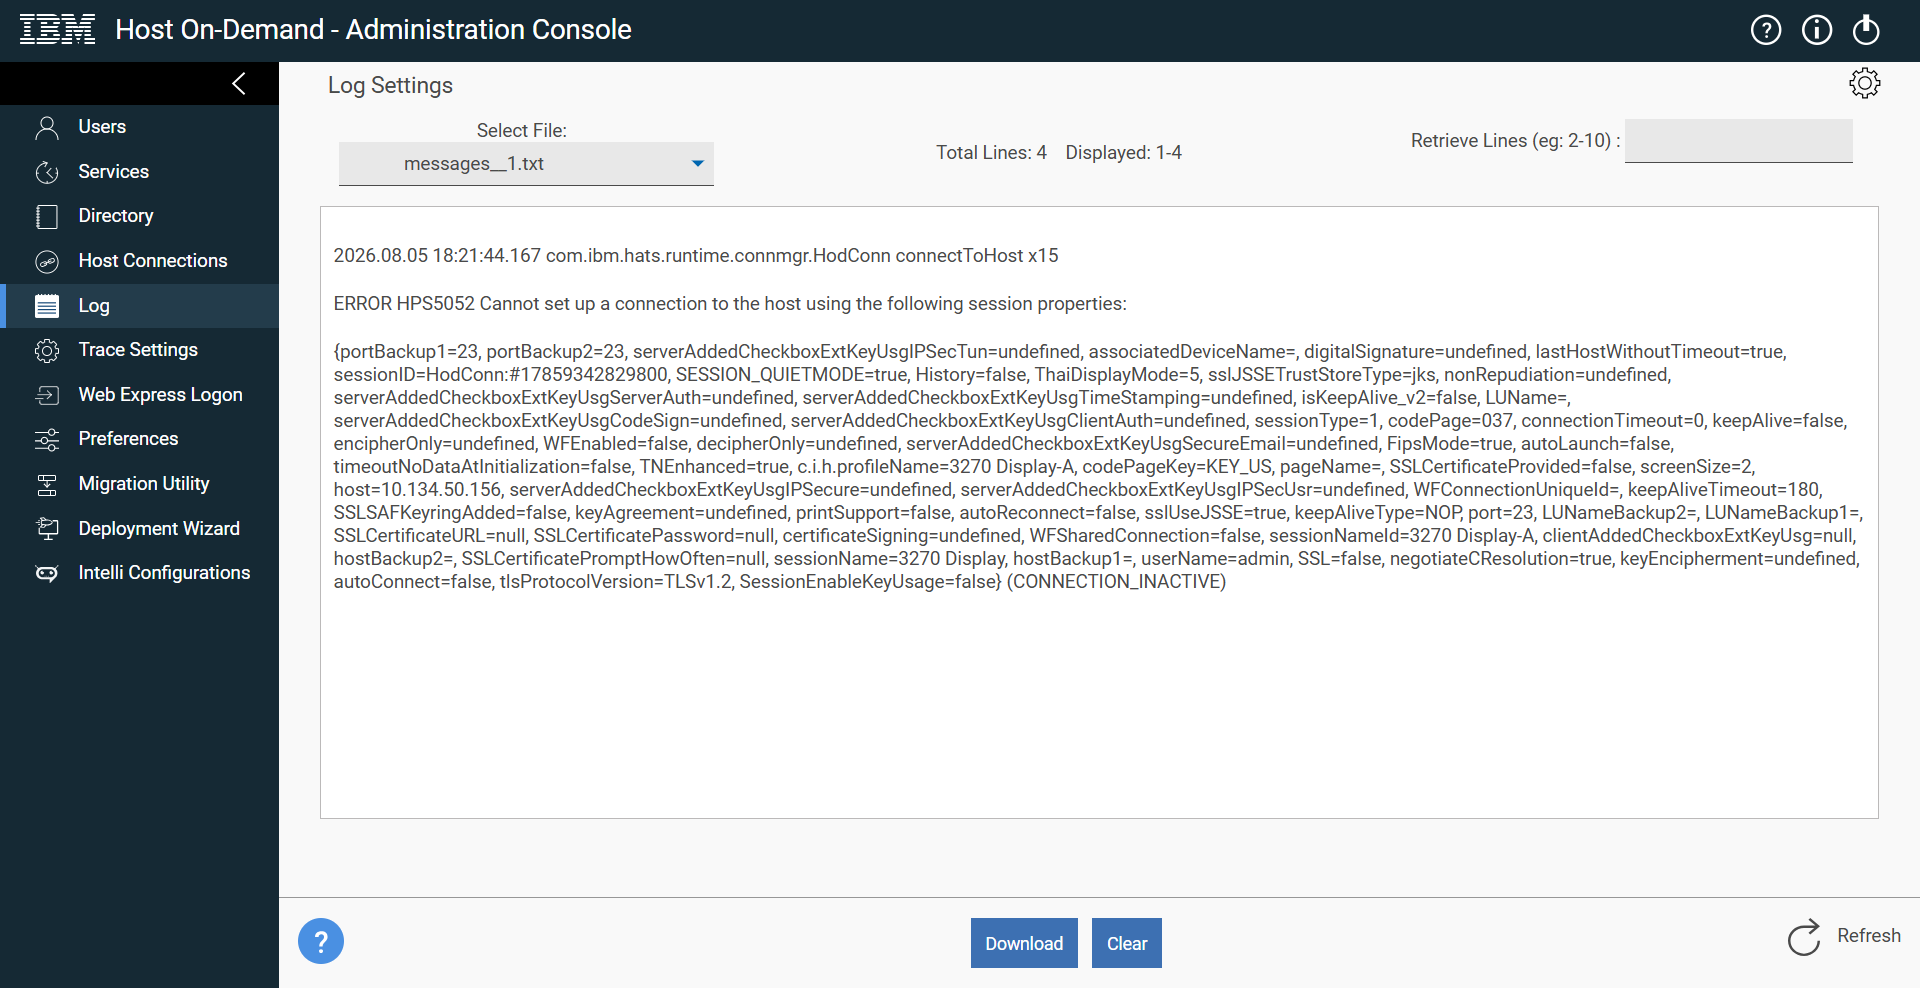
Download Selected log file by clicking on download. and selected Log file can be cleared by clicking on clear Log button.
Log Settings like file name, max size, no: of history files, can be updated by clicking on log Settings Icon.
Trace Settings
Trace settings can be updated in this Tab. Download & clearing the Trace buttons
are available here.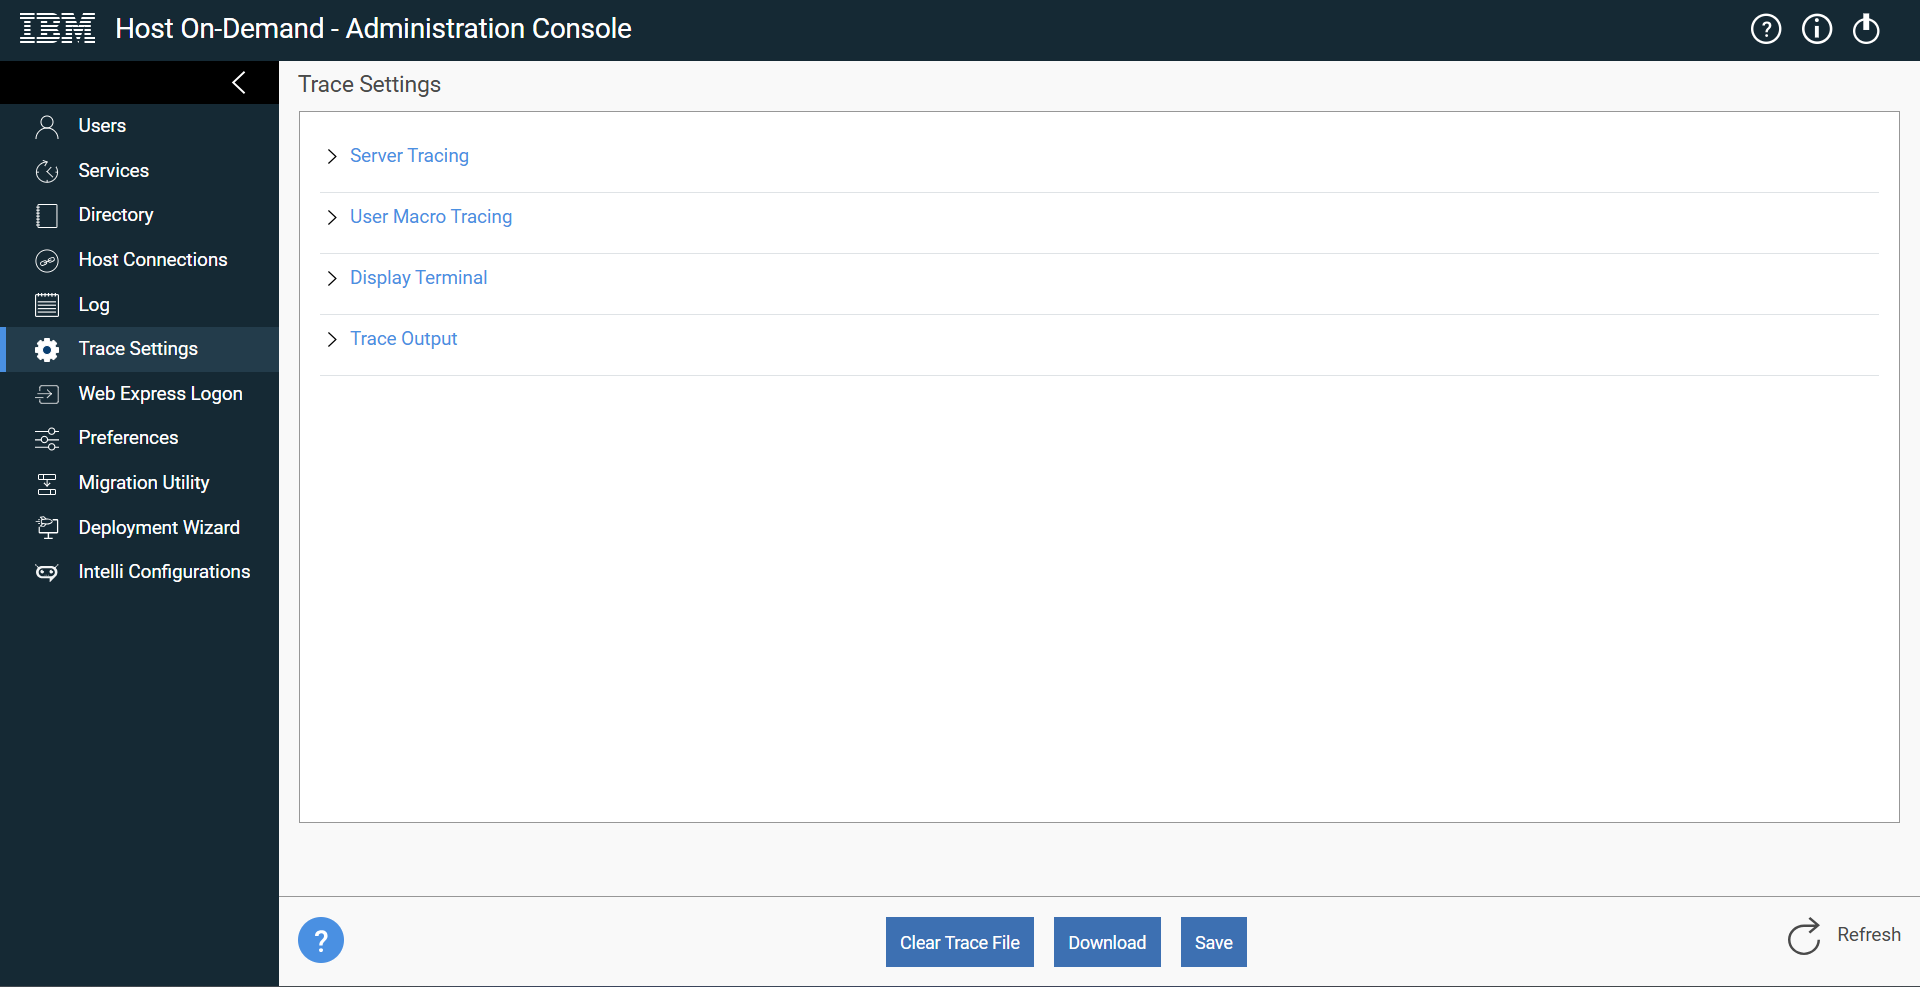
Trace Settings options are as follows:
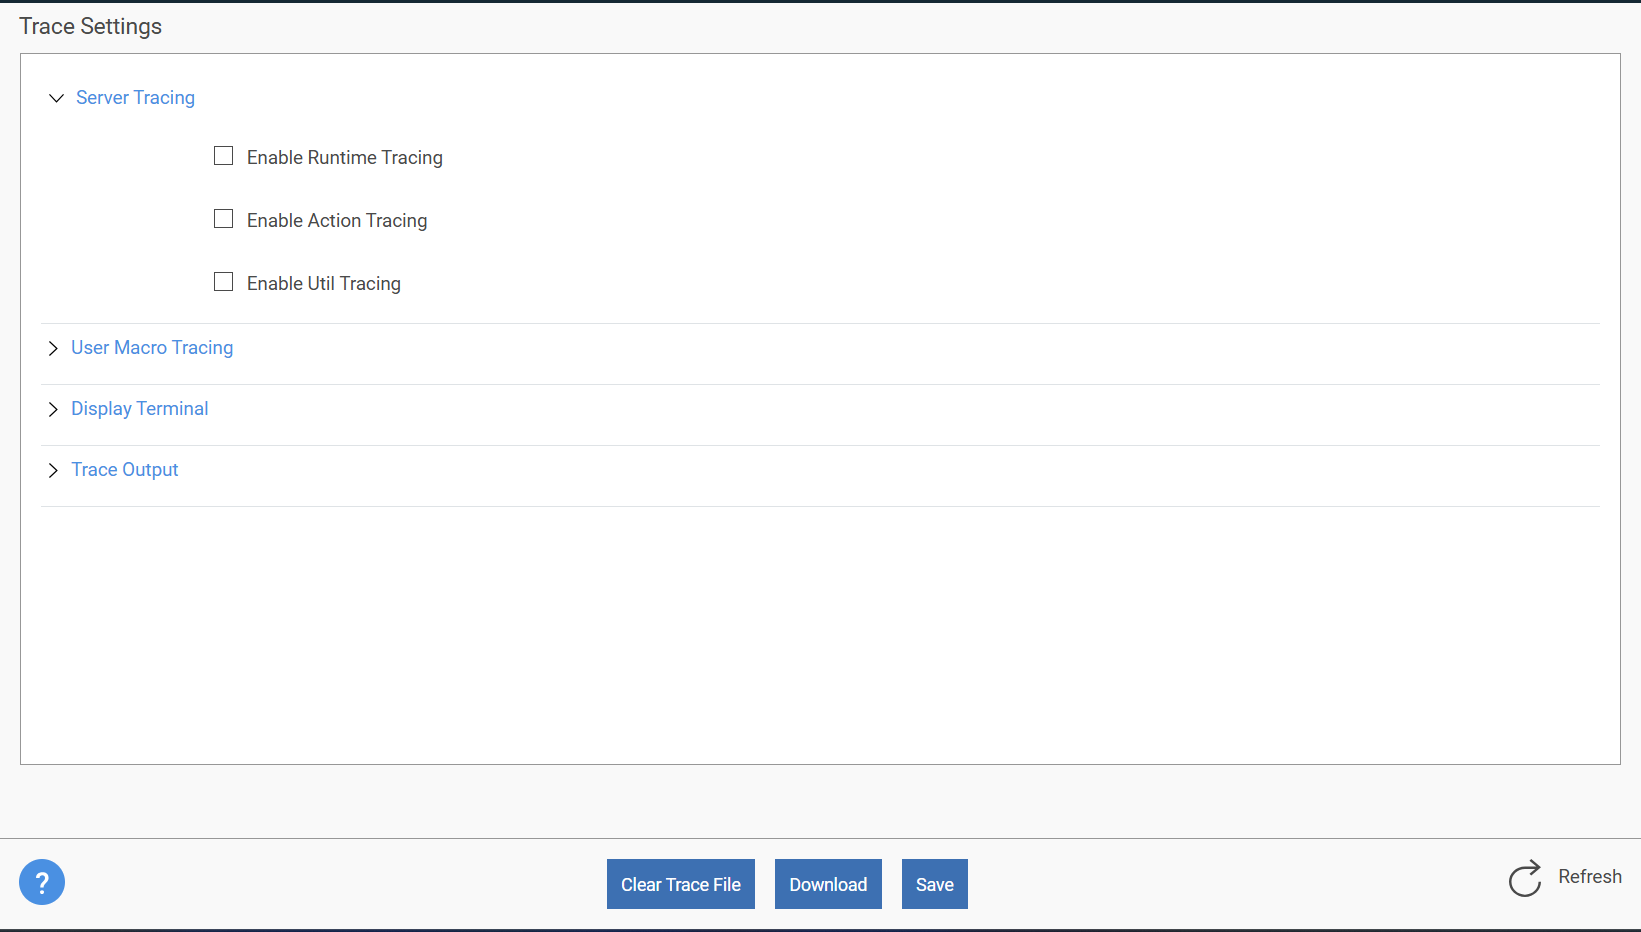
- Server Tracing: These options turn on different traces for the server.
Server tracing is used for tracing the various connection management and other
server-side tasks including administration.
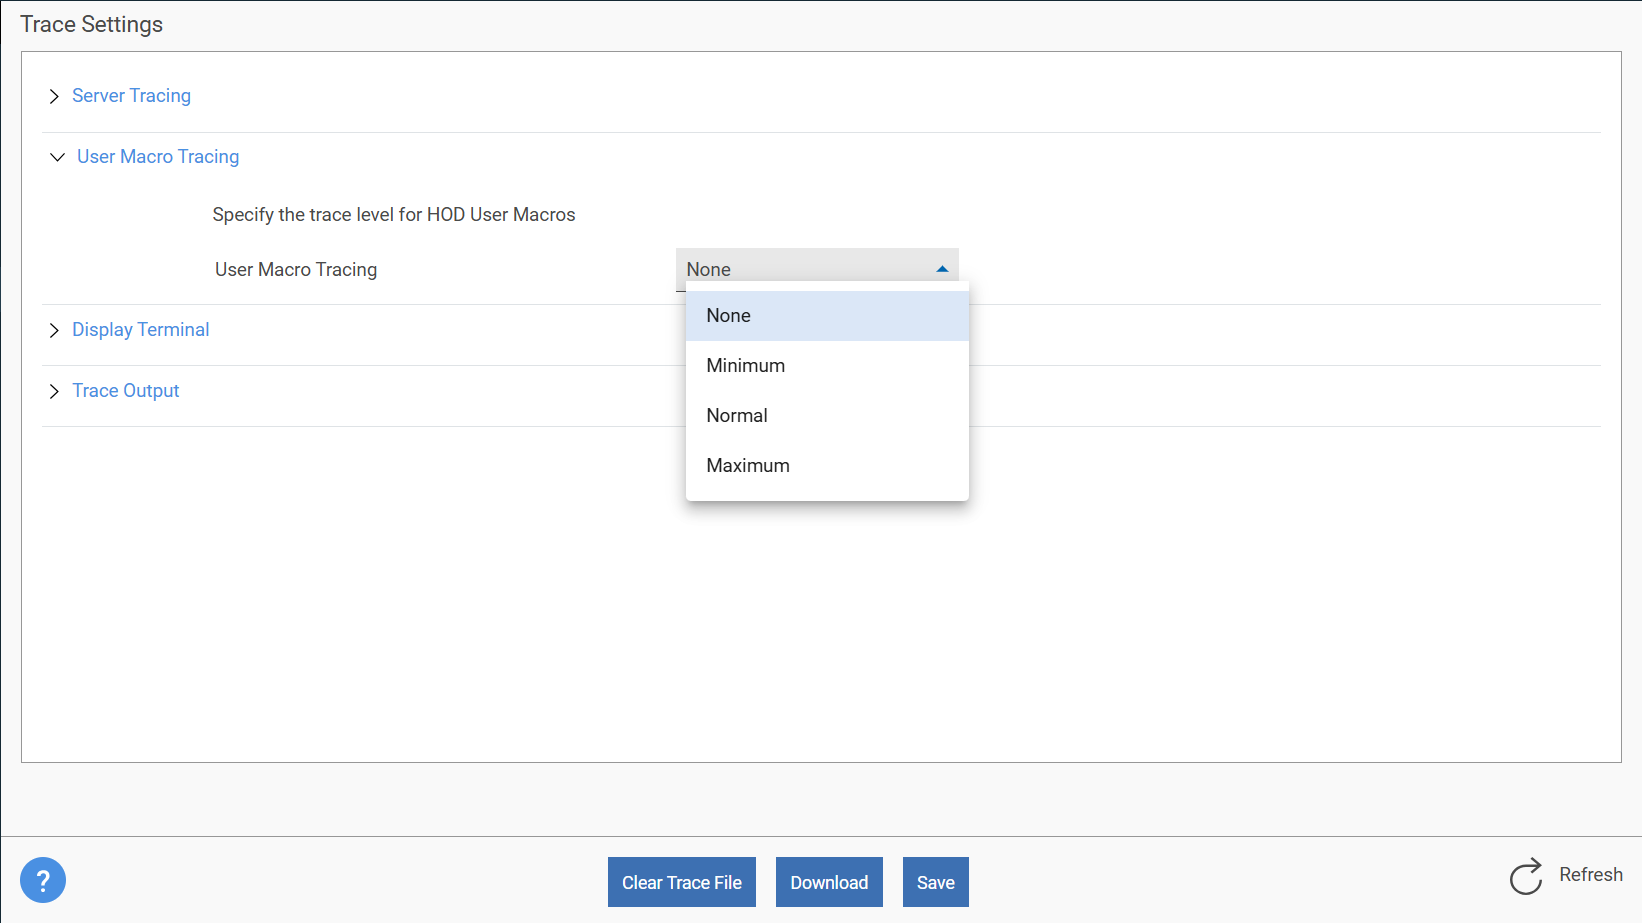
- User Macro Tracing: This option enables tracing for Host On-Demand User
Macros.
- Display Terminal: The Display Terminal option displays the green screen associated with a host connection. The display appears on the server machine.
- Trace Output: The trace output shows the name of the trace file in the operating system. The name specified here is only the template name for the trace files. The actual trace files are named by adding a number to the template name specified.
All above Tracing related properties can be modified in this Tab.
Web Express Logon
Web Express Logon (WEL) is a feature in HOD Hex Client that allows Users to perform Single Sign-On while recording macros. Single Sign-On allows Users to skip numerous login screens and permits to login at once with a single screen, which eliminates the need for the user to keep track of multiple credentials.
For more information refer to SSO via WEL: Configuring Single Sign-On using Web Express Logon section.
Preferences (Control)
It enables admin to set preferences values.
Migration Utility
The Migration Utility in the HOD Hex Client admin console serves as a web view for the traditional HOD Migration Utility, which allows the HOD Hex Client administrators to migrate the HOD user profiles and data from a lower to a higher version.
This module includes the Export, Import, and Rollback process.
Export:This process allows users to export the HOD data into a Migrationpackage.zip file which gets downloaded to the browser-configured download location on successful export.
Below inputs are provided by the users:-
Provide the complete HOD source installation path (mandatory field)
Example: C:\Program Files\ibm\HostOnDemand
-
Provide the complete path of custom files except for the default location, i.e., HODObjs
Example: C:\ibm\CustomFiles
Import:This process allows users to import the lower version of HOD data to migrate to a higher version as a .zip file.
- Browse the MigrationPackage.zip file that needs to be imported (mandatory field)
-
Provide the complete Target HOD installation path (mandatory field)
Example: C:\Program Files\ibm\HostOnDemand15.0.0.0
- Next, the ‘Target Backup’ option (by default checked) creates the backup server files of the target HOD.
- There are options to override the directories (by default checked), which include ‘Private Directory, Publish Directory, PDFPdt, and Dirutils.’
- Next, the ‘Other optional settings’ link is available to override multiple keys and values.
- The mandatory dropdown allows users to select any of the options below.
- Terminal
- FileTransfer
- Icon
- FTPTerminal
- dbaOptions
- targetUI
On successful import, the NCService Manager will hang on until restart.
Rollback:This Rollback option allows users to restore the application to its previous state. It is applicable only when the ‘Target Backup’ option is selected while importing the files.Users must provide the complete path of the Target HOD installation path (mandatory field).
Example: C:\Program Files\ibm\HostOnDemand15.0.0.0 On successful rollback, the NCService Manager will hang on until restart.Terminal:This process has the ability to override the 'Terminal' properties of configuration user profiles during import.
Users provide the following inputs for the configuration migration utility:
-
Browse and import the ConfigParameters.properties file, which must contain ‘Terminal’ parameters as a key and value pair.
Example: portBackup1(key) = 23(value)
-
Provide the complete Target HOD installation path.
Example: C:\Program Files\ibm\HostOnDemand15.0.0.0
- Click on import.
- On successful import, the .user files under HOD private directory will be
overwritten.Note:
- .properties files disable the directories such as TargetBackup in the import panel.
- On successful import, the NCService Manager will hang on until restart.
Web-Based Deployment Wizard
The Web-Based Deployment Wizard (DW) is a component of the web-based admin console where users can create multiple sessions (3270 Display, 5250 Display, FTP, VT, CICS, 3270 Printer and 5250 Printer sessions) using the web page. The web-based admin console sessions created by default are cache client type. The user can launch the HOD Hex Client page immediately after creating it.
Users can create HTML pages using the web-based DW. Those HTML pages can be accessed using a web client and a desktop client.
Prerequisites
- Ensure that the HOD Hex Client admin console and all supported HOD components are running.
- Choose any one of the two options below under the DW section of the admin console.
Options
-
Create new HTML file
Users can create Deployment Wizard files in the same way as a standalone wizard.
-
Edit existing HTML file
Edit the existing file via the Deployment Wizard in the admin console.
Users can edit or create HTML pages using the following three ways:
- HTML - based Model
- Configuration Server-based Model
- Combined Model
- Flow of Event for Create new HTML file:
Execute the below steps to create HTML pages.
- Login to the Admin console.
- Click on the Deployment Wizard tab from the left-side navigation bar.
- Users are redirected to the DW home page.
- Now, users can use any one of the three ways to create DW files.
- HTML - based Model:
- Select an HTML-based model.
- Users will navigate to the Host Session page, which has New/Import and Disable function buttons.
- Click on the New/Import button.
- A pop-up will appear where users can select any new
session (3270,5250, FTP, VT, CICS,3270 Printer and 5250
Printer sessions) from the drop-down or import the
existing session.Note:Click on the “Disable function” button, it will open a pop-up that contains all disable functionalities.
- Now, the new/imported session will be added to the card of the host session.
- Click on more icon for other features like Properties
& Action.
Note: The feature Action has options like Start, Copy, Delete, Export session, Toolbar, Popup Keypad etc.
- Click on Properties to display the respective properties of the session.
- Click on the next arrow and navigate to the next Page,
i.e., Launcher Option, which has three
tabs/options.
- Client Options
It configures Basic and Upgrade options.
Basic Options - Specify the width and height (both in pixels) of the progress indicator frame for the download process.
Upgrade Options - Specify how to upgrade the client option.
- Preload Options
It controls the initial download size by specifying the HOD Hex Client components to be included in the initial download. This allows users to select frequently used components. All other components are downloaded as needed. If the user accesses a function for which the components have not been downloaded, the component will be downloaded at that time.
- Advanced Options
Advanced Options allow users to configure additional HTML parameters, a code base, HTML templates, problem determination settings, user updates, and session appearance. Users can also use this panel to configure other options, such as Session Manager APIs, server connection options, language, and the number of sessions allowed.
- Client Options
- Select the required Output Format. A summary will appear, which displays all the selected data and added session names from previous pages.
- Enter the page title and file name, and then click the
Next arrow.
Note: The Next arrow button will be Disabled till the names and output format are chosen.
- The Congratulation Page will appear on successful page creation.
- The Congratulation Page, based on the below
selection, users are navigated to the required page:
- Launch Web Browser Client - Navigate to the HOD Hex Client Page.
- Launch Desktop Client - Navigate to the HOD Page.
- Restart Deployment Wizard - Navigate to the Home Page of DW.
- Configuration Server–based Model:
Once the user clicks on Configuration Server–based Model, users will navigate to the Logon Type Page, which has the following three options:
- Prompt users to enter Host On-Demand User ID.
- Use Web Express Logon.
- Automatically log users on to the Host On-Demand using their Windows username.
Once the user selects any one of the above and moves to the next, they are redirected to the Launcher Option. Repeat the configuration steps from 8 to 12 given in the HTML - based Model.
- Combined Model:
Once the user clicks on Combined Model, a popup will appear. Enter the Group Name, and click the OK button which navigates to the Launcher Option. Repeat the configuration steps from 8 to 12 given in the HTML-based model.
- HTML - based Model:
Note:
- In the initial screen page, use the Reset button to reset the saved values.
- In all screens, click the Restart button on the upper right corner to navigate to the Home Page.
- Also, Help icons are available on all screens to help the new users.
- Flow of Event for Edit existing HTML file:
- Select Edit existing HTML file.
- Now, a popup will appear containing the existing list of pages.
- Select the required page that needs to be edited and click OK.
- From here rest, all the screens remain the same as Create HTML File (i.e., 3 different ways).
Note:
- Use the search Filter to easily find the exact file from the list.
- The OK button will be disabled till the user selects any file from the list.
Intelli Configurations
-
Backend port: Port on which the Intelli backend (Node js) is running
-
URL: User can add URL on which HOD Hex client is running. Only specified URL is authenticated to access Intelli backend.
Syntax: http://AppserverMachineIp:AppserverPort
Example: http://10.134.54.99:8080-
secure: Boolean variable is used to enable the https in backend server.
-
keystore_path: By default the value for this property is “default†which means it will take /bin/HODServerKeyStore.jks file for https. If user wants to use different jks, he/she must give complete path of the jks.
-
keyAlias: Alias to the key that needs to be used for https
-
passphrase: Passphrase for the keystore.
-
Batch size: The number of training samples processed together in one forward/backward pass (e.g., 32 samples at a time). Larger batches speed up training but use more memory.
-
hidden units: The number of neurons/memory cells in the LSTM layer (e.g., 128 units). More units increase model capacity but risk overfitting.
-
Train: Upon clicking the train button, it will fetch the data from the train_data.txt file in the publish directory. It will tokenize each command and convert it into the tensor form. Once training starts, current Epoch, current accuracy, current loss, and progress can be seen in the status box.
- Fetch: Upon clicking the fetch button, Latest model.json and weights.bin file will be fetched in the WAR file.
Properties
List of Properties used in the Admin Console.
- Status Bar Visible for all - Boolean (True or False). Lock Required.
- Status bar editable by admin - Boolean (True or False).
- Client Refresh Interval – Integer
- Quick Connect – Boolean
- Default Locale – Select Option
- Preferred Locale – Multiple Select Option
- Template URL – file path (C:\\Users\\test\\custom
UI\\UI.jsp)Note:If web.properties file does not exist, it will be created at the backend and saves properties with default values.
Default Values for web.properties:
- templateURL – blank
- QuickConnectByAdmin – false (disabled)
- enableStatusBarForAll – false (disabled)
- clientRefreshInterval – false (disabled)
- defaultLocale- en
- isStatusBarEditableByAdmin – false (disabled)
- Server Port - Number
- Secure Port - Number
- Publish Context Path - Text
- Licence Manger Context Path – Text
- Amcms Context Path - TextNote:If the web.properties file is not present under the HOD private directory, then launch the HOD Hex Client admin console and click on Preferences tab to create the default values under private directory.
Default values for config.properties:
- AllowBlankPassword – YES
- enableChannelConnection – true
- publishDirContextPath – hod
- WebAppServerPort - 8080
- WebAppServerSecurePort – 8443
- lmContextPath – lm
- zfpClientContextPath – hex
Web app service port is displayed under services -web app service user can change the service port and restart the service to reflect the change.
Sessions
- Create a Session or Import Session. (Supports Only 3270 and 5250 Display)
- Start Session, opens a popup with session launched.
- Delete will delete the selected session.
- Click on Properties will open Window to modify Session Properties.
- Export will download session properties file with ‘. hod’ extension.
- Keyboard mapping can be done by clicking on keyboard icon.
- Copy Session from once User/Group to other User/Group by clicking on Copy Session option on Session and paste Session option on User/Group.