Configuring the TIBCO Rendezvous Trace probe
How to configure the TIBCO RVD probe.
About this task
The TIBCO Rendezvous Trace probe runs on a TIBCO Rendezvous daemon (RVD) that is configured in the Architecture School Physical View.
To configure the default probe or add another:
Procedure
- Edit the RVD resource and click the Probes tab.
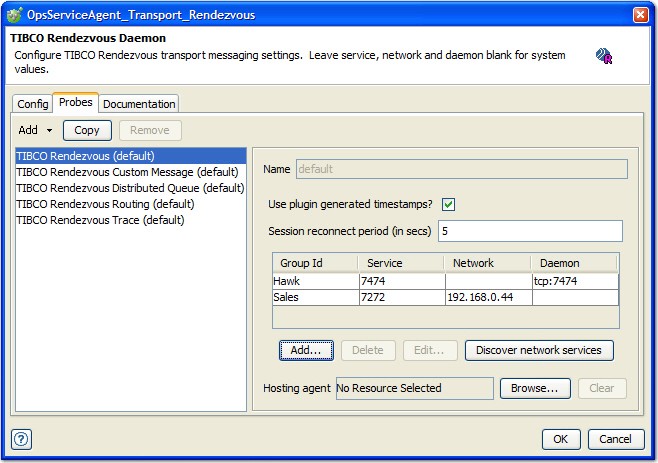
- Next, you can choose from one of the following
actions:
- To add a probe, click .
- To copy an existing probe, select a probe and click Copy.
- To delete a probe, select it and click Remove.
- For probes other than the default one, you
can enter a name in the Name field.
In the Update Period, enter (in seconds) the time interval between each query to the
rvtraceprocess.Note: Thervtraceprocess has its own update interval (the default is 10 seconds), and messaging statistics are reset at the end of this period. The TIBCO Rendezvous Trace probe must use the same update period asrvtrace. Otherwise, data are lost. For more information, see Using the rvtrace program. - To select or change the agent that hosts the selected probe, click Browse next to the Hosting agent field and select the agent you want from the project resource tree.
- To clear the current selection, click Clear.
- Under the Update Period field, you
can configure the local SNMP port that is used by the probe, the
rvtraceagents that are to be used, and subject monitoring details. - Click the Local SNMP Transport tab
to configure the port that is used by
rvtrace.The default port that is used by
rvtracefor SNMP isUDP 161, but you can change the port number. Alternatively, depending on howrvtraceis configured, you can use TCP instead of UDP.Note: On Unix-like systems, if the port number is less than 1024, the probe has to be run as userroot(or an equivalent super user) because, on Unix-like systems, ports below 1024 are privileged. - Click the Monitored rvtrace SNMP
agents tab to configure the
rvtraceagents to be used. - Click Add to add
an agent, and enter the Network Tag, Host, and Port as
required. The Network Tag is displayed on the client, so it
is recommended that a meaningful name is used.
To delete an agent, select it and click Delete.
To edit an agent, select it and click Edit.
- To limit the data that are collected, click
the Subject Monitoring tab and select the Ignore
Advisory Subjects? check box. Note: The underscore (_) character is used to indicate RVD advisory subjects.