Creating physical Apache Kafka transport connections
In Rational® Integration Tester, creating a Kafka transport involves creating a Kafka transport broker resource, which provides information about connectivity to a physical Kafka transport broker.
Before you begin
If you want to configure SSL for a Kafka transport, you must have created a trust store in your project to store certificates. If you are using client authentication, you must have set up the client identity store and configured the corresponding certificate in the Kafka server.
About this task
A Kafka transport broker is a server that exchanges messages between Kafka transport producers and consumers.
Procedure
- Open the Physical View of the Architecture School perspective.
-
On the toolbar of the Physical View, click .
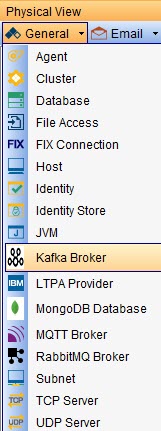
The New Kafka Broker window is displayed.
Alternatively, open the Logical View, right-click a Kafka transport connection, and in the pop-up menu, click .
-
Optionally, enter a name for the broker in the Name field.
Note: Assigning a name helps to identify the broker if there are multiple Kafka transport brokers in your project.
-
Click Settings to configure the basic transport settings for the
Kafka transport broker.
The Broker settings are described in the following table:
Table 1. Kafka Broker window: Settings tab Option Description Host
The hostname or IP address of the computer that hosts one of the Kafka transport broker nodes to which you want to connect.
Port
The port on which Kafka broker node is listening for requests. The default port is 9092.
Specify the port that you have configured for the Kafka broker for communication over SSL.
However, 9092 is only a default value and the actual TCP/IP port number that you must enter in this field depends on the configuration of the physical Kafka transport broker node to which you want to connect.
ClientID
By default, API Tester is displayed in this field. You can enter any other text in this field. The text that you enter helps to identify the client computer that used the Kafka Broker in Rational® Integration Tester tests.
Authentication
Authentication Type
Option Description None No credentials are requested. Plain Proxy authentication that uses a plain-text authentication. Important: This method of authentication is only considered secure when the connection used is encrypted.SCRAM-SHA-1 Salted Challenge Response Authentication Mechanism by using the SHA-1 hashing function. SCRAM-SHA-256 Salted Challenge Response Authentication Mechanism by using the SHA-256 hashing function. Note: You can use the Simple Authentication and Security Layer (SASL) authentication for clients with or without the Secure Sockets Layer (SSL) authentication.User
If the physical Kafka transport broker requires a user name and password for authentication, enter the user name in the field provided.
Password
If the physical Kafka transport broker requires a user name and password for authentication, enter the password in the field provided.
-
To provide an Apache Camel URI for the Producer and
Consumer in the Kafka transport broker, click the
Advanced check box:
Option Description Action Producer URI
Specifies the Apache Camel URI for a Kafka Producer.
The URI to be specified is in the following format:kafka:items-topic?brokers=localhost:9092&clientId=<clientID><some other query parameters>, where <clientID> is the name you specified under the ClientID field in the Settings tab.Note: You can refer to the Camel Kafka Component documentation for the additional parameters that you can provide in the URI.Enter the URI that you configured for the Producer. Consumer URI
Specifies the Apache Camel URI for a Kafka Consumer.
Enter the URI that you configured for the Consumer. -
Click SSL to configure the secure socket layer (SSL) settings
for the Kafka transport.
The SSL settings are described in the following table:
Table 2. Kafka Broker window: SSL tab Setting Description Use SSL
Select this check box to enable security for the transport. When you select this check box, the other controls on the SSL tab available.Note: You can use the Secure Sockets Layer (SSL) authentication with or without the Simple Authentication and Security Layer (SASL) authentication.Server certificates to trust
Select one of the following menu items:After you define the identity stores, identity stores that are available are displayed in the list.Option Description None To accept any certificate presented by the server, regardless of its validity. This option is the default option and assumes that you are focused on testing an application rather than the security of the server. New To define a new identity store. Client identities to give to the server
Select one of the following menu items:After you define the identity stores, identity stores that are available are displayed in the list.Option Description None If the server does not request an identity. New To define a new identity store. Note: To complete the configuration of SSL for the transport, set the Port field in the Settings tab to 9093 or the port that you have configured for the broker for SSL communications in the server.properties file of Kafka.Important: If you make any configuration changes in the server.properties file of Kafka, you must restart the Kafka server for the changes to take effect. - Click Test Transport to verify that the connection works.
- Click OK.
Results
The new physical Kafka transport broker is added to your project.