Configuring JNDI connections
You can configure IBM® WebSphere® Application Server service integration bus (SIBus) transports to connect to the bus using a preconfigured JMS connection factory accessed through JNDI.
Before you begin
You must first create a SIBus transport. For more information, see Creating WebSphere service integration bus (SIBus) transports.
About this task
The Architecture School perspective of Rational® Integration Tester is used to configure the JNDI connection.
Procedure
-
In the Physical View of the Architecture School perspective,
double-click a SIBus resource.
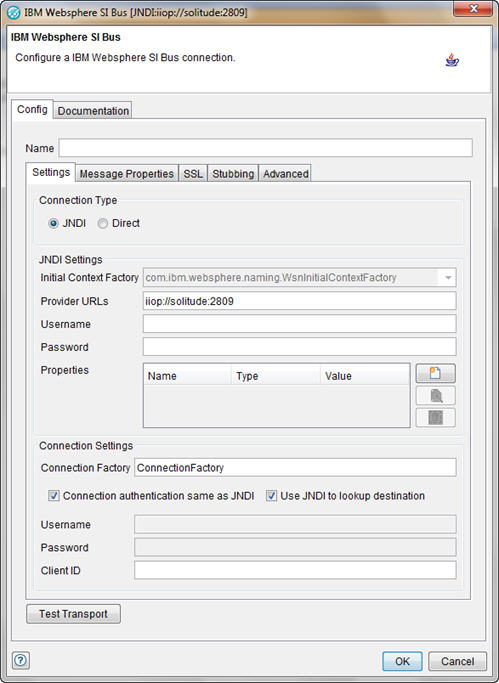
The IBM WebSphere SI Bus window is displayed.
-
In the Name field, type a name for
the transport.
This will help to identify it when multiple SIBus transports are available.
-
Under Connection Type, click JNDI as
the connection type.
By default, the JNDI settings are displayed. When JNDI is clicked, JMS ConnectionFactories can be accessed as administered objects created in WebSphere® Application Server by their associated JNDI name.
Note: Recording and stubbing using sift-and-pass-through is not supported when using JNDI to look up SIBus destinations.All of the configuration fields support the use of tags. Tags can be entered manually or from the menu, except in the Password field, where tag names must be entered directly (for example, %%pswd%%). Because this field is encrypted, any characters that are entered are hidden.
You can test the connection parameters at any time by clicking Test Transport.
-
Define the JNDI configuration options as described in the
following table:
Field Description Provider URLs The hostname and port of the SIBus server to use for lookup, in the form of iiop://<Hostname>:<port>. The default port number is7222. For example,iiop://myserver:7222.Username, Password If security is enabled on WebSphere® Application Server, these fields are the user name and password that were configured to access the topics and queues. Contact your system or WebSphere® Application Server administrator if you do not know these values. If security is not in use, these fields can be left blank. Properties More JNDI properties to use (for example, when secure connections are made to the JNDI). Each property has a name, type, and value. To add a property, click
 .
.To edit an existing property, select it and click
 .
.To delete a property, select it and click
 .
.Connection Factory The connection factory in WebSphere® Application Server that is used to locate topics and queues. Connection authentication same as JNDI Enable this option to use the same user name and password for the both connection factory and JNDI. If disabled, the Username and Password fields become active. Use JNDI to look up destination If the check box is selected, the destination that is set in a message action editor is the JNDI name for the destination. If the check box is not selected, you must use the SIBus destination name and then specify whether the destination name is for a queue or a topic. Username, Password If security is enabled on WebSphere® Application Server, these fields are the user name and password that were configured to access the topics and queues. Contact your system or WebSphere® Application Server administrator if you do not know these values. If security is not in use, these fields can be left blank. Client ID A unique ID that identifies Rational® Integration Tester to WebSphere® Application Server. Typically, this ID is used to identify durable subscribers. -
On the Message Properties tab, you
can configure more message properties to be used with the SIBus transport.
Each property has a name, type, and value. These properties are added automatically to any messages that are created by using the transport.
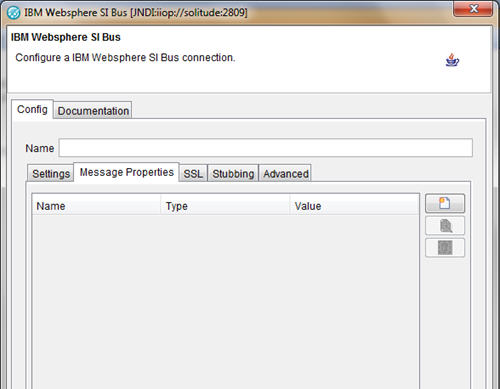
- To add a property, click .
- To edit an existing property, select it and click: .
- To delete a property, select it and click: .
- To add a property, click