Install Host On-Demand using GUI Mode
This section describes the procedure to install the IBM Host On-Demand.using GUI Mode.
Execute the following steps to install the Host On-Demand:
- Right-click on the HOD_Windows_x64.exe and select Run as Administrator.
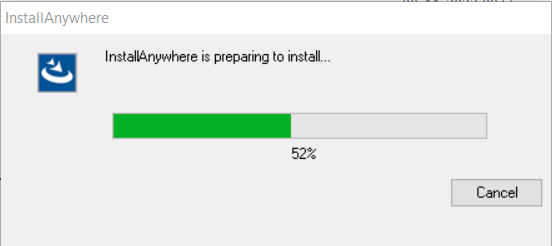
- The InstallAnywhere is preparing to install window appears.
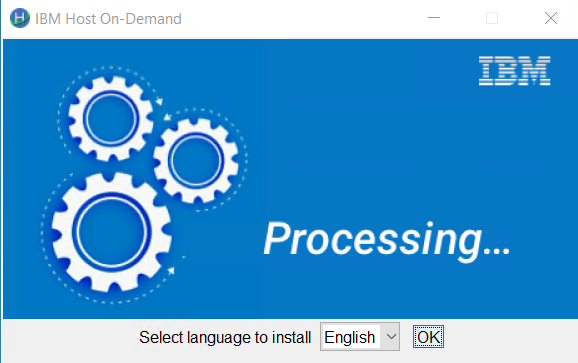
- Once the InstallAnywhere is ready, the IBM Host On-Demand window appears.
- Select the required language from the Select language to install
drop-down and click OK.
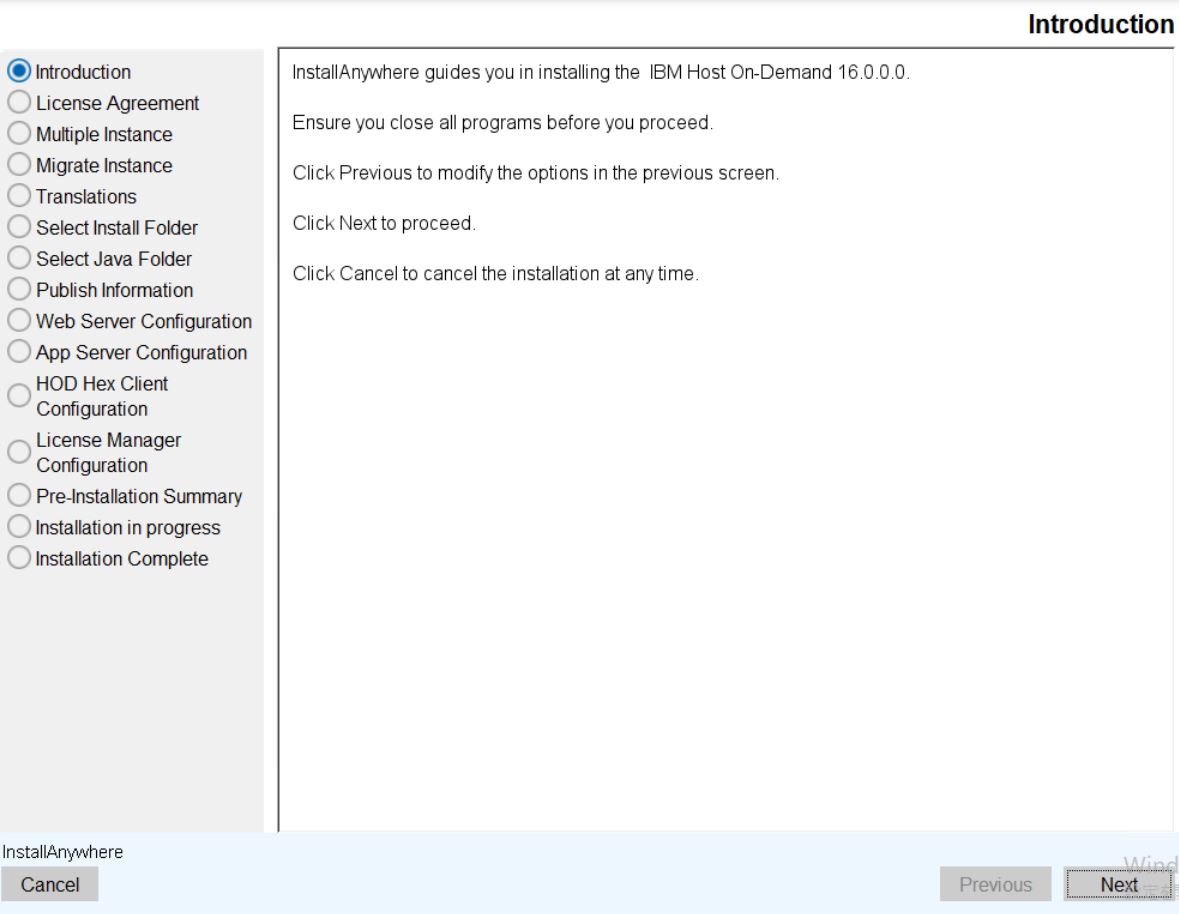
- The Introduction screen appears.
- Read the instructions carefully and click Next.
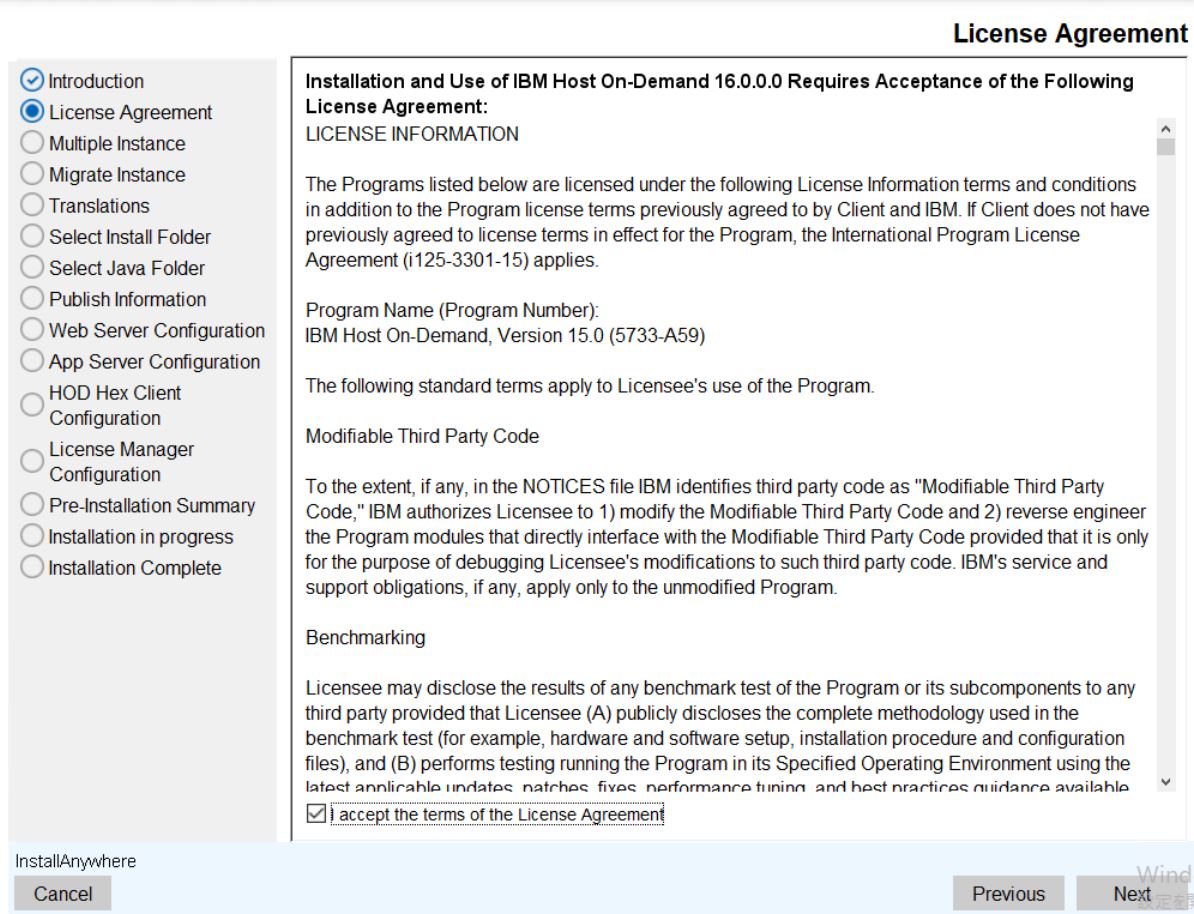
- The License Agreement screen appears.
- Read the license agreement carefully and select the I accept the terms of the License Agreement checkbox.
- Click Next to continue.
- The Multiple Instance screen appear.
- Select any one of the following option and click Next.
- IBM Host On-Demand New Instance
- IBM Host On-Demand 15.0.1.0
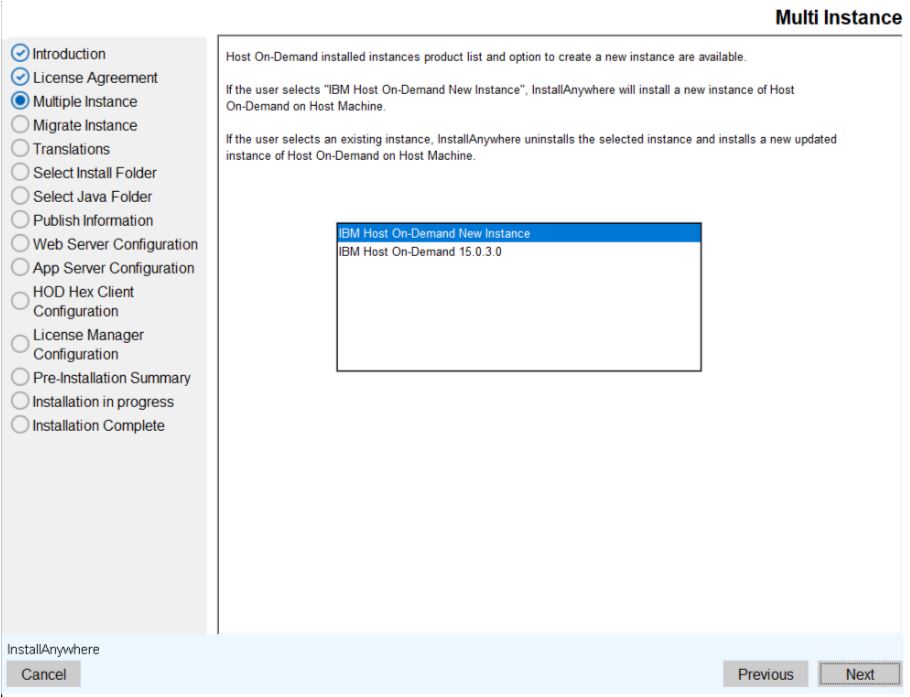 Note:The Multiple Instance panel is displayed when an earlier version of InstallAnywhere Host On-Demand is installed.
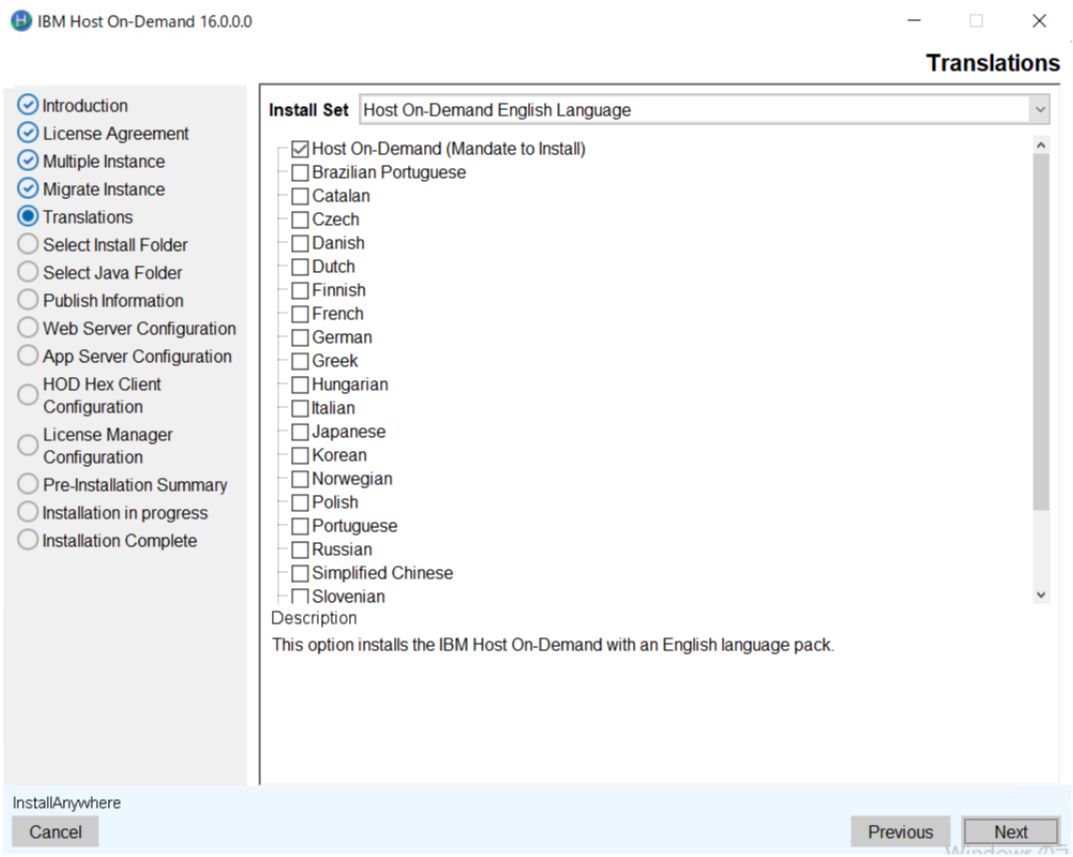
- The Translations screen appears.
- Selec the required language pack(s) and click Next.
 Note:
- The Host On-Demand (English language pack) is a mandatory option and it is selected as default.
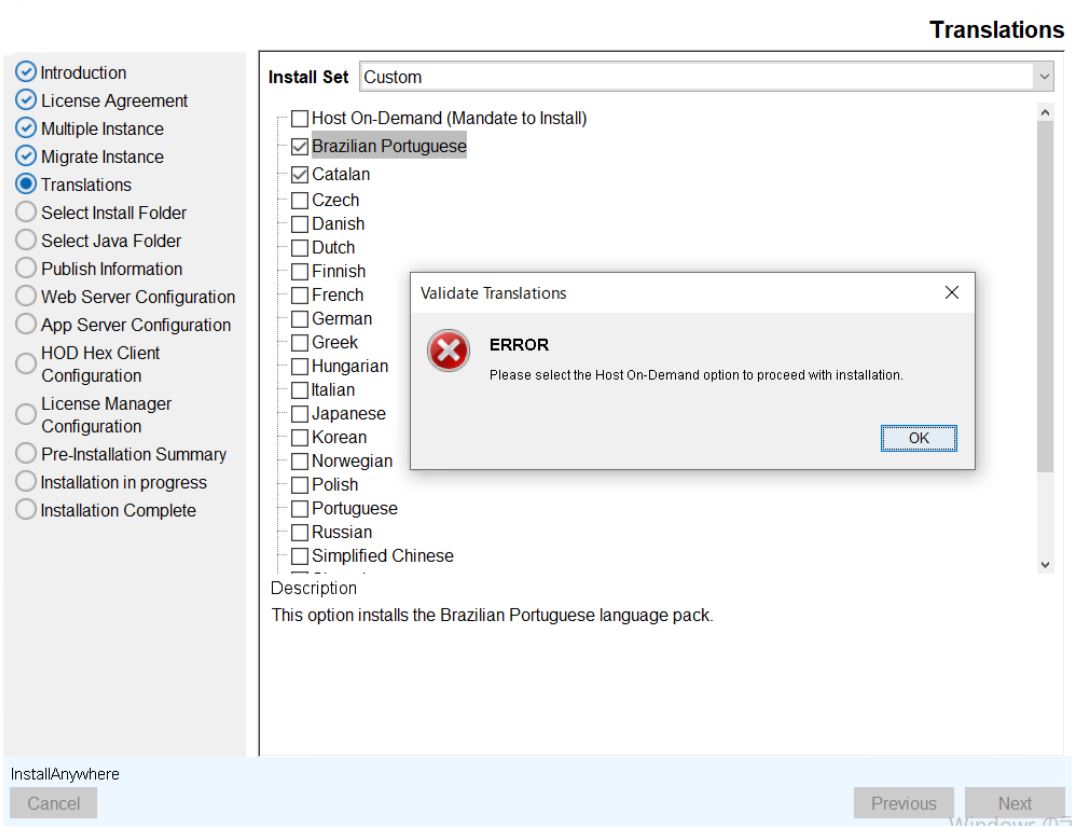
- If the Host On-Demand is not selected, an error message
appears as shown below.
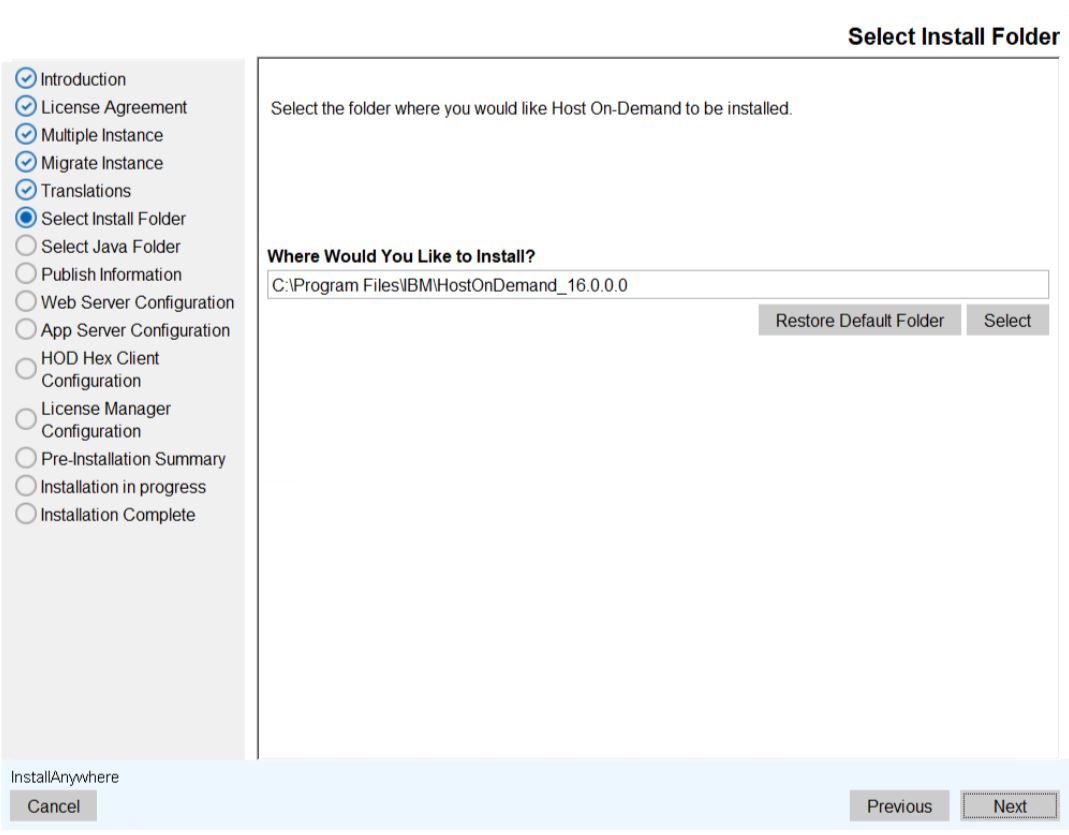
- The Select Install Folder screen appears.
- Select the required folder location to install the product and click
Next.
 Note:
- To restore the default folder location, click the Restore Default Folder button.
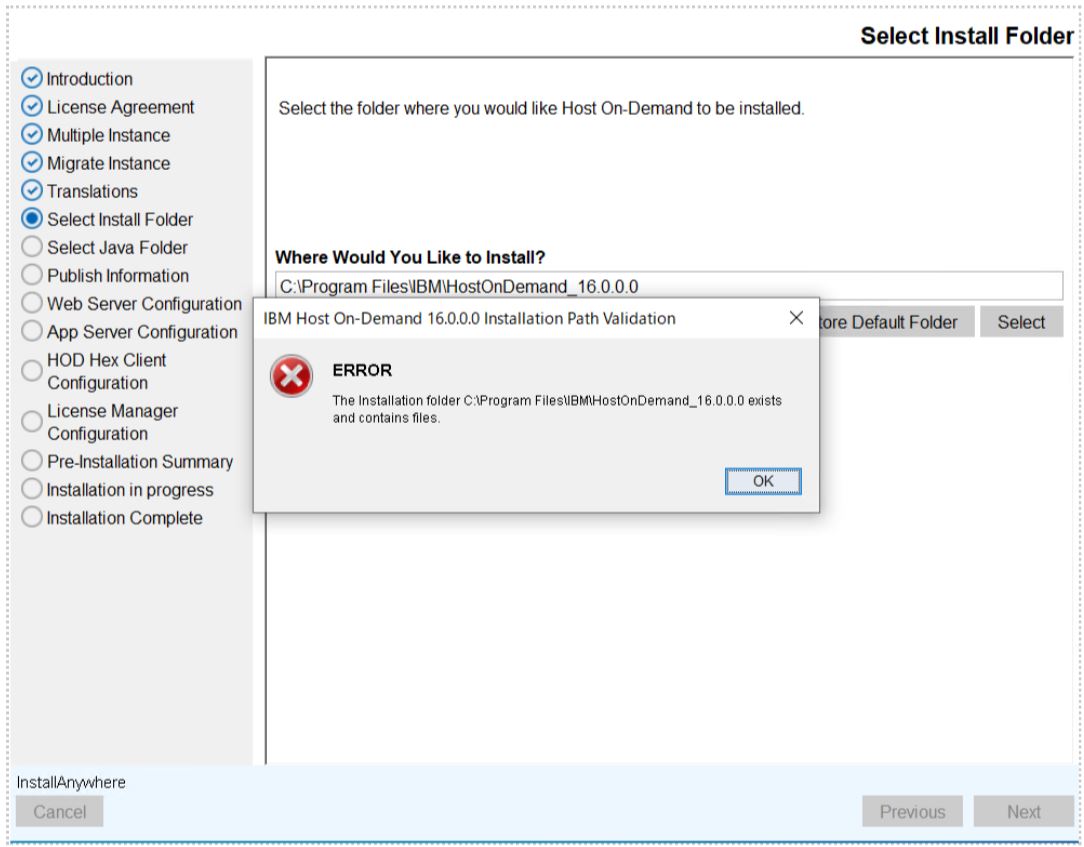
- The error message will appear if the install folder already
exists, as shown below.
- The Publish Information screen appears.
- Enter the required information and click Next.
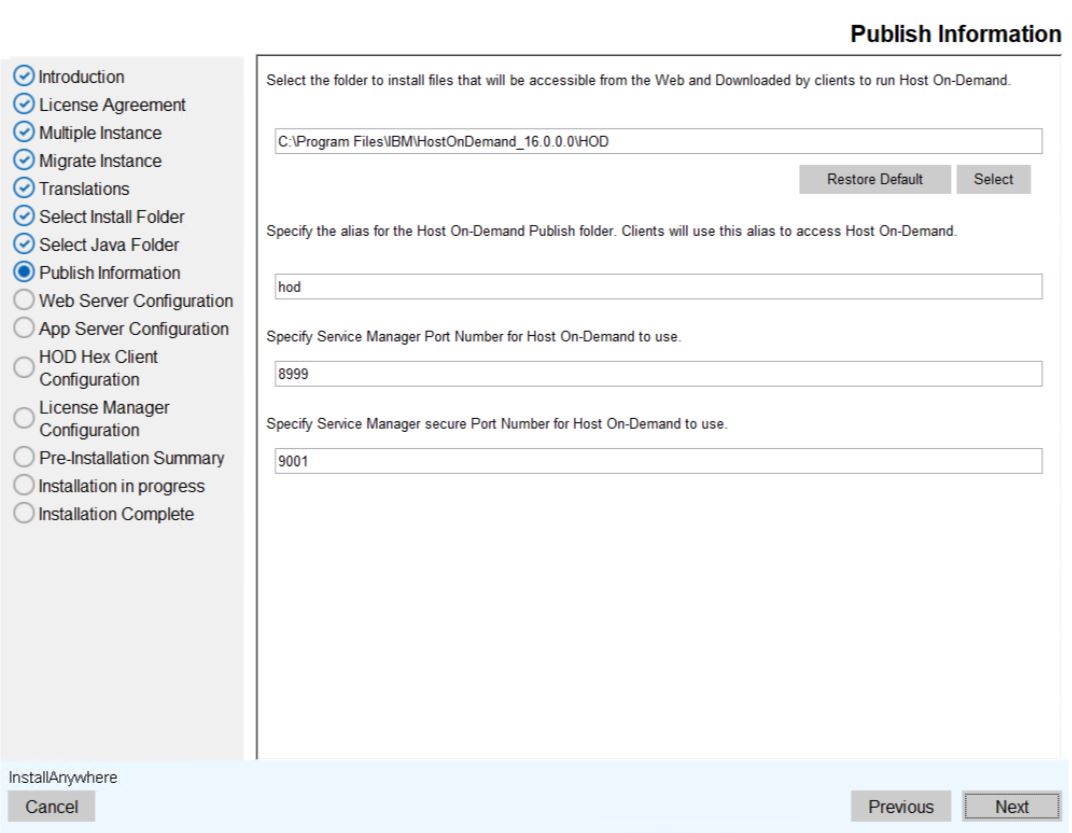
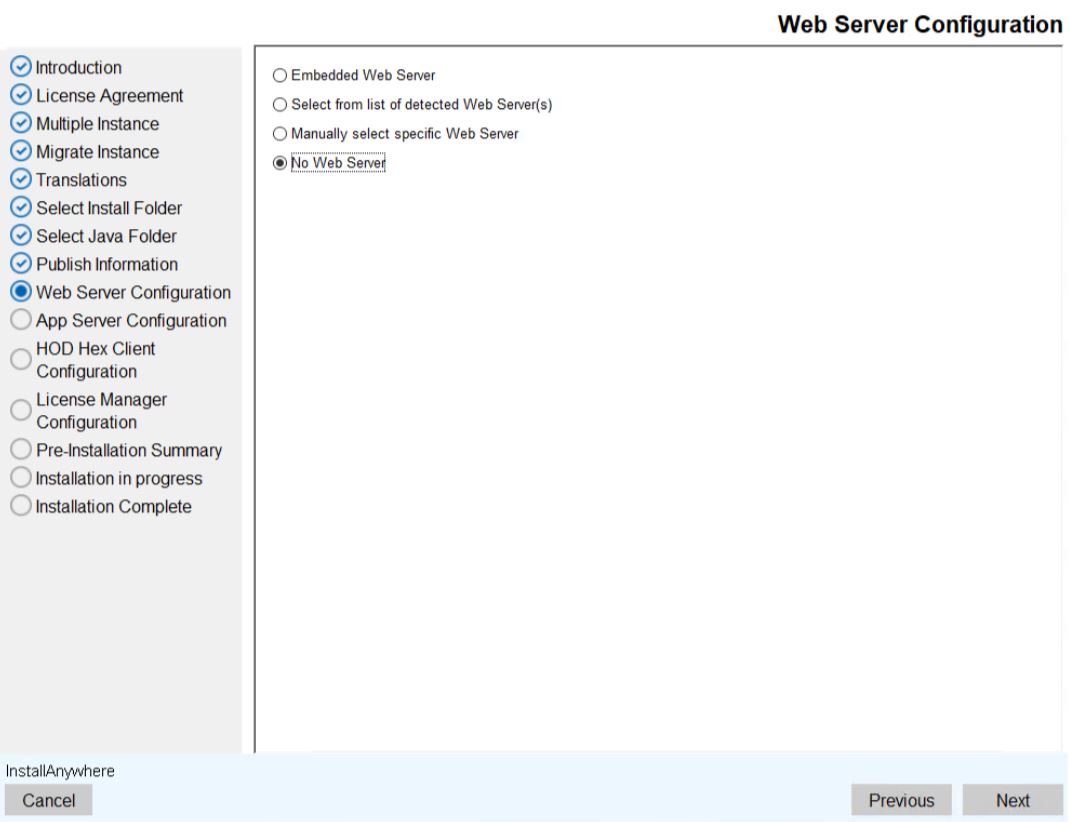
Note:The Service Manager Port and Secure Port must be a system-free port. If other applications use the port number, the Host On-Demand Server will not start. - The Web Server Configuration screen appears.
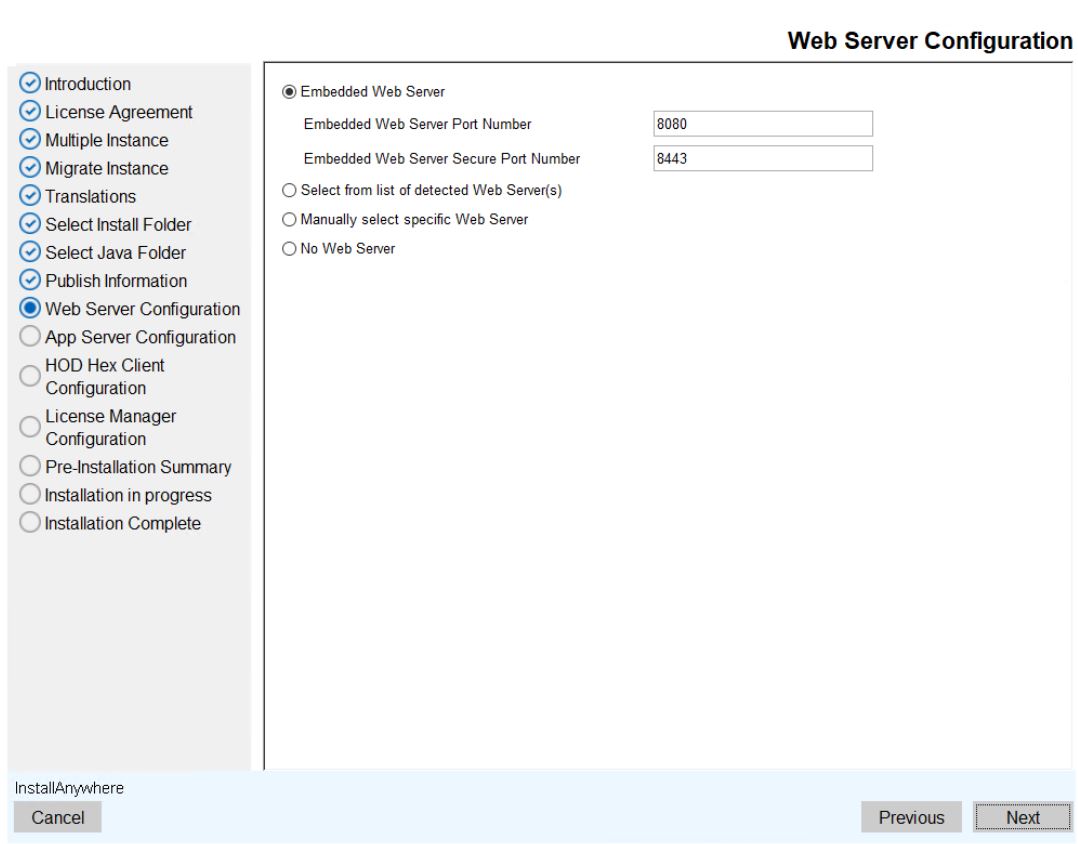 Note:
- By default, the Embedded Web Server option is selected.
- If no web server is selected, the HOD HEX Client and License Manager will not be configured.
- Select any one of the following option and click Next.
- Select from the list of detected web server: Select the detected
web server from the dropdown list.
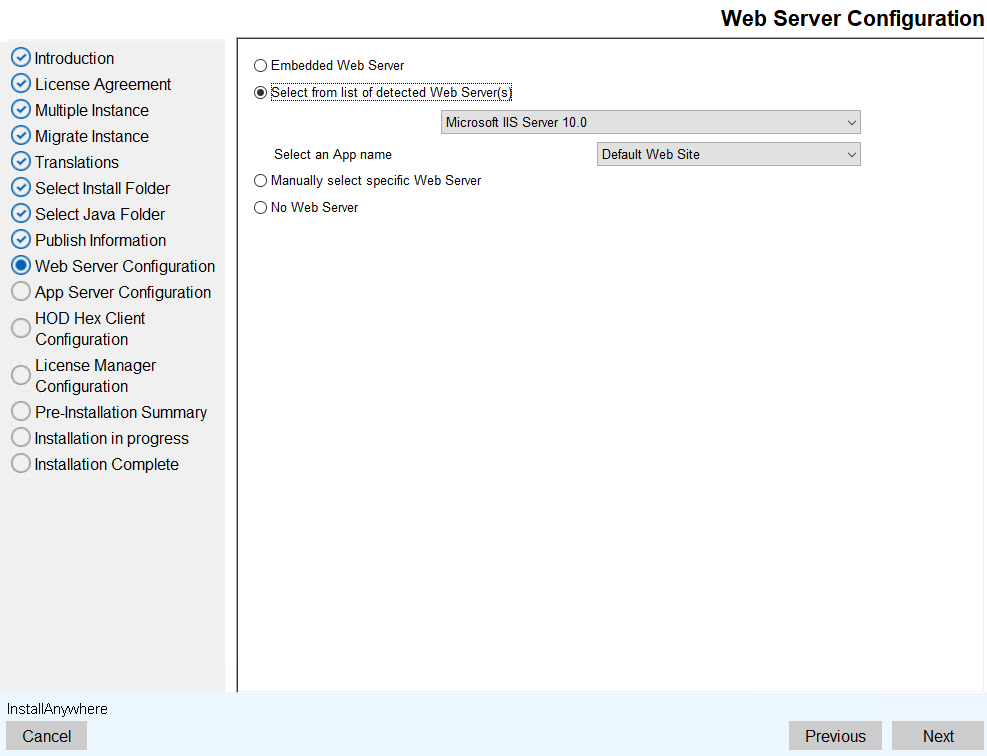
Note:From Apache 2.4, HOD will no longer automatically detect the installed Apache web server instance. To proceed, manually select the Apache web server option during the HOD installation process. - Manually select Specific web server: Manually select the required
web server.
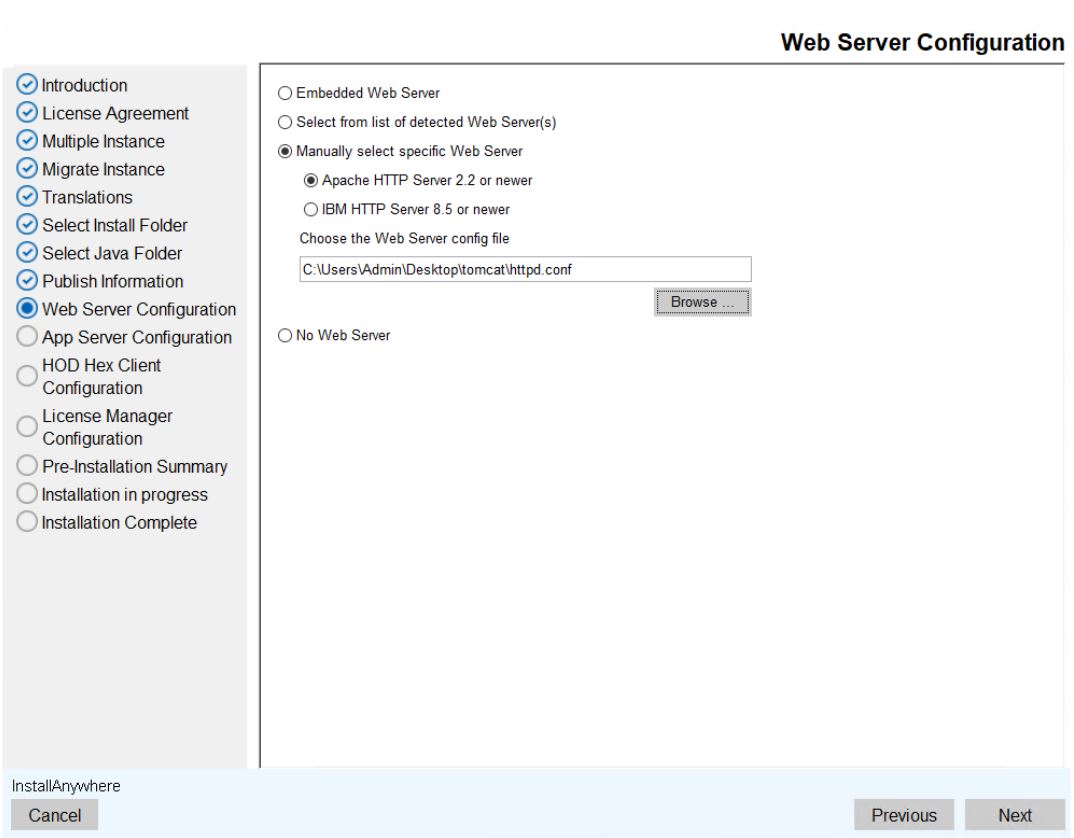
- No Web Server: If the web server is not installed, then select
this option.
- Select from the list of detected web server: Select the detected
web server from the dropdown list.
- The Application Server Configuration screen appears.
- Select the WebSphere Application Server check box.
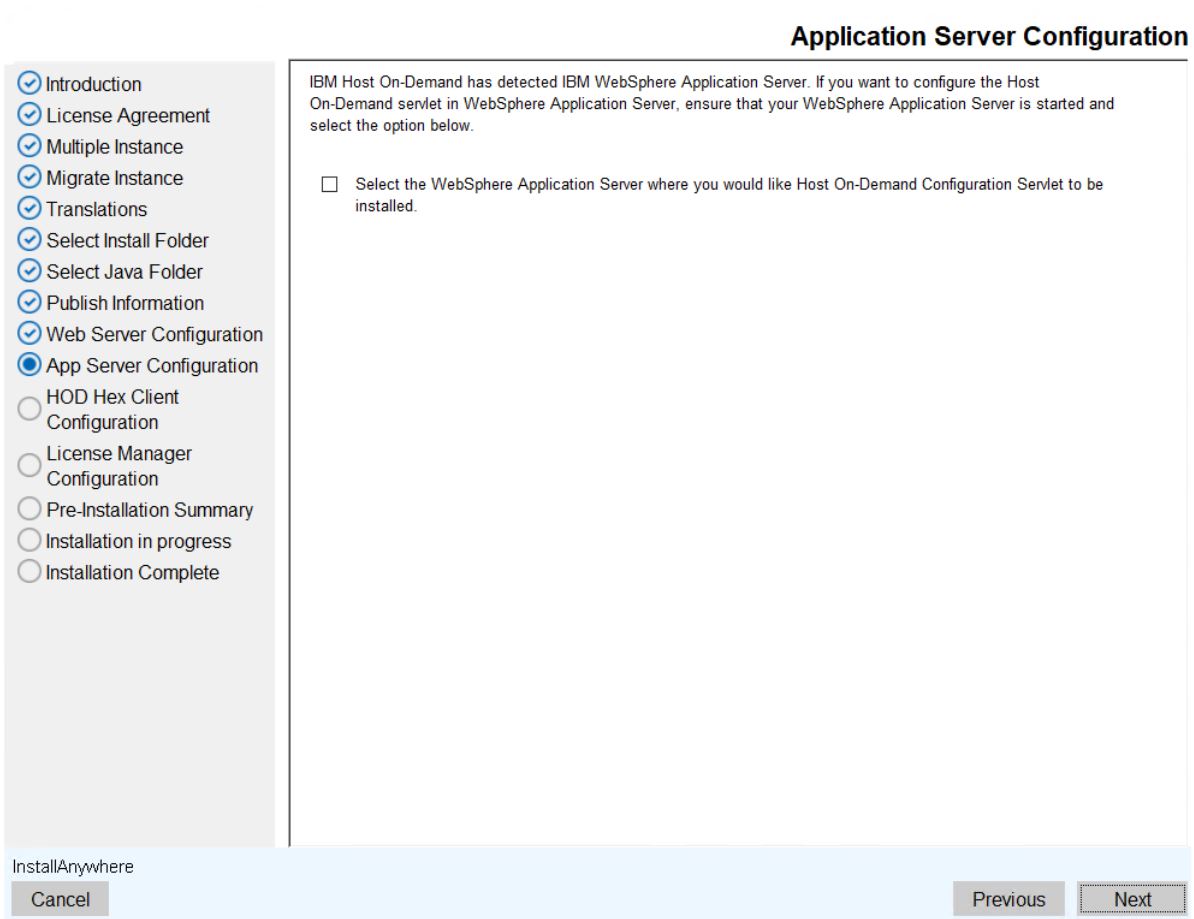
- Select the required WebSphere Application Server, Profile(s) and Server(s) from
the dropdown list, and click Install.
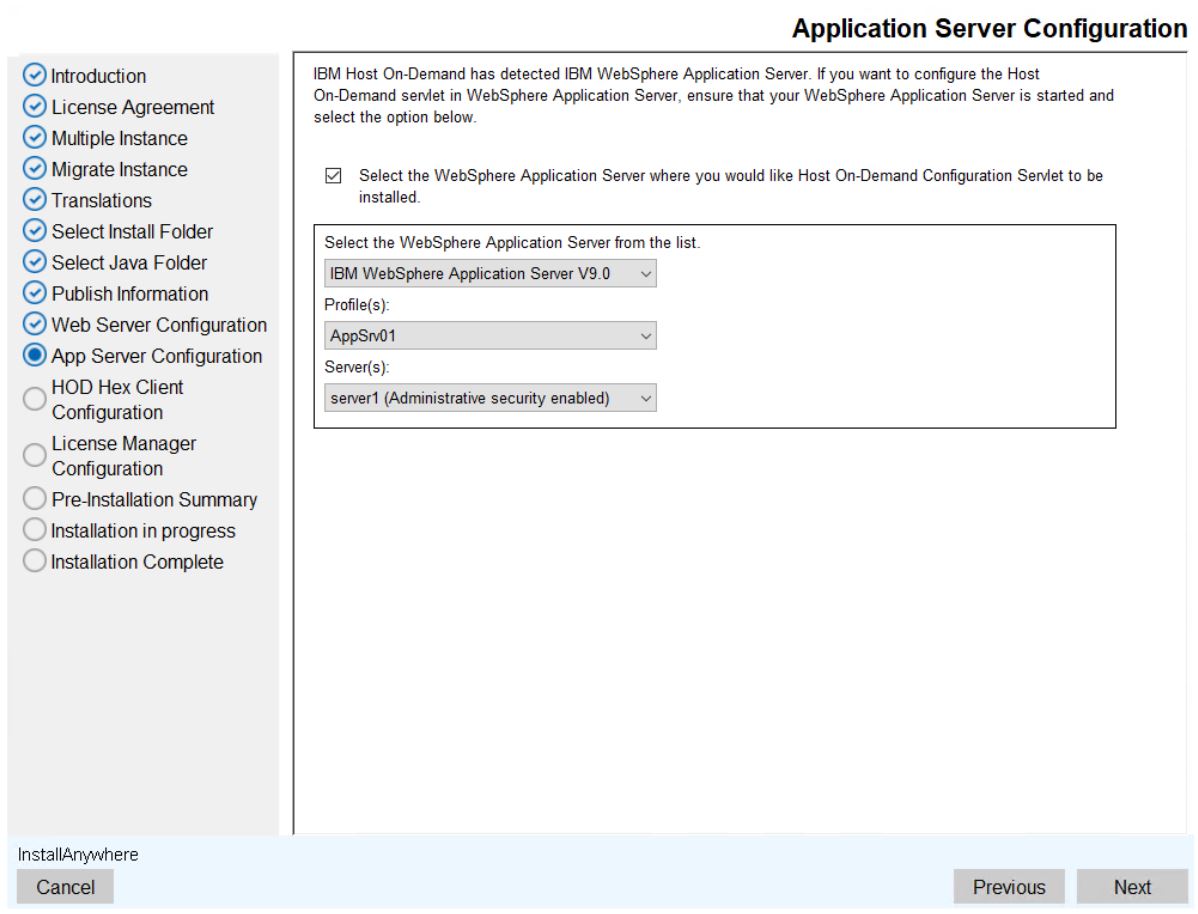
Note:The IBM Host On-Demand does not support an Administrative Security webserver. The validating message window appears as shown below.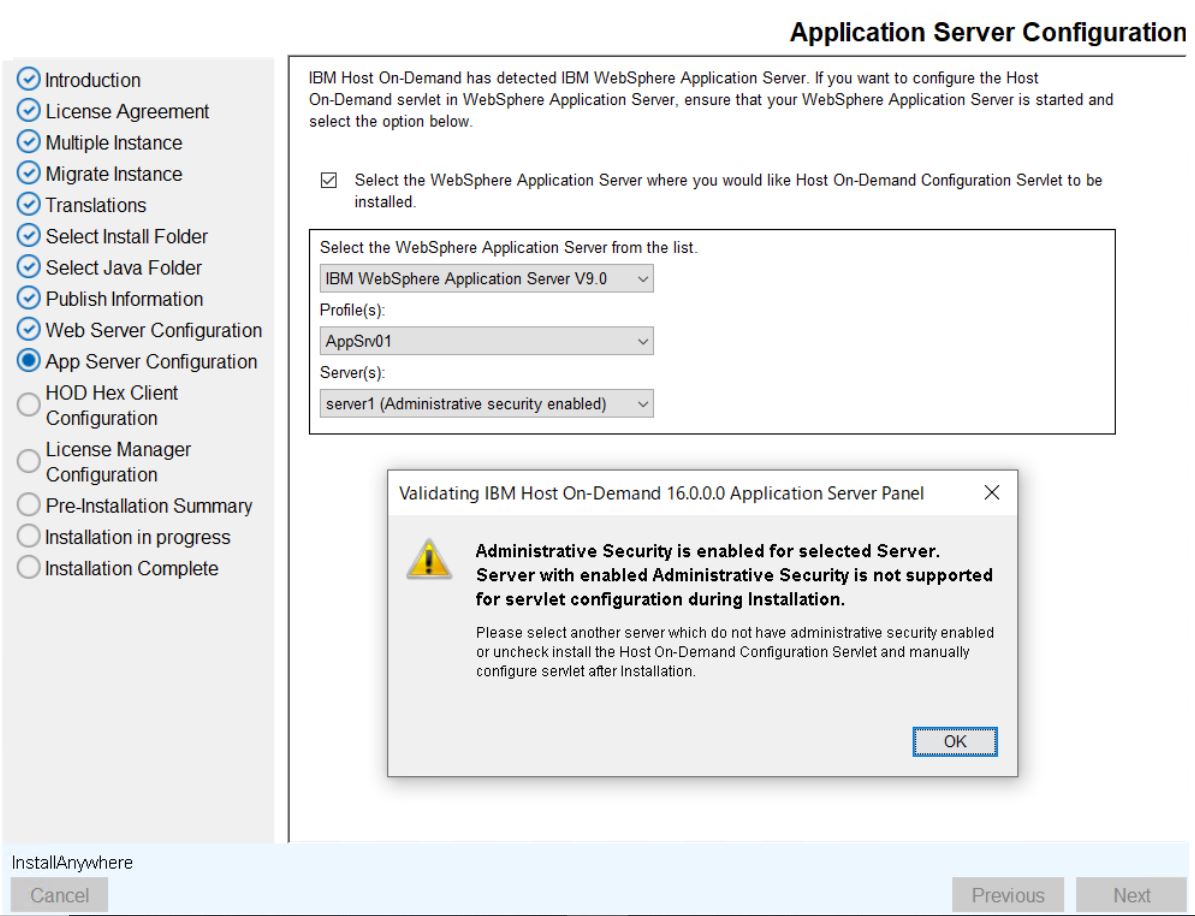
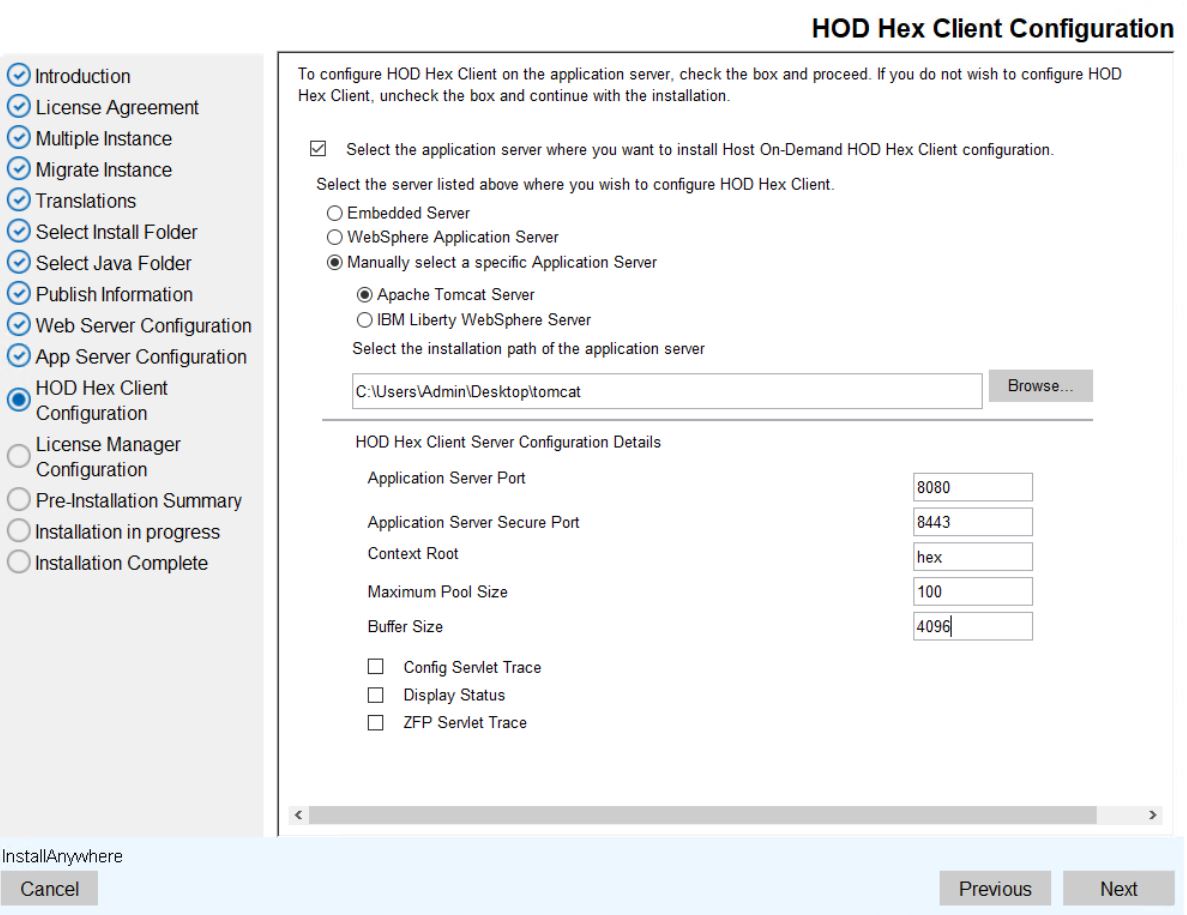
- The HOD Hex Client Configuration screen appears.
- Select the HOD Hex Clinet configuration check box, if you want to install HOD
Hex Client during HOD installation. Note:
- If the Embedded Web Server option is not selected in the Web Server Panel, the Embedded Server will not appear on the HOD Hex Client panel.
- If the Embedded Web Server option is not selected in the Web Server Panel, the Web Server Port, Application Server Port, and Application Server Secure Port fields will appear on the HOD Hex Client panel.
- If the Embedded Web Server option is selected in the Web Server Panel but not selected in the HOD Hex Client, the Application Server Port and Application Server Secure Port fields will appear on the HOD Hex Client panel.
- To deploy the HOD Hex Client on the Embeded Web Server, enable the deployment option as it is not enabled by default.
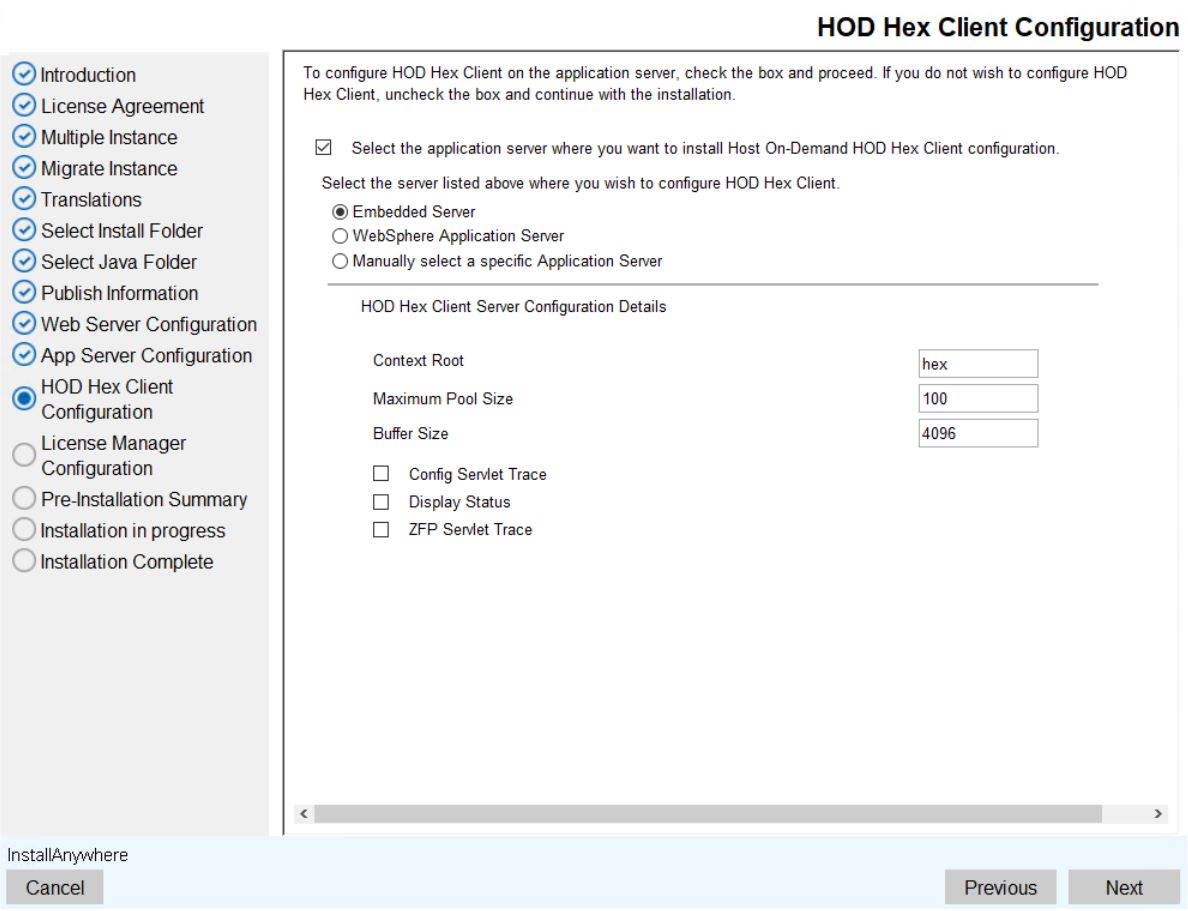
- Select the reuqired server and enter the required details.
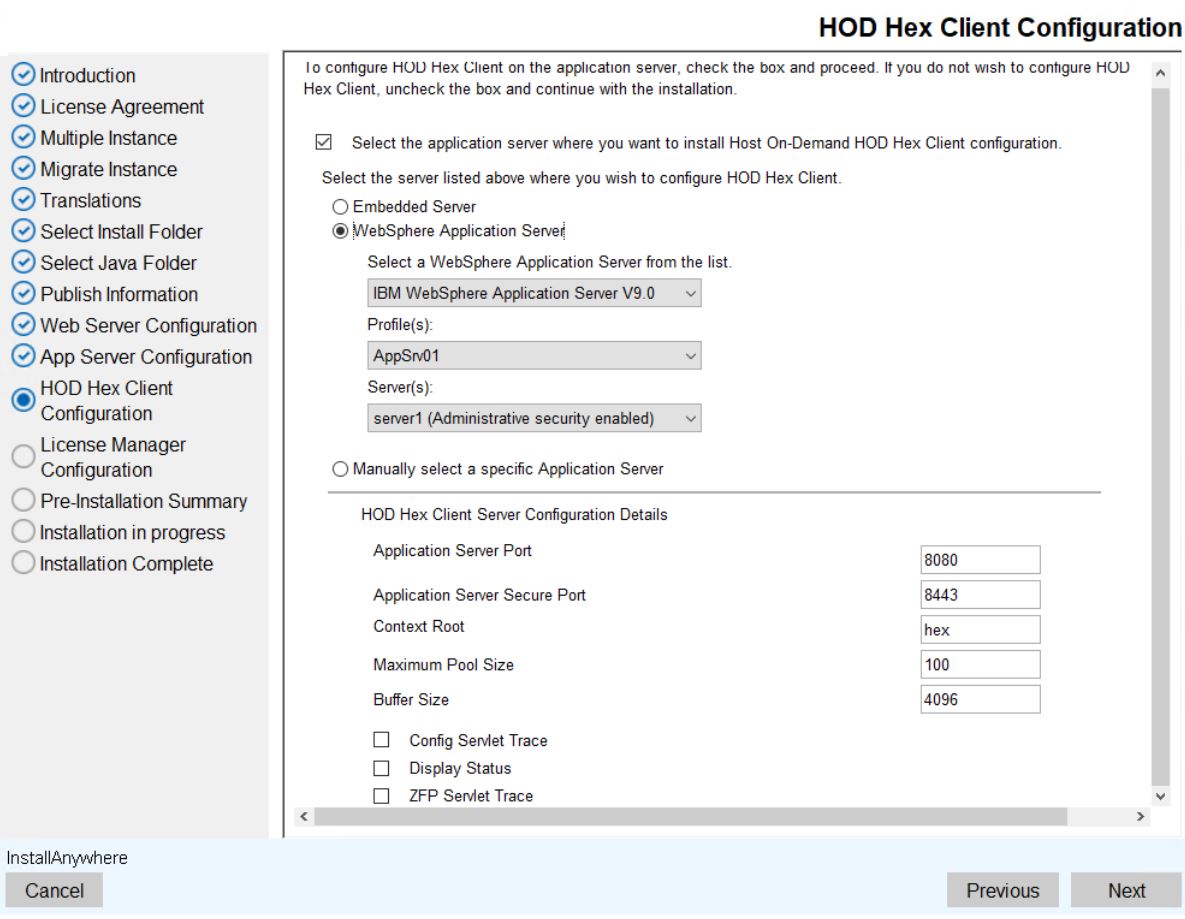
- To configure the server manually, select the Manually select a specific
Application server option.
 Note:
-
For Apache Tomcat, specify the server installation path up to the root folder of webapps.
-
For IBM Liberty, specify the server path up to the Web Server configuration directory.
-
- Select the License Manager Configuration check box, if you want to install
License Manager during HOD installation.Note:
- If the Embedded Web Server option is not selected in the Web Server Panel, the Embedded Server will not appear on the License Manager panel.
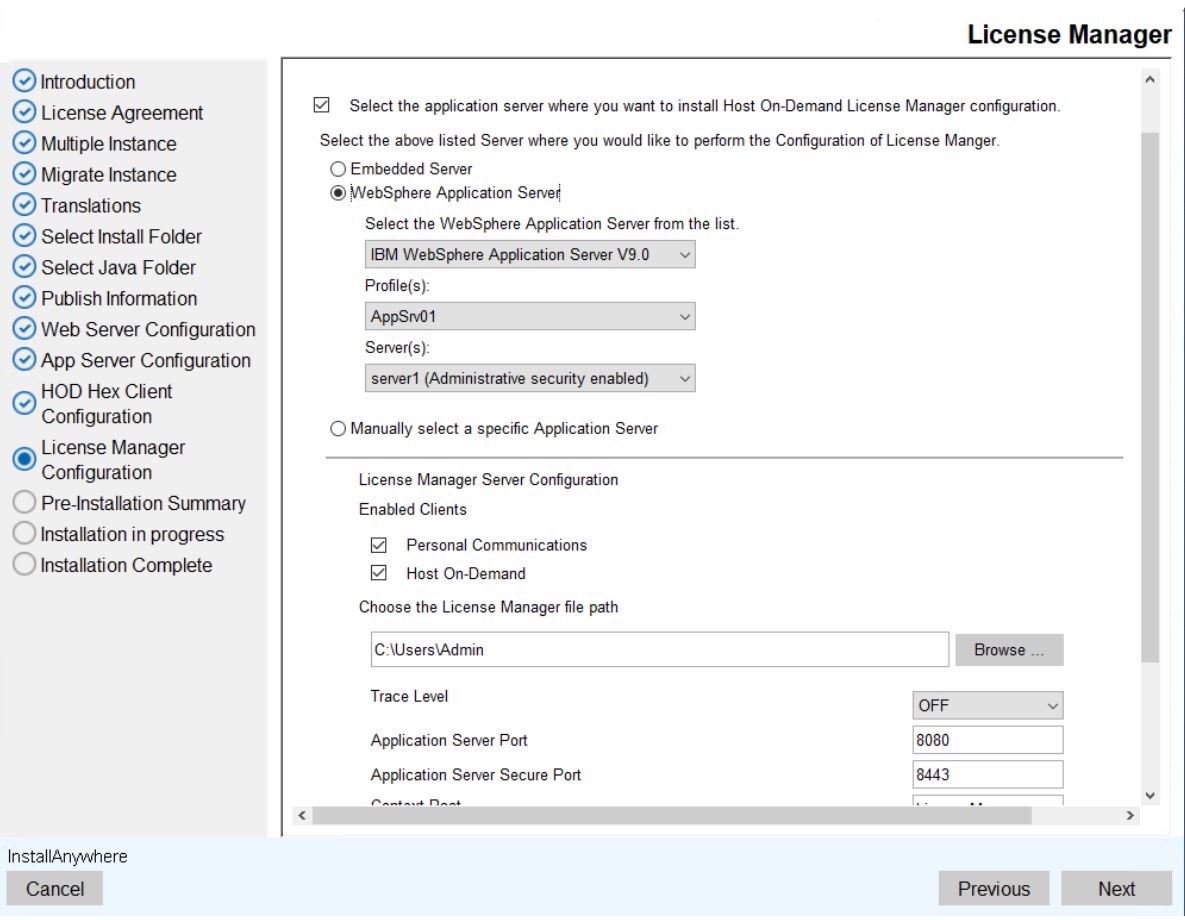
- If an external application server is selected, the Application Server Port and Application Server Secure Port fields are displayed on the License Manager panel.
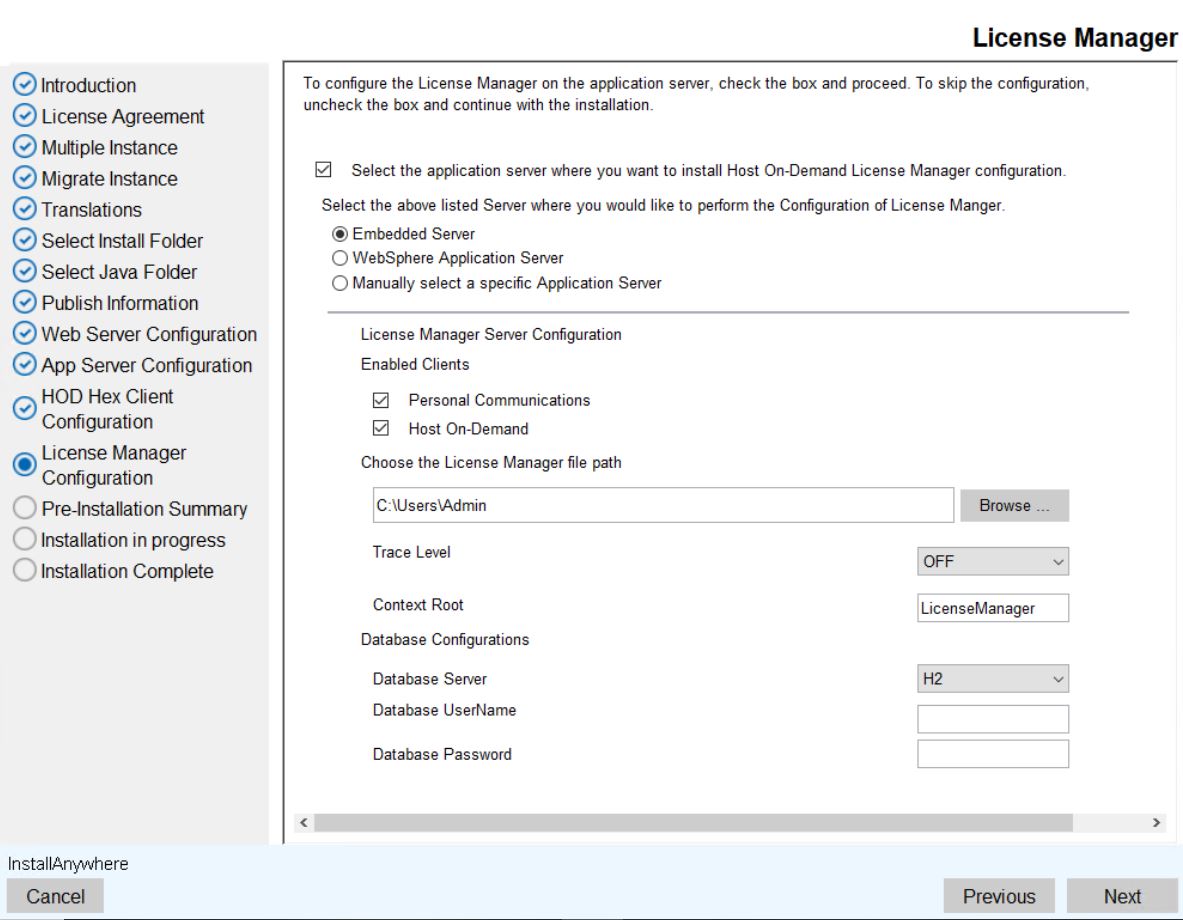
- Select the reuqired server and enter the required details.
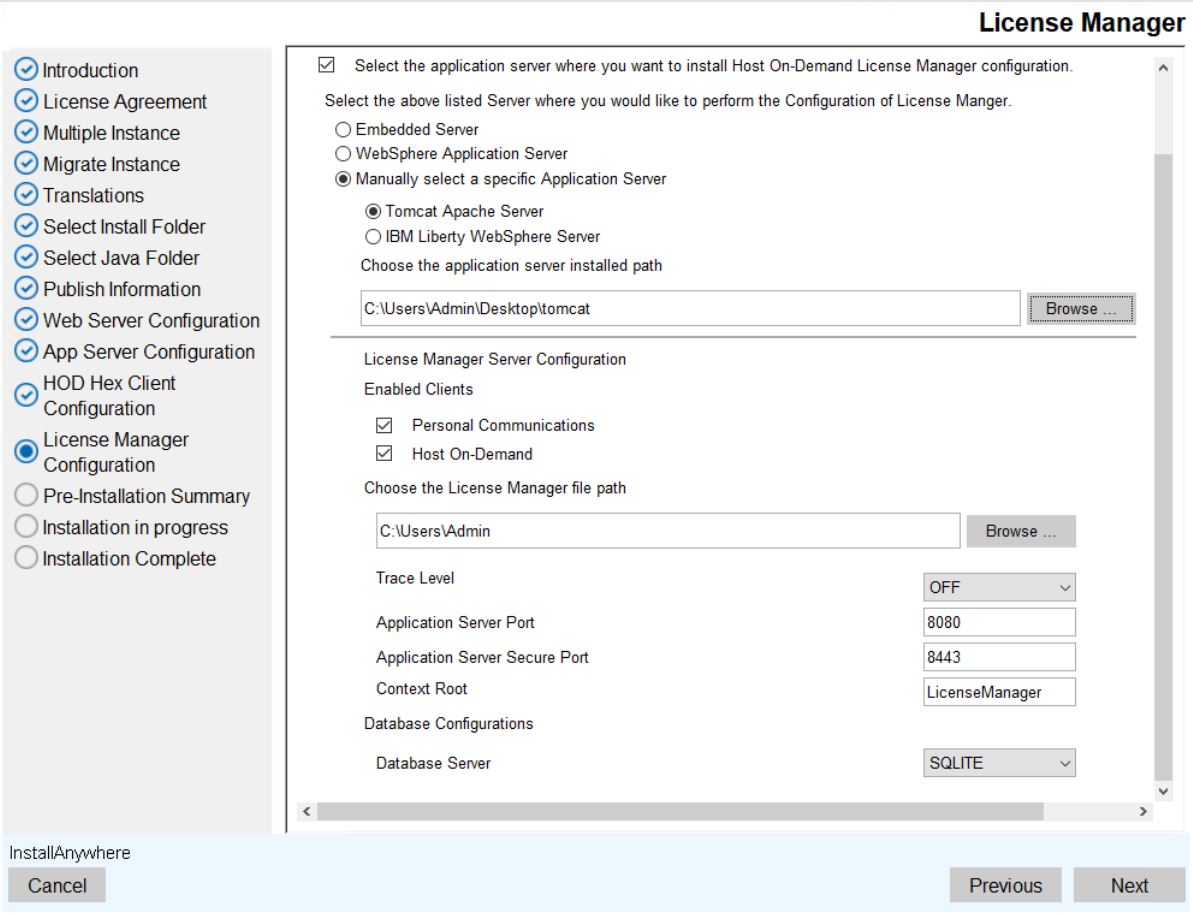
- To configure the server manually, select the Manually select a specific
Application server option.
 Note:
-
For Apache Tomcat, specify the server installation path up to the root folder of webapps.
-
For IBM Liberty, specify the server path up to the Web Server configuration directory.
-
- Click Next to continue.
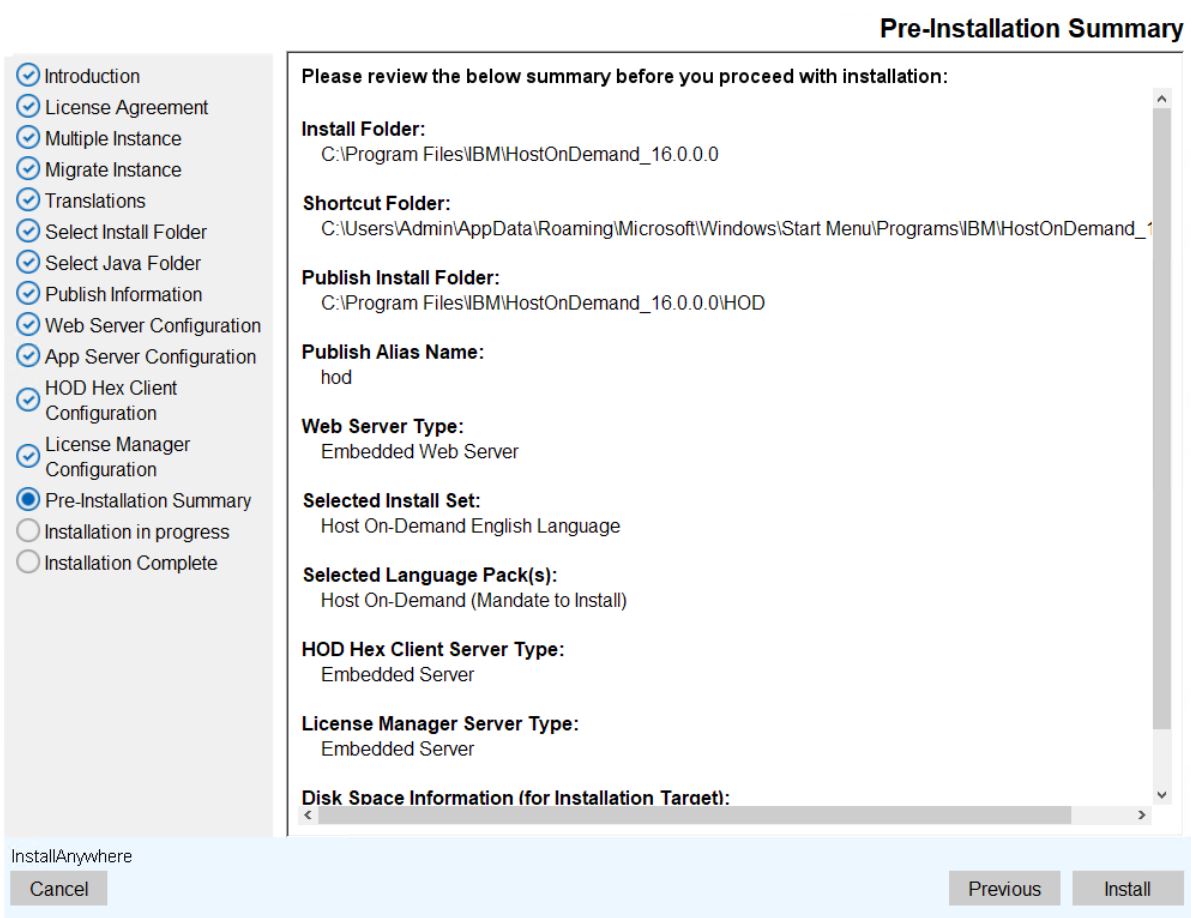
- The Pre-Installation Summary screen appears.
- Review the installation summary carefully details and click Install.
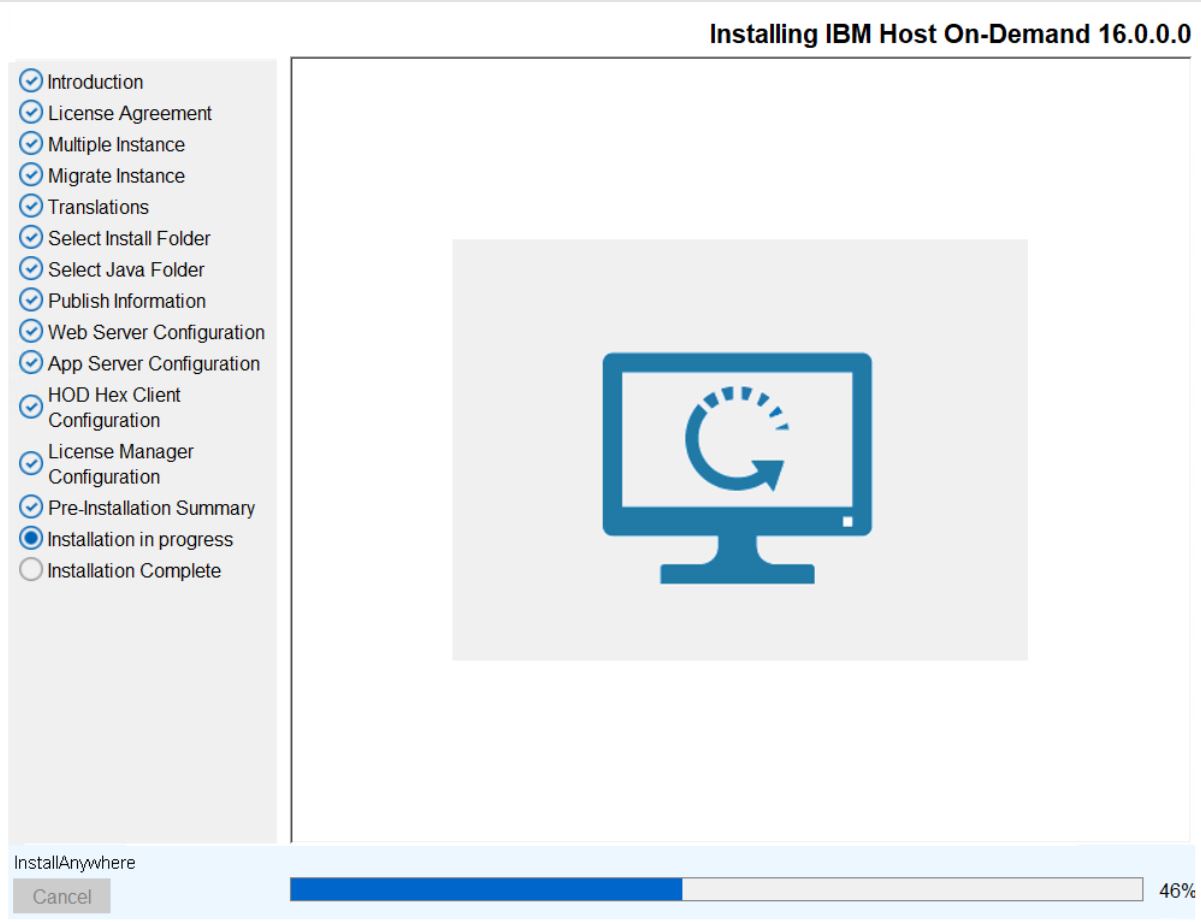
- The Installing IBM Host on-Demand 16.0.0 screen appears, which displays
the installation progress.
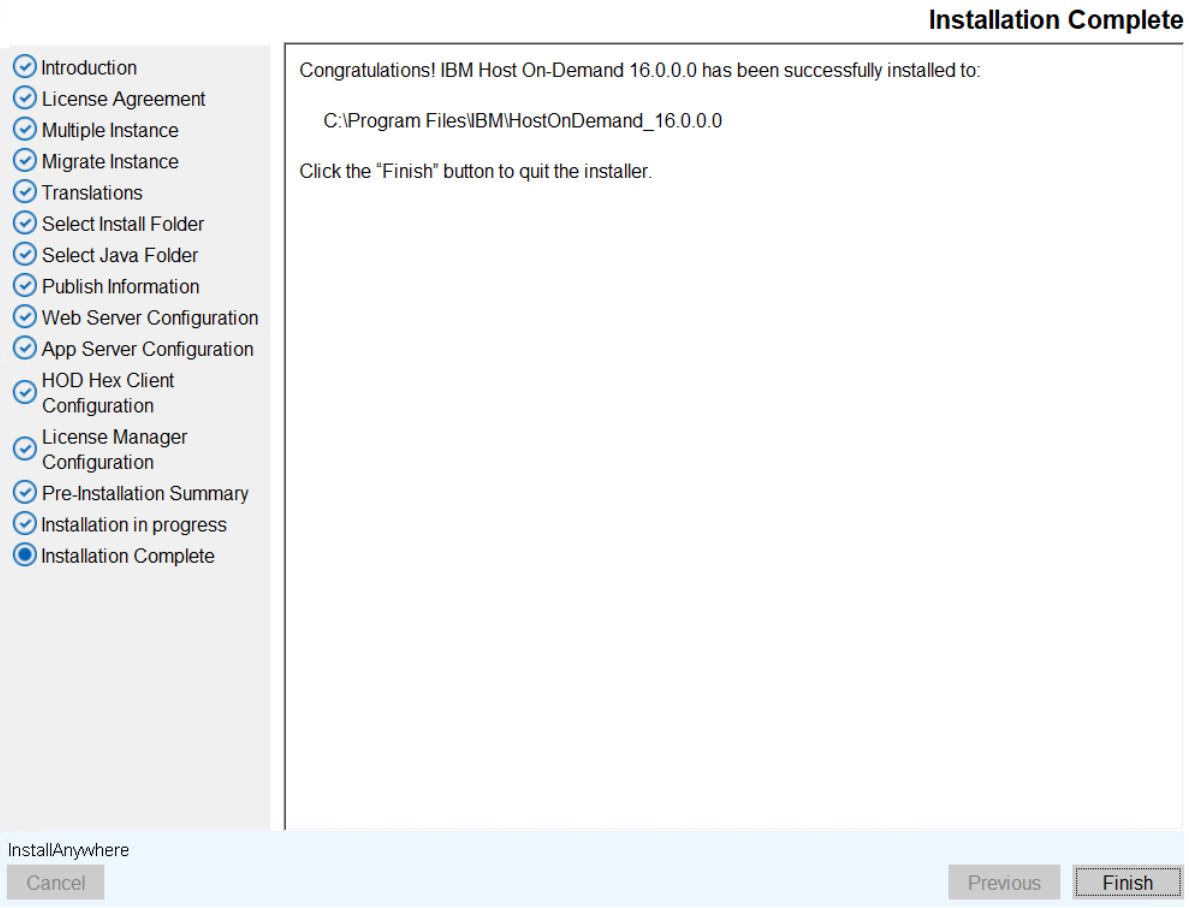
- After successful installation, the Installation Complete screen appears.
- Click Finish to close the installer.