Multiple Instance or Upgrade Installation
Multiple Instance or Upgrade Installation from earlier version of v16.0.0.
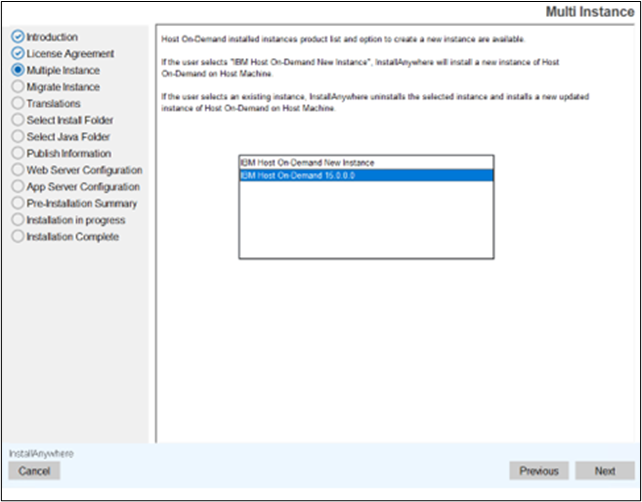
- IBM Host On-Demand v16.0.0 search the previous installed release of IBM Host On-Demand v16.0 and displays on Multiple Instance dialog.
- IBM Host On-Demand v16.0.0 supports multiple instances, suppose user wants to install latest release as separate product whichever version is already installed needs to select "IBM Host On-Demand New Instance" in multiple instance dialog and provide different installation path and port to configure as multiple instance installation.
- IBM Host On-Demand v16.0.0 supports upgrade instance from v15.0, suppose
user wants to perform upgrade installation from v15.0 to v16.0.0, then needs
to select "IBM Host On-Demand 16.0.0.0" in multiple instance dialog and it
performs upgrade installation with base product configurations.Note:
- In case Upgrade installation fails, the user needs to install v16.0.0 in separate path and different port multiple instance type installation and then copy the user configured files from previous installed Host On-Demand location to v16.0.0 installation path manually.
- The IBM HTTP Server is configured for the Web Server environment. Before proceeding with the multiple-instance upgrade installation, the IBM HTTP Server must be stopped.
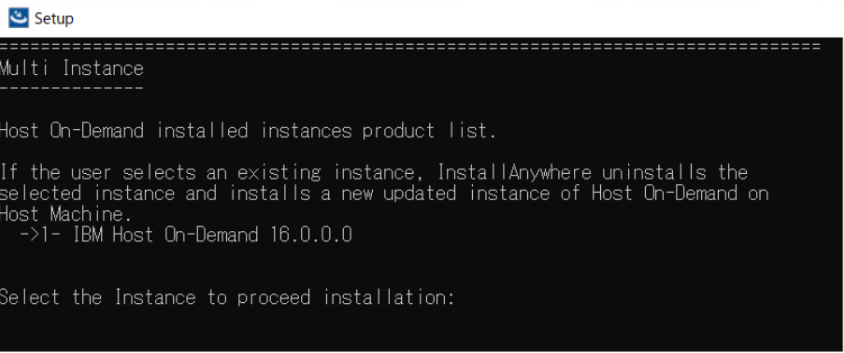
The IBM Host On-Demand v16.0 is installed on the host. IBM Host On-Demand v16.0 displays a multiple instance dialog with IBM Host On-Demand New Instance and IBM Host On-Demand installed product list. If the user selects "IBM Host On-Demand New Instance," it is installed as New Instance (Multiple versions installed on same host with different configurations). If the user selects IBM Host On-Demand 16.0.0.0, it performs upgrade installation with base configurations.
Console Mode Multiple Instance or Upgrade Installation
The IBM Host On-Demand v16.0 is installed on the host. IBM Host On-Demand v16.0 displays a multiple instance console dialog with IBM Host On-Demand New Instance and IBM Host.
On-Demand installed product list. If the user selects "IBM Host On-Demand New Instance," it is installed as New Instance (Multiple versions installed on same host with different configurations). If the user selects IBM Host On-Demand 16.0.0.0, it performs upgrade installation with base configurations.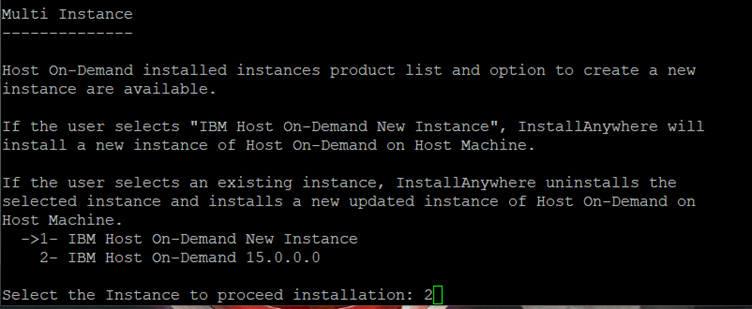
Silent Mode Multiple Instance or Upgrade Installation
The IBM Host On-Demand v16.0.0 supports silent mode installation either upgrade scenario or multiple instance type installation.
For more information, refer to Installing the IBM Host On-Demand, Deployment Wizard and HACL Tool kit in Silent Mode.
Upgrade Installation from v16.0.0.0 to v16.0.1.0.
This section describes a procedure to install a fix pack or refresh pack for Host On-Demand v16.0.1.0.
Pre-requisites
-
Minimum 2GB space is required in the temp directory during the update process.
-
Ensure that System Java 17 is installed/configured on i5/OS, z/OS, and Linux PPC (BE).
-
Ensure that the base version v16.0.0.0 is installed.
-
For Windows, Right click on HOD_Windows_x64.exe and click Run as Administrator.
-
For Linux, run sh ./setup.bin from Linux terminal with superuser privileges.
-
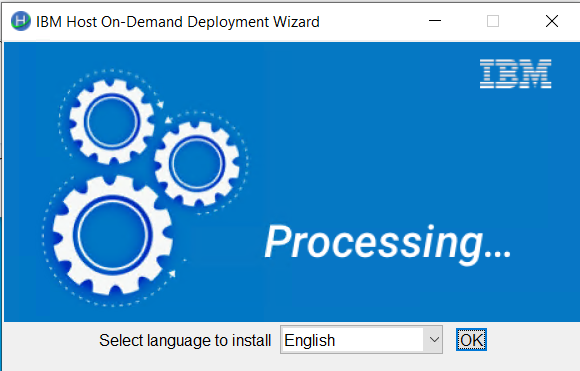
The following panel appears.
- Select the required language from the drop-down and click OK. By default, the panel will appear in the current locale of the operating system.
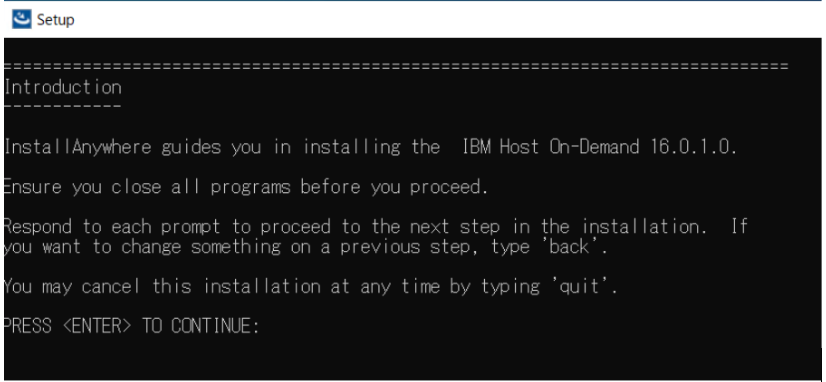
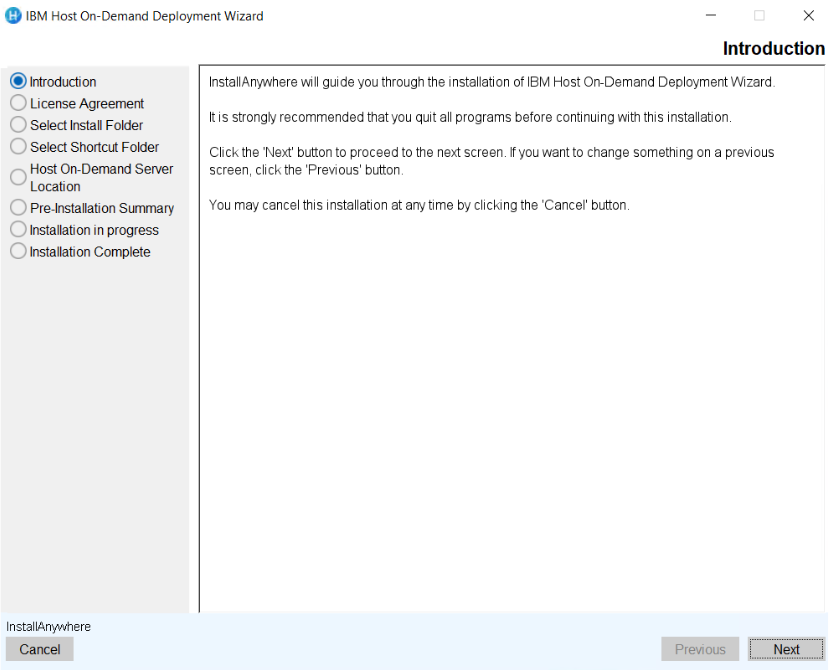
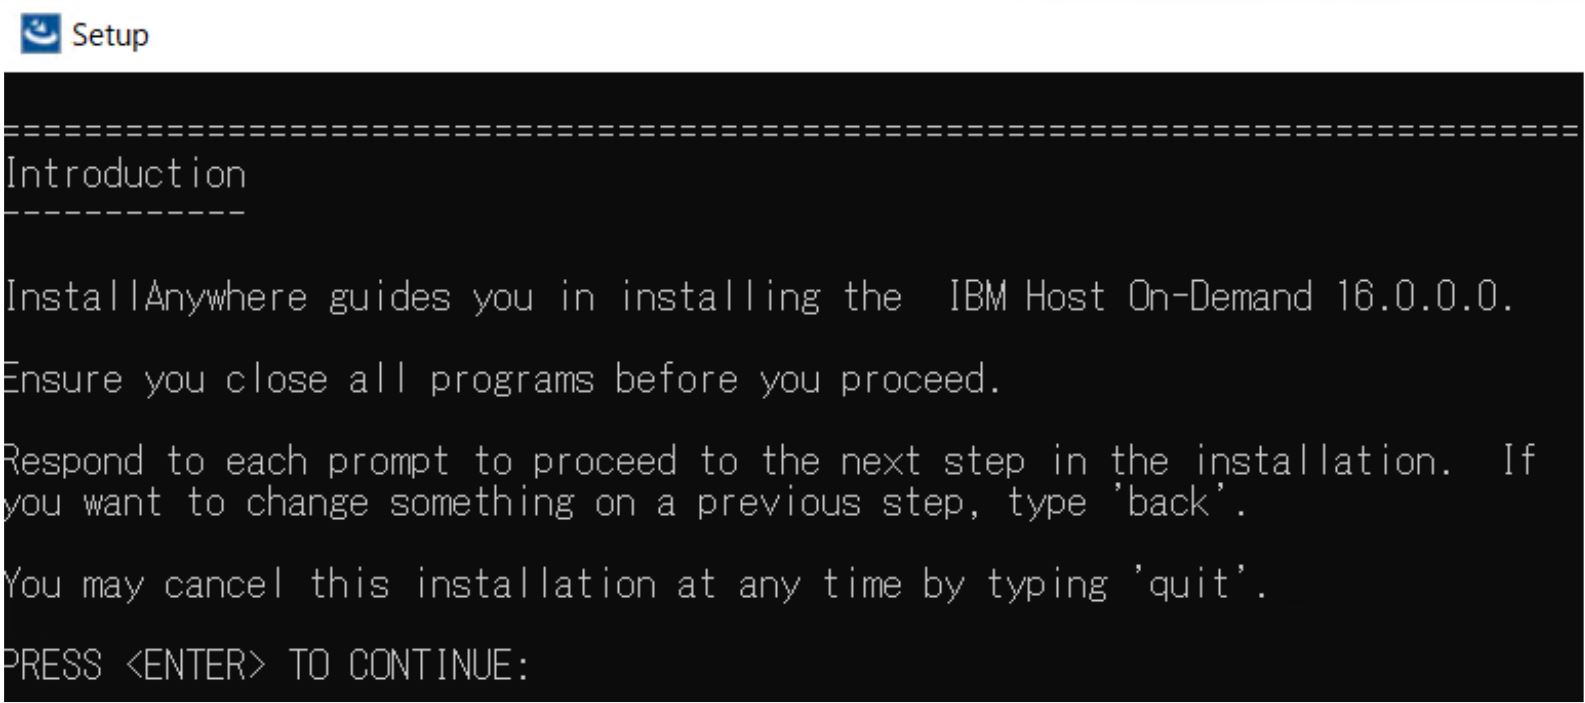
- The Introduction panel appears. Click Next to continue.
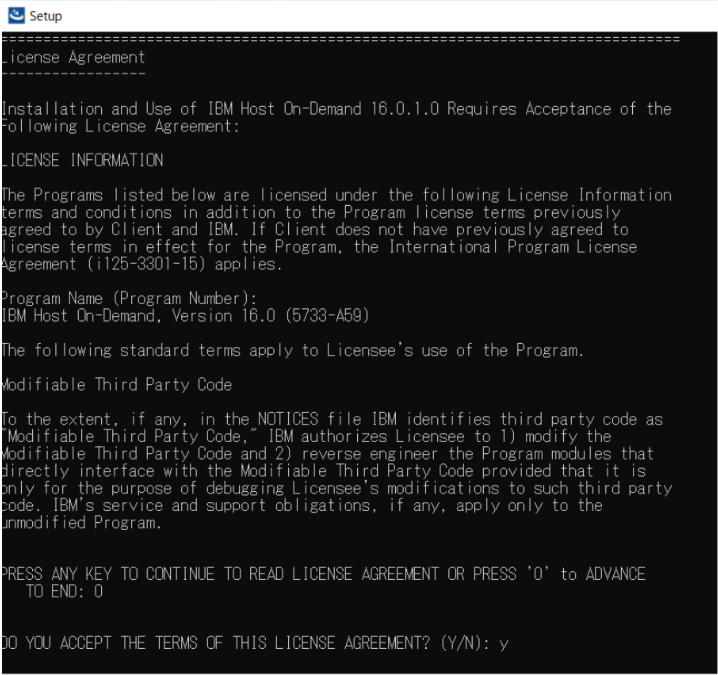
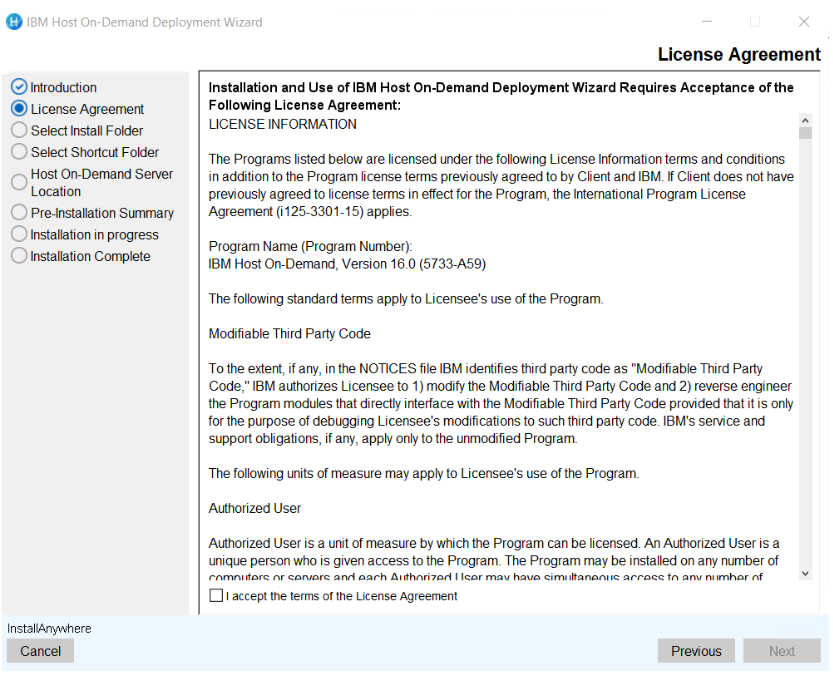
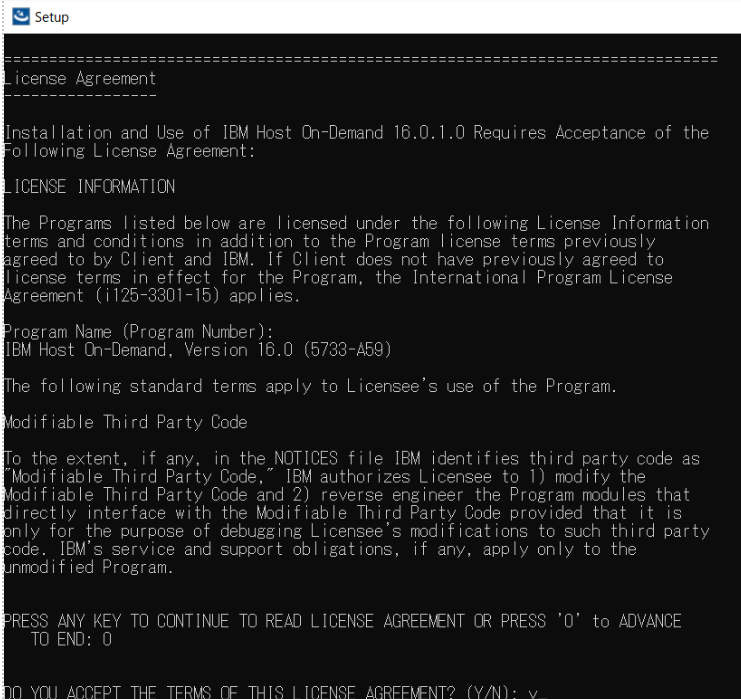
- The License Agreement panel appears. Select the check box to accept the License agreement and click Next to continue.
- The Multiple Instance panel appears. Select the existing base
version of HOD and click Next to continue.

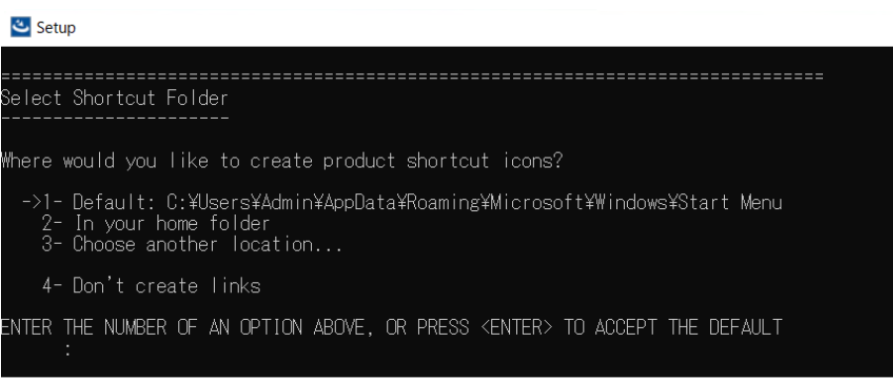
- The Select Shortcut Folder screen appears. Select the
required option to create the product shortcut icon.
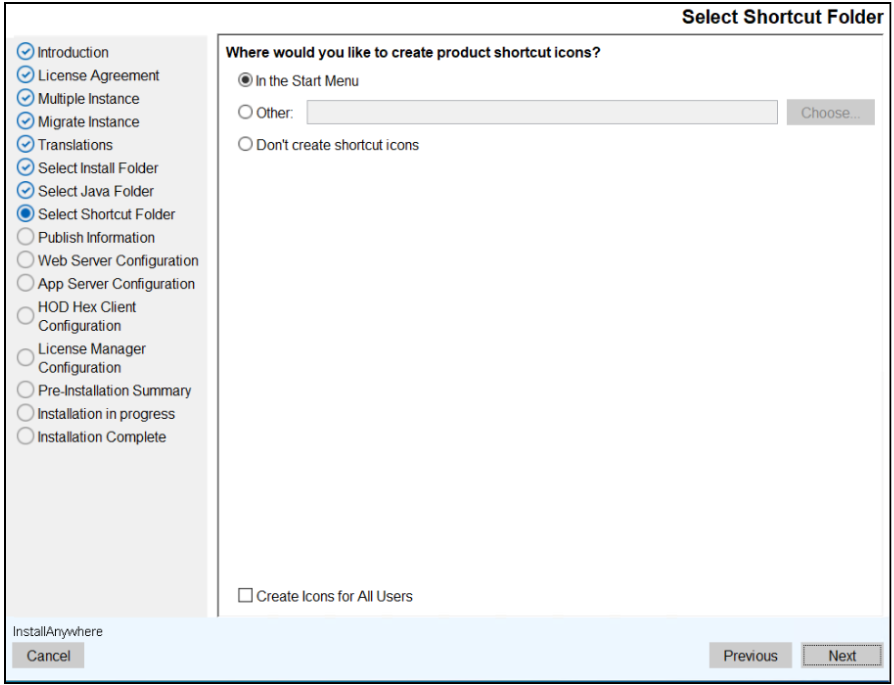 Note:The shortcut folder option is applicable for Windows OS only.
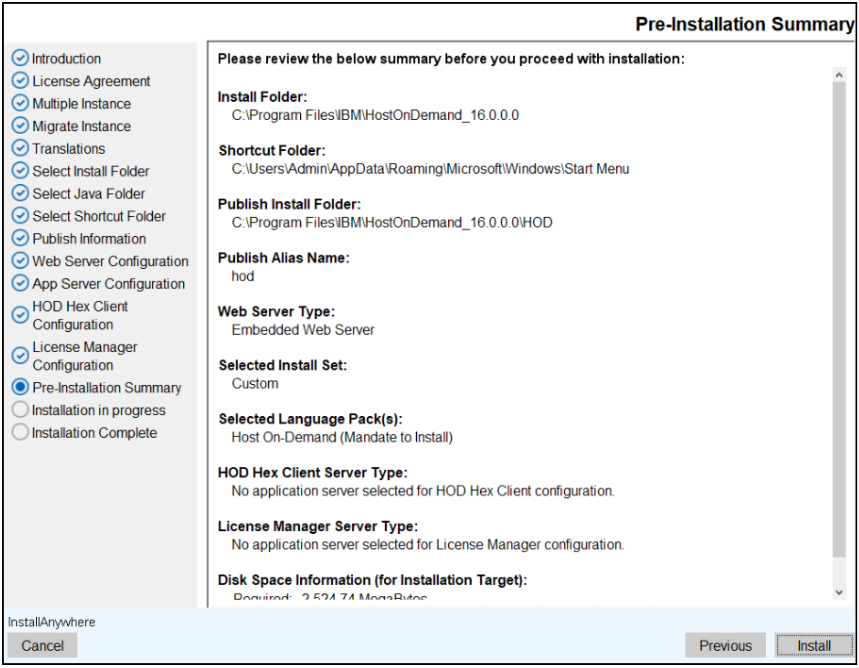
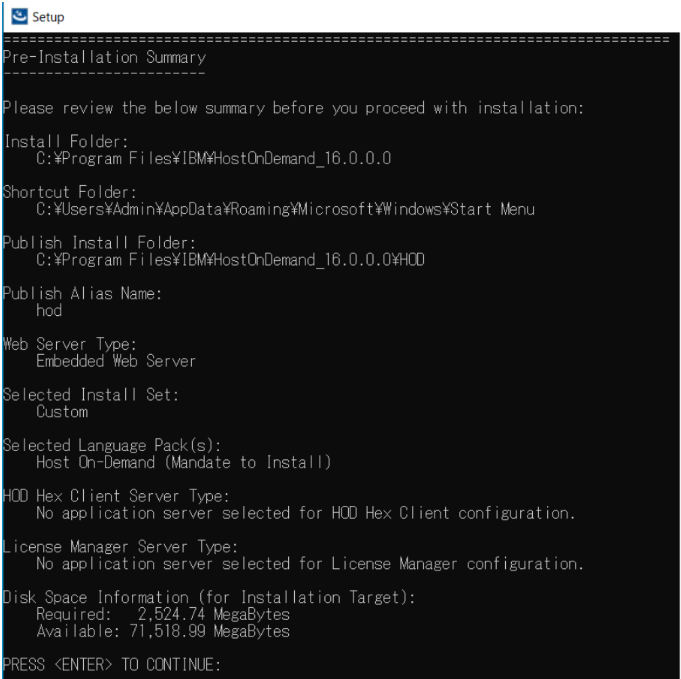
 - The Pre-Installation Summary appears. Review the summary and
click the Install button.
- After successful installation click Finish.

Silent Mode Installation
- Copy the setup files to the respective operating systems.
- Use the commands below for the respective operating systems to install HOD
16.0.1 in silent mode.
Table 1. Silent Mode Comands OS Type Command More Information Windows IBM Host On-Demand HOD_Windows_x64.exe
-i silent -f installer.properties
Administrator user Command Prompt Deployment Wizard HOD_DW_Windows_x64
.exe -i silent -f installer.properties
Administrator user Command Prompt HACL Tool kit HOD_HACL_Windows_x
64.exe -i silent -f installer.properties
Administrator user Command Prompt AIX IBM Host On-Demand sh ./setup.bin -i silent -f
installer.properties
Root user Terminal
client
Linux IBM Host On-Demand sh ./setup.bin -i silent -f
installer.properties
Root user Terminal
client
I5/OS IBM Host On-Demand java -jar setup.jar
-i silent -f installer.properties
Root (qsh) shell Prompt z/OS IBM Host On-Demand java -jar setup.jar
-i silent -f installer.properties
Root user account OMVS or ISPF shell prompt
#  /*

#  *+------------------------------------------------------------------------+

#  *| Licensed Materials - Property of HCL                                   |

#  *| (c) Copyright HCL Technologies Ltd. 2021.  All Rights Reserved.        |

#  *+------------------------------------------------------------------------+

#  */


# ---------------------------------------------------------------------------

#    Silent Installation properties file

# ---------------------------------------------------------------------------

INSTALLER_UI=silent


# ---------------------------------------------------------------------------

#    IBM Host On-Demand supports Multiple/Upgrade Instance Support

#        0 -> To install only one instance

#        1 -> To Support More than one instance or Upgrade Instance

# ---------------------------------------------------------------------------

MI_SUPPORT=1


# ---------------------------------------------------------------------------

# Specify Product Name to install as New instance or Upgrade Instance

#    For Upgrade instance Product name with Version

#        MI_PRODUCT_NAME=IBM Host On-Demand 15.0.1.0

#    For Multiple/New Instance support

#        MI_PRODUCT_NAME=IBM Host On-Demand New Instance

# ---------------------------------------------------------------------------

MI_PRODUCT_NAME=IBM Host On-Demand 16.0.0.0


# ---------------------------------------------------------------------------

#    IBM Host On-Demand IM Instance upgrade Support

#        0 -> Does Not IM HOD Upgrade Installation

#        1 -> To Support IM HOD Upgrade Installation

# ---------------------------------------------------------------------------

IM_UPGRADE_SUPPORT=0


# Specify Product Name with Installation Path to Migrate Installation Manager installed Instance

IM_PRODUCT_NAME=Host On-Demand 14.0.4.0 (C:\\Program Files\\IBM\\HostOnDemand)


# ---------------------------------------------------------------------------

#    IBM Host On-Demand Installation Path

# ---------------------------------------------------------------------------

USER_INSTALL_DIR=C:\\Program Files\\IBM\\HostOnDemand_16.0.0.0


# ---------------------------------------------------------------------------

#    Manditate Product Features

# Host On-Demand                                -> HOD


#   Choose optional Language Features

# For Brazilian Portuguese Language Pack        -> LANG_PT_BR

# For Catalan Language Pack                     -> LANG_CA

# For Czech Language Pack                       -> LANG_CS

# For Danish Language Pack                      -> LANG_DA

# For Dutch Language Pack                       -> LANG_NL

# For Finnish Language Pack                     -> LANG_FI

# For French Language Pack                      -> LANG_FR

# For German Language Pack                      -> LANG_DE

# For Greek Language Pack                       -> LANG_EL

# For Hungarian Language Pack                   -> LANG_HU

# For Italian Language Pack                     -> LANG_IT

# For Japanese Language Pack                    -> LANG_JA

# For Korean Language Pack                      -> LANG_KO

# For Norwegian Language Pack                   -> LANG_NO

# For Polish Language Pack                      -> LANG_PL

# For Portuguese Language Pack                  -> LANG_PT

# For Russian Language Pack                     -> LANG_RU

# For Simplified Chinese Language Pack          -> LANG_ZH_CN

# For Slovenian Language Pack                   -> LANG_SL

# For Spanish Language Pack                     -> LANG_ES

# For Swedish Language Pack                     -> LANG_SV

# For Traditional Chinese Language Pack         -> LANG_ZH_TW

# For Turkish Language Pack                     -> LANG_TR

# ---------------------------------------------------------------------------

CHOSEN_INSTALL_SET=Custom

CHOSEN_FEATURE_LIST=HOD,LANG_HU,LANG_IT,LANG_JA,LANG_KO,LANG_NO,LANG_PL,LANG_PT


# ---------------------------------------------------------------------------

#    IBM Host On-Demand Publish Information

# ---------------------------------------------------------------------------

# Publish alias Name

PUBLISH_ALIAS_NAME=hod

# Publish Director name to install publish files

PUBLISH_DIR=HOD

# Publish Port

PUBLISH_PORT=8999

# Publish secure Port

PUBLISH_SECURE_PORT=9001


# ---------------------------------------------------------------------------

#   IBM Host On-Demand shortcut Path

# ---------------------------------------------------------------------------

USER_SHORTCUTS=C\:\\ProgramData\\Microsoft\\Windows\\Start Menu


# ---------------------------------------------------------------------------

#    IBM Host On-Demand Web Server Configuration

#        Web Server Type

#           1 -> Embedded Web server Type

#           2 -> Detected Web server Type

#           3 -> Manually select specific Web server Type

#           4 -> No Web server Type

# ---------------------------------------------------------------------------

WS_TYPE=1


# ---------------------------------------------------------------------------

#    Embedded Web Server Type  IBM Host On-Demand Installation

# ---------------------------------------------------------------------------

# Web Server Port

WS_PORT=8080

# Web Server SSL Port

WS_SSL_PORT=8443


# ---------------------------------------------------------------------------

#    Detected Web server Type IBM Host On-Demand Installation

# ---------------------------------------------------------------------------

#Supported Web Server are APACHE or IIS

WS_DTD_SERVER_TYPE=IIS


# If IIS Webserver type then specify ISS Website Name

WS_DTD_IIS_APPNAME=Default Web Site


# If Apache is selected for installation need to specify apache installed Config Path

# C:\\Program Files (x86)\\Apache Software Foundation\\Apache2.2\\conf\\httpd.conf

WEB_SERVER_CONFIG_FILE=C:\\Program Files (x86)\\Apache Software Foundation\\Apache2.2\\conf\\httpd.conf


# ---------------------------------------------------------------------------

#    Manual specify web server Type IBM Host On-Demand Installation

#        1 -> Apache HTTP Server 2.2 or newer

#        2 -> IBM HTTP Server 8.5 or newer

# ---------------------------------------------------------------------------

WS_MAN_SERVER_TYPE=1

# If Apache or HTTP Server is selected for installation need to specify Server Config Path

WS_MAN_CONFIG_FILE=C:\\Program Files (x86)\\Apache Software Foundation\\Apache2.2\\conf\\httpd.conf


# ---------------------------------------------------------------------------

#    IBM WebSphere Application Server Configuration

#        0 -> without Application  Server Configuration

#        1 -> To Configure WAS Application Server

# ---------------------------------------------------------------------------

APP_SERVER_SELECTED=0


# Application Server Name

APP_SERVER=IBM WebSphere Application Server V9.0

# Application server Profile Name

WAS_PROFILE=AppSrv01

# WAS Server Name

WAS_SERVER=Server1

# ---------------------------------------------------------------------------

#    HOD Hex Client  Application Server Configuration

#        0 -> without HOD Hex Client Configuration

#        1 -> To Configure HOD Hex Client Configuration

# ---------------------------------------------------------------------------

HODCLIENT_SUPPORT=0

# ---------------------------------------------------------------------------

#    HOD Hex Client Application Server Configuration

#        1 -> Embedded Server

#        2 -> IBM WebSphere Application Server

#        3 -> Manually select specific Web Server

# ---------------------------------------------------------------------------

HODCLIENT_SERVERTYPE=1


# ---------------------------------------------------------------------------

#    HODCLIENT_SERVERTYPE=2

#        HOD Hex Client IBM WebSphere Application Server Configuration

#----------------------------------------------------------------------------


# Application Server Name

HODCLIENT_WAS_APPSERVER=IBM WebSphere Application Server V9.0

# Application server Profile Name

HODCLIENT_WAS_PROFILE=AppSrv01

# WAS Server Name

HODCLIENT_WAS_PROFILE_SERVER=Server1


# ---------------------------------------------------------------------------

#    HODCLIENT_SERVERTYPE=3

#    HOD Hex Client Manually select specific Web Server

#        1 -> Tomcat Apache Server

#        2 -> IBM Liberty WebSphere Server

#----------------------------------------------------------------------------

HODCLIENT_MAN_SERVERTYPE=1


#----------------------------------------------------------------------------

#    For Tomcat Apache Server installation path should be define up to Parent folder of WebApps

#        HODCLIENT_MAN_SERVERPATH=C:\Program Files\Tomcat9.0

#    For BM Liberty WebSphere Server installation path should be define up to Parent folder of bin

#        HODCLIENT_MAN_SERVERPATH=C:\Program Files\IBM Liberty

#----------------------------------------------------------------------------

HODCLIENT_MAN_SERVERPATH=C:\\Program Files\\Tomcat9.0


#----------------------------------------------------------------------------

#    HODCLIENT Configuration

#        In Web Server Configuration type Embedded server is selected, and

#           HOD Hex Client Embedded Appserver is selected, no need to define Application Server and Secure port.

#        In Web Server Configuration type Embedded server is selected no need to define HOD Hex Client Webserver Port

#----------------------------------------------------------------------------

# Host On-Demand Configured WebServer port to communicate with HOD Hex Client Application Server

HODCLIENT_WEBSERVER_PORT=8080

# HODCLIENT Application Server Port

HODCLIENT_APPSERVER_PORT=8080

# HODCLIENT Application Server Secure Port

HODCLIENT_APPSERVER_SECUREPORT=8443

# HODCLIENT Max Pool Size accepts only integer value

HODCLIENT_MAX_POOL_SIZE=100

# HODCLIENT Buffer Size accepts only integer value

HODCLIENT_BUFFER_SIZE=4096


# HODCLIENT War file will be deployed based on HODCLIENT_CONTEXT_ROOT value

HODCLIENT_CONTEXT_ROOT=hex


# HOD Hex Client Config trace accepted values true or false

HODCLIENT_CONFIG_TRACE=false

# HOD Hex Client Show Status accepted values true or false

HODCLIENT_SHOW_STATUS=false

# HOD Hex Client Map File accepted values true or false

HODCLIENT_MAP_FILE=false

# HOD Hex Client ZFP trace accepted values true or false

HODCLIENT_ZFP_TRACE=false

# ---------------------------------------------------------------------------

#    License Manager  Application Server Configuration

#        0 -> without License Manager Configuration

#        1 -> To Configure License Manager Configuration

# ---------------------------------------------------------------------------

LM_SUPPORT=1

# ---------------------------------------------------------------------------

#    License Manager Application Server Configuration

#        1 -> Embedded Server

#        2 -> IBM WebSphere Application Server

#        3 -> Manually select specific Web Server

# ---------------------------------------------------------------------------

LM_SERVERTYPE=1


# ---------------------------------------------------------------------------

#    LM_SERVERTYPE=2

#        License Manager IBM WebSphere Application Server Configuration

#----------------------------------------------------------------------------


# Application Server Name

LM_WAS_APPSERVER=IBM WebSphere Application Server V9.0

# Application server Profile Name

LM_WAS_PROFILE=AppSrv01

# WAS Server Name

LM_WAS_PROFILE_SERVER=Server1


# ---------------------------------------------------------------------------

#    LM_SERVERTYPE=3

#    License Manager Manually select specific Web Server

#        1 -> Tomcat Apache Server

#        2 -> IBM Liberty WebSphere Server

#----------------------------------------------------------------------------

LM_MAN_SERVERTYPE=1


#----------------------------------------------------------------------------

#    For Tomcat Apache Server instalaltion path should be define upto Parent folder of WebApps

#        LM_MAN_SERVERPATH=C:\\Program Files\\Tomcat9.0

#    For BM Liberty WebSphere Server instalaltion path should be define upto Parent folder of bin

#        LM_MAN_SERVERPATH=C:\\Program Files\\IBM Liberty

#----------------------------------------------------------------------------

LM_MAN_SERVERPATH=C:\\Program Files\\Tomcat9.0


#----------------------------------------------------------------------------

#    License Manger Configuration

#----------------------------------------------------------------------------


# License Manager Application Server Port

LM_APPSERVER_PORT=8080

# License Manager Application Server Secure Port

LM_APPSERVER_SECUREPORT=8443

# License Manager War file will be deployed based on LM_CONTEXT_ROOT value

LM_CONTEXT_ROOT=LicenseManager

# License Manager PCOMM Enablement accepted values true or false

LM_PCOMM=true

# License Manager HOD Enablement accepted values true or false

LM_HOD=true

# License Manager License file Path

LM_FILEPATH=C:\\Users\\Admin

# License Manager trace Level accepted values "DEBUG", "INFO", "ALL", "TRACE", "WARN", "ERROR", "FATAL", "OFF"

LM_TRACE_LEVEL=INFO

# License Manager Database Server accepted values "H2", "SQLITE", "MYSQL", "DB2"

LM_DB_SERVER=DB2

# License Manager Database Driver; Database Driver applicable for "MYSQL", "DB2" Servers

LM_DB_DRIVER=org.h2.Driver

# License Manager Database User details; Database User applicable for "H2", "MYSQL", "DB2"  Servers

LM_DB_USER=admin

# License Manager Database Password details; Database Password applicable for "H2", "MYSQL", "DB2" Servers

LM_DB_PASSWORD=admin

# License Manager Database URL details; Database URL applicable for "MYSQL", "DB2" Servers

LM_DB_URL=DB URL


# ---------------------------------------------------------------------------

#    System Level Configuration: Don't change below values until it requires.

#    Reboot Parameter on uninstall and install scenarios

# ---------------------------------------------------------------------------

USER_REQUESTED_RESTART=NO

RESTART_NEEDED=NO
Silent Installation Using Command-Line Arguments
Installing Host On-Demand using silent mode with use of command line Silent argument. For more information refer the below commands.
• To install the IBM Host On-Demand on Z/OS and I5/OS in Silent mode, use the following command in the terminal.
Command: java -jar <file name> -i silent -DMI_SUPPORT=1 -DMI_PRODUCT_NAME="IBM Host On-Demand 16.0.0.0" -DIM_UPGRARE_SUPPORT=0 -DUSER_INSTALL_DIR=/opt/IBM/Host On Demand_16.0.0.0 -DHOD_JRE_HOME=/usr/lpp/java/J17.0_64 -DPUBLISH_ALIAS_NAME=hod -DPUBLISH_DIR=HOD -DPUBLISH_PORT=8999 -DPUBLISH_SECURE_PORT=9001 -DWS_TYPE=4 -DAPP_SERVER_SELECTED=0
• To install IBM Host On-Demand on windows in Silent mode, use the following command in the terminal.
Command: HOD_Windows_x64.exe -i silent -DMI_SUPPORT=1 -DMI_PRODUCT_NAME="IBM Host On-Demand 16.0.0.0" -DIM_UPGRADE_SUPPORT=0 -DUSER_INSTALL_DIR=/opt/IBM/Host On Demand_16.0.0.0 -DPUBLISH_ALIAS_NAME=hod -DPUBLISH_DIR=HOD -DPUBLISH_PORT=8999 -DPUBLISH_SECURE_PORT=9001 -DWS_TYPE=4 -DAPP_SERVER_SELECTED=0 -DUSER_SHORTCUTS=C:\ProgramData\Microsoft\Windows\Start Menu
• To install the IBM Host On-Demand on AIX, Linux and Ubuntu in Silent mode, use the following command in the terminal.
Command: sh ./setup.bin -i silent -DMI_SUPPORT=1 -DMI_PRODUCT_NAME="IBM Host On- Demand 16.0.0.0" -DIM_UPGRADE_SUPPORT=0 -DUSER_INSTALL_DIR=/opt/IBM/Host On Demand_16.0.0.0 -DPUBLISH_ALIAS_NAME=hod -DPUBLISH_DIR=HOD -DPUBLISH_PORT=8999 -DPUBLISH_SECURE_PORT=9001 -DWS_TYPE=4 -DAPP_SERVER_SELECTED=0
Console Mode Installation
Administrators can use the console-based interface to install Host On-Demand on Linux, AIX, i5/OS and z/OS systems that do not support a graphical user interface (GUI).
Execute the following steps to install the Host On-Demand in console mode:
-
Copy the setup files to the respective operating systems.
-
Use the commands below for the respective operating systems to install Host On-Demand v16.0.1 in silent mode.
Table 2. Console Mode Comands OS Type Command More Information Windows IBM Host On-Demand HOD_Windows_x64.exe -i console Administrator user Command Prompt Deployment Wizard HOD_DW_Windows_x64.exe -i console Administrator user Command Prompt HACL Tool kit HOD_HACL_Windows_x64.exe -i console Administrator user Command Prompt AIX IBM Host On-Demand sh ./setup.bin -i console Root user Terminal
client
Linux IBM Host On-Demand sh ./setup.bin -i console Root user Terminal
client
I5/OS IBM Host On-Demand java -jar setup.jar -i console Root (qsh) shell Prompt z/OS IBM Host On-Demand java -jar setup.jar -i console Root user account OMVS or ISPF shell prompt - Select the required Language(s) to start the installation.
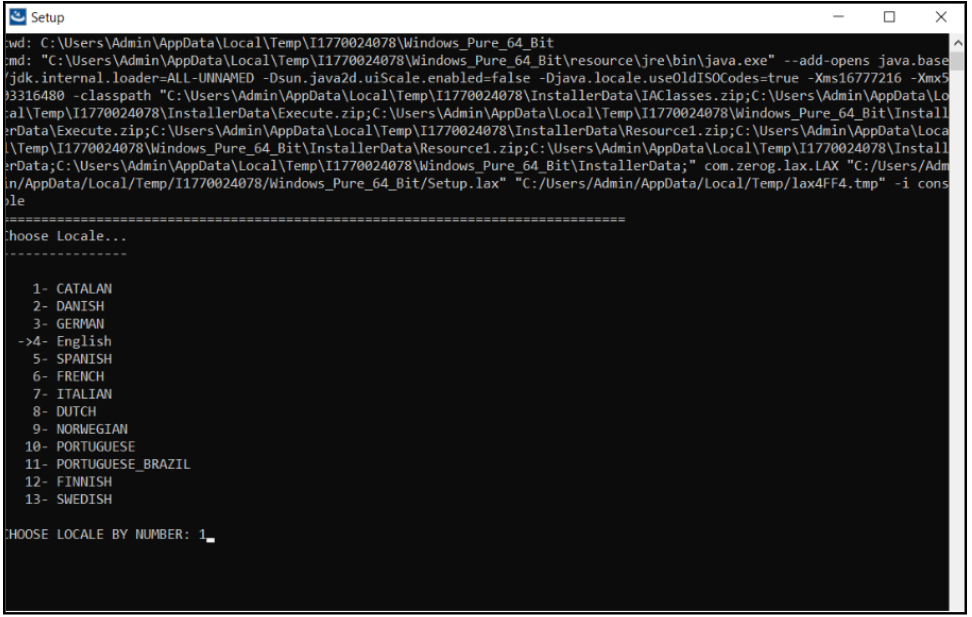
- Press Enter to continue.
- The License Agreement Configuration screen displays. Select “0” to move
to the end of the agreement. Type “Y” to accept the terms of License Agreement.
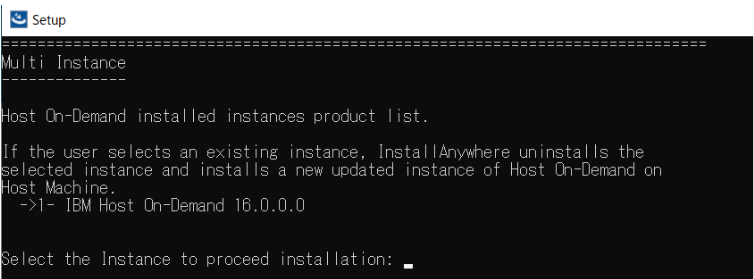
- In Multi Instance, select an installed version.
- Select the required option to create the product shortcut icons.
 Note:The shortcut folder option is applicable for Windows OS only.
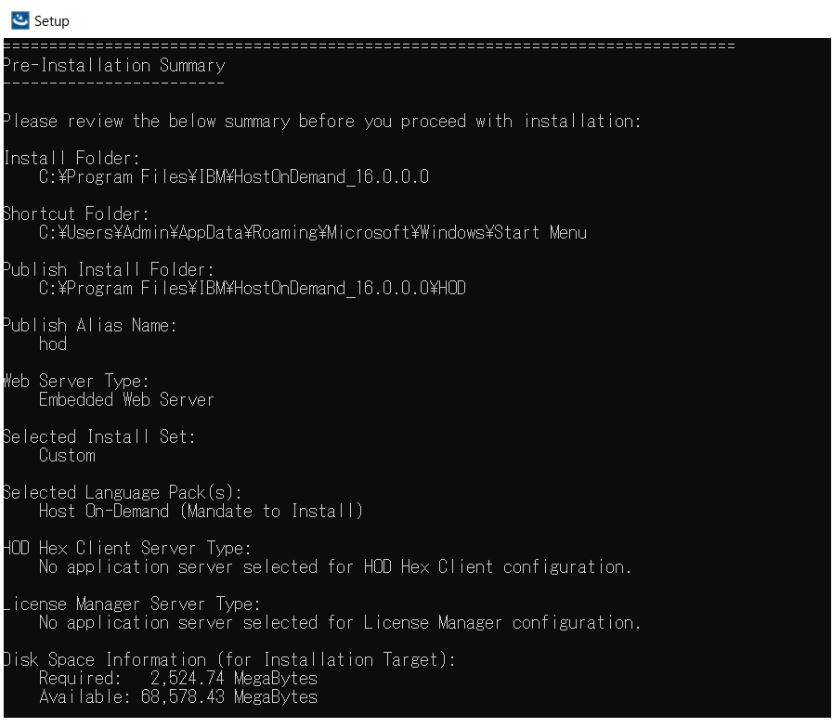
 - Review the Pre-Installation Summary panel and press Enter to start
the installation.
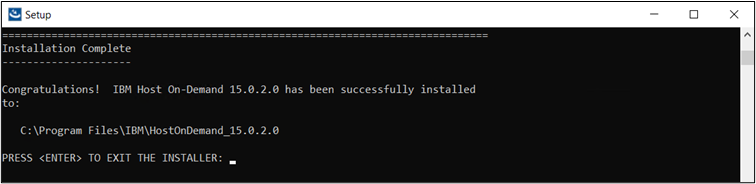
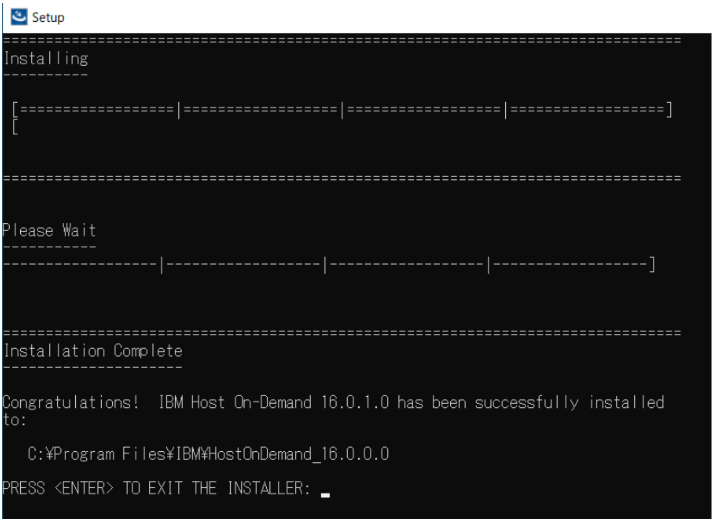
- After successful installation, the installed location for the updated instance
is displayed. Press Enter to exit from the Installer.
Upgrade Installation from v16.0.0.0 to v16.0.X (Latest Version)
This section describes a procedure to install a fix pack or refresh pack for Host On-Demand v16.0.2.0.
Pre-requisites
-
Minimum 2GB space is required in the temp directory during the update process.
-
Ensure that System Java 17 is installed/configured on i5/OS and z/OS.
-
Ensure that the base version v16.0.0.0 or v16.0.1.0 is installed.
-
For Windows, Right click on HOD_Windows_x64.exe and click Run as Administrator.
-
For Linux, run sh ./setup.bin from Linux terminal with superuser privileges.
-
The following panel appears.
- Select the required language from the drop-down and click OK. By default, the panel will appear in the current locale of the operating system.
- The Introduction panel appears. Click Next to continue.
- The License Agreement panel appears. Select the check box to accept the License agreement and click Next to continue.
- The Multiple Instance panel appears. Select the existing base
version of HOD and click Next to continue.
- The Select Shortcut Folder screen appears. Select the
required option to create the product shortcut icon.Note:If you select the Don’t create shortcut icons option, the installer does not create shortcut icons. As a result, utilities such as Standalone Deployment Wizard, Code Page Converter, Printer Definition, and User Defined Characters are not available.Note:The shortcut folder option is applicable for Windows OS only.
- The Pre-Installation Summary appears. Review the summary and
click the Install button.
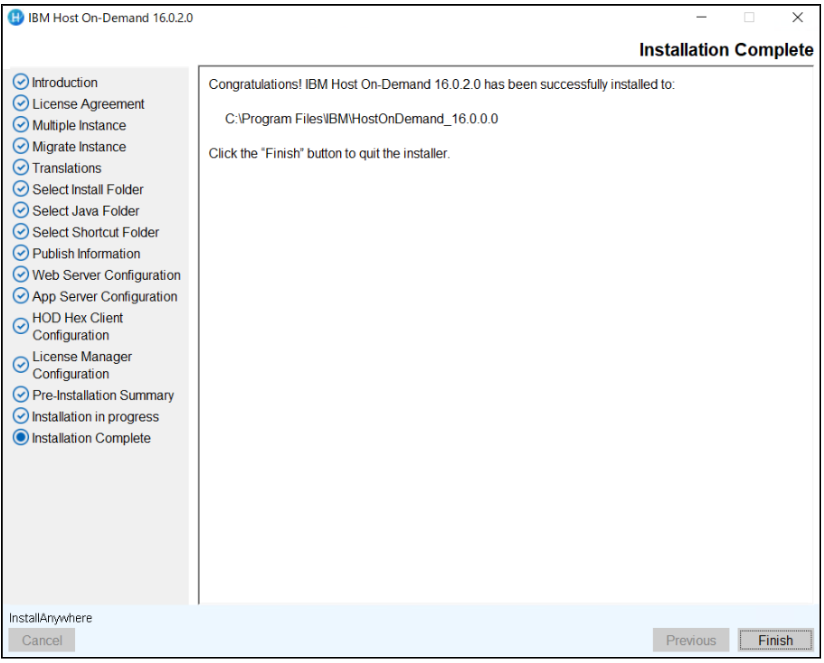
- After successful installation click Finish.
Silent Mode Installation
- Copy the setup files to the respective operating systems.
- Use the commands below for the respective operating systems to install HOD
16.0.2 in silent mode.
Table 3. Silent Mode Comands OS Type Command More Information Windows IBM Host On-Demand HOD_Windows_x64.exe
-i silent -f installer.properties
Administrator user Command Prompt Deployment Wizard HOD_DW_Windows_x64
.exe -i silent -f installer.properties
Administrator user Command Prompt HACL Tool kit HOD_HACL_Windows_x
64.exe -i silent -f installer.properties
Administrator user Command Prompt AIX IBM Host On-Demand sh ./setup.bin -i silent -f
installer.properties
Root user Terminal
client
Linux IBM Host On-Demand sh ./setup.bin -i silent -f
installer.properties
Root user Terminal
client
I5/OS IBM Host On-Demand java -jar setup.jar
-i silent -f installer.properties
Root (qsh) shell Prompt z/OS IBM Host On-Demand java -jar setup.jar
-i silent -f installer.properties
Root user account OMVS or ISPF shell prompt
#  /*

#  *+------------------------------------------------------------------------+

#  *| Licensed Materials - Property of HCL                                   |

#  *| (c) Copyright HCL Technologies Ltd. 2021.  All Rights Reserved.        |

#  *+------------------------------------------------------------------------+

#  */


# ---------------------------------------------------------------------------

#    Silent Installation properties file

# ---------------------------------------------------------------------------

INSTALLER_UI=silent


# ---------------------------------------------------------------------------

#    IBM Host On-Demand supports Multiple/Upgrade Instance Support

#        0 -> To install only one instance

#        1 -> To Support More than one instance or Upgrade Instance

# ---------------------------------------------------------------------------

MI_SUPPORT=1


# ---------------------------------------------------------------------------

# Specify Product Name to install as New instance or Upgrade Instance

#    For Upgrade instance Product name with Version

#        MI_PRODUCT_NAME=IBM Host On-Demand 15.0.1.0

#    For Multiple/New Instance support

#        MI_PRODUCT_NAME=IBM Host On-Demand New Instance

# ---------------------------------------------------------------------------

MI_PRODUCT_NAME=IBM Host On-Demand 16.0.0.0


# ---------------------------------------------------------------------------

#    IBM Host On-Demand IM Instance upgrade Support

#        0 -> Does Not IM HOD Upgrade Installation

#        1 -> To Support IM HOD Upgrade Installation

# ---------------------------------------------------------------------------

IM_UPGRADE_SUPPORT=0


# Specify Product Name with Installation Path to Migrate Installation Manager installed Instance

IM_PRODUCT_NAME=Host On-Demand 14.0.4.0 (C:\\Program Files\\IBM\\HostOnDemand)


# ---------------------------------------------------------------------------

#    IBM Host On-Demand Installation Path

# ---------------------------------------------------------------------------

USER_INSTALL_DIR=C:\\Program Files\\IBM\\HostOnDemand_16.0.0.0


# ---------------------------------------------------------------------------

#    Manditate Product Features

# Host On-Demand                                -> HOD


#   Choose optional Language Features

# For Brazilian Portuguese Language Pack        -> LANG_PT_BR

# For Catalan Language Pack                     -> LANG_CA

# For Czech Language Pack                       -> LANG_CS

# For Danish Language Pack                      -> LANG_DA

# For Dutch Language Pack                       -> LANG_NL

# For Finnish Language Pack                     -> LANG_FI

# For French Language Pack                      -> LANG_FR

# For German Language Pack                      -> LANG_DE

# For Greek Language Pack                       -> LANG_EL

# For Hungarian Language Pack                   -> LANG_HU

# For Italian Language Pack                     -> LANG_IT

# For Japanese Language Pack                    -> LANG_JA

# For Korean Language Pack                      -> LANG_KO

# For Norwegian Language Pack                   -> LANG_NO

# For Polish Language Pack                      -> LANG_PL

# For Portuguese Language Pack                  -> LANG_PT

# For Russian Language Pack                     -> LANG_RU

# For Simplified Chinese Language Pack          -> LANG_ZH_CN

# For Slovenian Language Pack                   -> LANG_SL

# For Spanish Language Pack                     -> LANG_ES

# For Swedish Language Pack                     -> LANG_SV

# For Traditional Chinese Language Pack         -> LANG_ZH_TW

# For Turkish Language Pack                     -> LANG_TR

# ---------------------------------------------------------------------------

CHOSEN_INSTALL_SET=Custom

CHOSEN_FEATURE_LIST=HOD,LANG_HU,LANG_IT,LANG_JA,LANG_KO,LANG_NO,LANG_PL,LANG_PT


# ---------------------------------------------------------------------------

#    IBM Host On-Demand Publish Information

# ---------------------------------------------------------------------------

# Publish alias Name

PUBLISH_ALIAS_NAME=hod

# Publish Director name to install publish files

PUBLISH_DIR=HOD

# Publish Port

PUBLISH_PORT=8999

# Publish secure Port

PUBLISH_SECURE_PORT=9001


# ---------------------------------------------------------------------------

#   IBM Host On-Demand shortcut Path

# ---------------------------------------------------------------------------

USER_SHORTCUTS=C\:\\ProgramData\\Microsoft\\Windows\\Start Menu


# ---------------------------------------------------------------------------

#    IBM Host On-Demand Web Server Configuration

#        Web Server Type

#           1 -> Embedded Web server Type

#           2 -> Detected Web server Type

#           3 -> Manually select specific Web server Type

#           4 -> No Web server Type

# ---------------------------------------------------------------------------

WS_TYPE=1


# ---------------------------------------------------------------------------

#    Embedded Web Server Type  IBM Host On-Demand Installation

# ---------------------------------------------------------------------------

# Web Server Port

WS_PORT=8080

# Web Server SSL Port

WS_SSL_PORT=8443


# ---------------------------------------------------------------------------

#    Detected Web server Type IBM Host On-Demand Installation

# ---------------------------------------------------------------------------

#Supported Web Server are APACHE or IIS

WS_DTD_SERVER_TYPE=IIS


# If IIS Webserver type then specify ISS Website Name

WS_DTD_IIS_APPNAME=Default Web Site


# If Apache is selected for installation need to specify apache installed Config Path

# C:\\Program Files (x86)\\Apache Software Foundation\\Apache2.2\\conf\\httpd.conf

WEB_SERVER_CONFIG_FILE=C:\\Program Files (x86)\\Apache Software Foundation\\Apache2.2\\conf\\httpd.conf


# ---------------------------------------------------------------------------

#    Manual specify web server Type IBM Host On-Demand Installation

#        1 -> Apache HTTP Server 2.2 or newer

#        2 -> IBM HTTP Server 8.5 or newer

# ---------------------------------------------------------------------------

WS_MAN_SERVER_TYPE=1

# If Apache or HTTP Server is selected for installation need to specify Server Config Path

WS_MAN_CONFIG_FILE=C:\\Program Files (x86)\\Apache Software Foundation\\Apache2.2\\conf\\httpd.conf


# ---------------------------------------------------------------------------

#    IBM WebSphere Application Server Configuration

#        0 -> without Application  Server Configuration

#        1 -> To Configure WAS Application Server

# ---------------------------------------------------------------------------

APP_SERVER_SELECTED=0


# Application Server Name

APP_SERVER=IBM WebSphere Application Server V9.0

# Application server Profile Name

WAS_PROFILE=AppSrv01

# WAS Server Name

WAS_SERVER=Server1

# ---------------------------------------------------------------------------

#    HOD Hex Client  Application Server Configuration

#        0 -> without HOD Hex Client Configuration

#        1 -> To Configure HOD Hex Client Configuration

# ---------------------------------------------------------------------------

HODCLIENT_SUPPORT=0

# ---------------------------------------------------------------------------

#    HOD Hex Client Application Server Configuration

#        1 -> Embedded Server

#        2 -> IBM WebSphere Application Server

#        3 -> Manually select specific Web Server

# ---------------------------------------------------------------------------

HODCLIENT_SERVERTYPE=1


# ---------------------------------------------------------------------------

#    HODCLIENT_SERVERTYPE=2

#        HOD Hex Client IBM WebSphere Application Server Configuration

#----------------------------------------------------------------------------


# Application Server Name

HODCLIENT_WAS_APPSERVER=IBM WebSphere Application Server V9.0

# Application server Profile Name

HODCLIENT_WAS_PROFILE=AppSrv01

# WAS Server Name

HODCLIENT_WAS_PROFILE_SERVER=Server1


# ---------------------------------------------------------------------------

#    HODCLIENT_SERVERTYPE=3

#    HOD Hex Client Manually select specific Web Server

#        1 -> Tomcat Apache Server

#        2 -> IBM Liberty WebSphere Server

#----------------------------------------------------------------------------

HODCLIENT_MAN_SERVERTYPE=1


#----------------------------------------------------------------------------

#    For Tomcat Apache Server installation path should be define up to Parent folder of WebApps

#        HODCLIENT_MAN_SERVERPATH=C:\Program Files\Tomcat9.0

#    For BM Liberty WebSphere Server installation path should be define up to Parent folder of bin

#        HODCLIENT_MAN_SERVERPATH=C:\Program Files\IBM Liberty

#----------------------------------------------------------------------------

HODCLIENT_MAN_SERVERPATH=C:\\Program Files\\Tomcat9.0


#----------------------------------------------------------------------------

#    HODCLIENT Configuration

#        In Web Server Configuration type Embedded server is selected, and

#           HOD Hex Client Embedded Appserver is selected, no need to define Application Server and Secure port.

#        In Web Server Configuration type Embedded server is selected no need to define HOD Hex Client Webserver Port

#----------------------------------------------------------------------------

# Host On-Demand Configured WebServer port to communicate with HOD Hex Client Application Server

HODCLIENT_WEBSERVER_PORT=8080

# HODCLIENT Application Server Port

HODCLIENT_APPSERVER_PORT=8080

# HODCLIENT Application Server Secure Port

HODCLIENT_APPSERVER_SECUREPORT=8443

# HODCLIENT Max Pool Size accepts only integer value

HODCLIENT_MAX_POOL_SIZE=100

# HODCLIENT Buffer Size accepts only integer value

HODCLIENT_BUFFER_SIZE=4096


# HODCLIENT War file will be deployed based on HODCLIENT_CONTEXT_ROOT value

HODCLIENT_CONTEXT_ROOT=hex


# HOD Hex Client Config trace accepted values true or false

HODCLIENT_CONFIG_TRACE=false

# HOD Hex Client Show Status accepted values true or false

HODCLIENT_SHOW_STATUS=false

# HOD Hex Client Map File accepted values true or false

HODCLIENT_MAP_FILE=false

# HOD Hex Client ZFP trace accepted values true or false

HODCLIENT_ZFP_TRACE=false

# ---------------------------------------------------------------------------

#    License Manager  Application Server Configuration

#        0 -> without License Manager Configuration

#        1 -> To Configure License Manager Configuration

# ---------------------------------------------------------------------------

LM_SUPPORT=1

# ---------------------------------------------------------------------------

#    License Manager Application Server Configuration

#        1 -> Embedded Server

#        2 -> IBM WebSphere Application Server

#        3 -> Manually select specific Web Server

# ---------------------------------------------------------------------------

LM_SERVERTYPE=1


# ---------------------------------------------------------------------------

#    LM_SERVERTYPE=2

#        License Manager IBM WebSphere Application Server Configuration

#----------------------------------------------------------------------------


# Application Server Name

LM_WAS_APPSERVER=IBM WebSphere Application Server V9.0

# Application server Profile Name

LM_WAS_PROFILE=AppSrv01

# WAS Server Name

LM_WAS_PROFILE_SERVER=Server1


# ---------------------------------------------------------------------------

#    LM_SERVERTYPE=3

#    License Manager Manually select specific Web Server

#        1 -> Tomcat Apache Server

#        2 -> IBM Liberty WebSphere Server

#----------------------------------------------------------------------------

LM_MAN_SERVERTYPE=1


#----------------------------------------------------------------------------

#    For Tomcat Apache Server instalaltion path should be define upto Parent folder of WebApps

#        LM_MAN_SERVERPATH=C:\\Program Files\\Tomcat9.0

#    For BM Liberty WebSphere Server instalaltion path should be define upto Parent folder of bin

#        LM_MAN_SERVERPATH=C:\\Program Files\\IBM Liberty

#----------------------------------------------------------------------------

LM_MAN_SERVERPATH=C:\\Program Files\\Tomcat9.0


#----------------------------------------------------------------------------

#    License Manger Configuration

#----------------------------------------------------------------------------


# License Manager Application Server Port

LM_APPSERVER_PORT=8080

# License Manager Application Server Secure Port

LM_APPSERVER_SECUREPORT=8443

# License Manager War file will be deployed based on LM_CONTEXT_ROOT value

LM_CONTEXT_ROOT=LicenseManager

# License Manager PCOMM Enablement accepted values true or false

LM_PCOMM=true

# License Manager HOD Enablement accepted values true or false

LM_HOD=true

# License Manager License file Path

LM_FILEPATH=C:\\Users\\Admin

# License Manager trace Level accepted values "DEBUG", "INFO", "ALL", "TRACE", "WARN", "ERROR", "FATAL", "OFF"

LM_TRACE_LEVEL=INFO

# License Manager Database Server accepted values "H2", "SQLITE", "MYSQL", "DB2"

LM_DB_SERVER=DB2

# License Manager Database Driver; Database Driver applicable for "MYSQL", "DB2" Servers

LM_DB_DRIVER=org.h2.Driver

# License Manager Database User details; Database User applicable for "H2", "MYSQL", "DB2"  Servers

LM_DB_USER=admin

# License Manager Database Password details; Database Password applicable for "H2", "MYSQL", "DB2" Servers

LM_DB_PASSWORD=admin

# License Manager Database URL details; Database URL applicable for "MYSQL", "DB2" Servers

LM_DB_URL=DB URL


# ---------------------------------------------------------------------------

#    System Level Configuration: Don't change below values until it requires.

#    Reboot Parameter on uninstall and install scenarios

# ---------------------------------------------------------------------------

USER_REQUESTED_RESTART=NO

RESTART_NEEDED=NO
Silent Installation Using Command-Line Arguments
Installing Host On-Demand using silent mode with use of command line Silent argument. For more information refer the below commands.
• To install the IBM Host On-Demand on Z/OS and I5/OS in Silent mode, use the following command in the terminal.
Command: java -jar <file name> -i silent -DMI_SUPPORT=1 -DMI_PRODUCT_NAME="IBM Host On-Demand 16.0.0.0" -DIM_UPGRARE_SUPPORT=0 -DUSER_INSTALL_DIR=/opt/IBM/Host On Demand_16.0.0.0 -DHOD_JRE_HOME=/usr/lpp/java/J17.0_64 -DPUBLISH_ALIAS_NAME=hod -DPUBLISH_DIR=HOD -DPUBLISH_PORT=8999 -DPUBLISH_SECURE_PORT=9001 -DWS_TYPE=4 -DAPP_SERVER_SELECTED=0
• To install IBM Host On-Demand on windows in Silent mode, use the following command in the terminal.
Command: HOD_Windows_x64.exe -i silent -DMI_SUPPORT=1 -DMI_PRODUCT_NAME="IBM Host On-Demand 16.0.0.0" -DIM_UPGRADE_SUPPORT=0 -DUSER_INSTALL_DIR=/opt/IBM/Host On Demand_16.0.0.0 -DPUBLISH_ALIAS_NAME=hod -DPUBLISH_DIR=HOD -DPUBLISH_PORT=8999 -DPUBLISH_SECURE_PORT=9001 -DWS_TYPE=4 -DAPP_SERVER_SELECTED=0 -DUSER_SHORTCUTS=C:\ProgramData\Microsoft\Windows\Start Menu
• To install the IBM Host On-Demand on AIX, Linux and Ubuntu in Silent mode, use the following command in the terminal.
Command: sh ./setup.bin -i silent -DMI_SUPPORT=1 -DMI_PRODUCT_NAME="IBM Host On- Demand 16.0.0.0" -DIM_UPGRADE_SUPPORT=0 -DUSER_INSTALL_DIR=/opt/IBM/Host On Demand_16.0.0.0 -DPUBLISH_ALIAS_NAME=hod -DPUBLISH_DIR=HOD -DPUBLISH_PORT=8999 -DPUBLISH_SECURE_PORT=9001 -DWS_TYPE=4 -DAPP_SERVER_SELECTED=0
Console Mode Installation
Administrators can use the console-based interface to install Host On-Demand on Linux, AIX, i5/OS and z/OS systems that do not support a graphical user interface (GUI).
Execute the following steps to install the Host On-Demand in console mode:
-
Copy the setup files to the respective operating systems.
-
Use the commands below for the respective operating systems to install Host On-Demand 16.0.2 in silent mode.
Table 4. Console Mode Comands OS Type Command More Information Windows IBM Host On-Demand HOD_Windows_x64.exe -i console Administrator user Command Prompt Deployment Wizard HOD_DW_Windows_x64.exe -i console Administrator user Command Prompt HACL Tool kit HOD_HACL_Windows_x64.exe -i console Administrator user Command Prompt AIX IBM Host On-Demand sh ./setup.bin -i console Root user Terminal
client
Linux IBM Host On-Demand sh ./setup.bin -i console Root user Terminal
client
I5/OS IBM Host On-Demand java -jar setup.jar -i console Root (qsh) shell Prompt z/OS IBM Host On-Demand java -jar setup.jar -i console Root user account OMVS or ISPF shell prompt - Select the required Language(s) to start the installation.
- Press Enter to continue.
- The License Agreement Configuration screen displays. Select “0” to move
to the end of the agreement. Type “Y” to accept the terms of License Agreement.
- In Multi Instance, select an installed version.
- Select the required option to create the product shortcut icons.Note:The shortcut folder option is applicable for Windows OS only.
- Review the Pre-Installation Summary panel and press Enter to start
the installation.
- After successful installation, the installed location for the updated instance
is displayed. Press Enter to exit from the Installer.
Deployment Wizard Upgrade Installation
IBM Host On-Demand Deployment Wizard supports upgrade installation from v15.0.3.
- Launch the v15.0.3 Deployment Wizard installer.
- The IBM Host On-Demand Deployment Wizard window appears, click
OK.
- The Introduction screen appears, click Next.
- The License Agreement screen appears. Click the I accept the terms of the
License Agreement check box and click Next.
- The Select Install Folder screen appears, click Next.
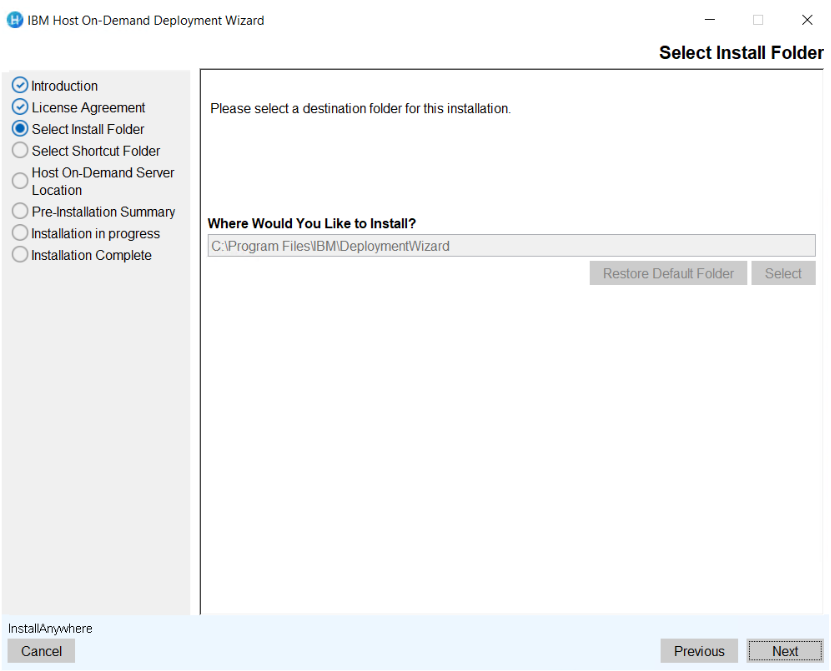 Note:During upgrade, a user will not able to change the installation path.
 - The Host On-Demand Server Location screen appears. Enter the Host
On-Demand server location in the field and click Next.
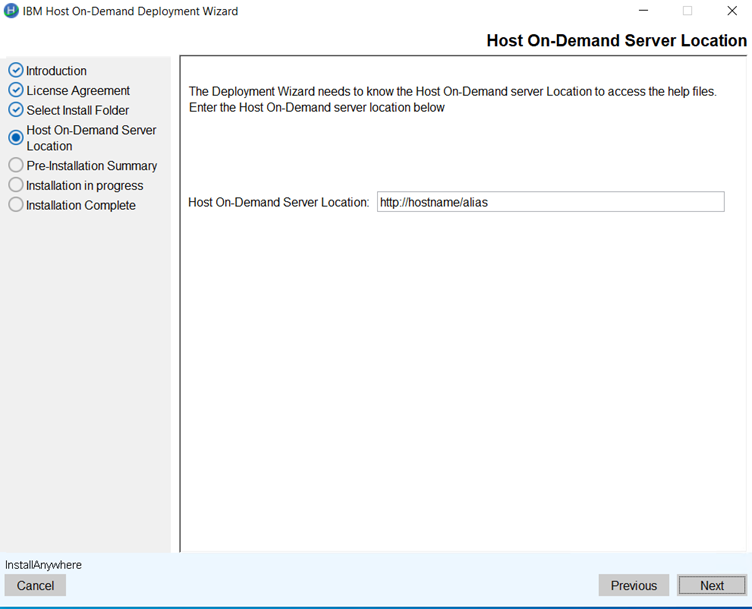 Note:Previous configured Host On-Demand server location will be retained.
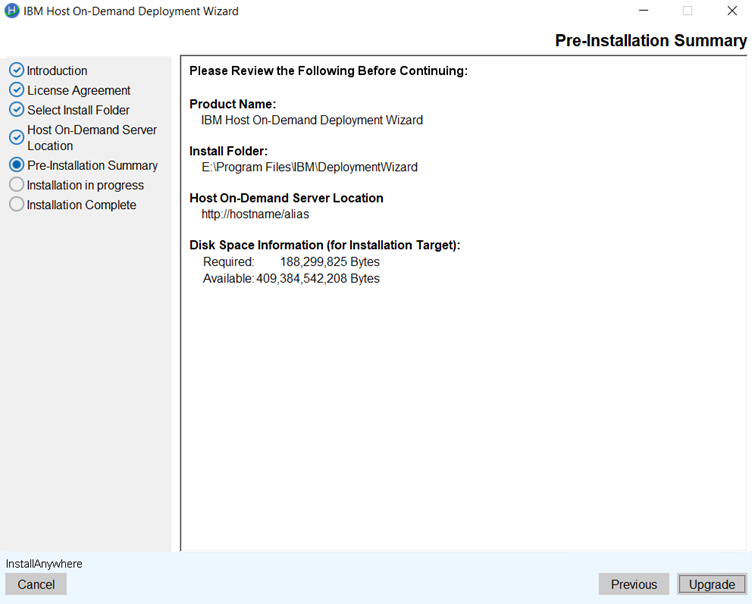
 - The Pre-Installation Summary screen appears. Review the summary
details and click Upgrade.
- The upgrade process gets start.
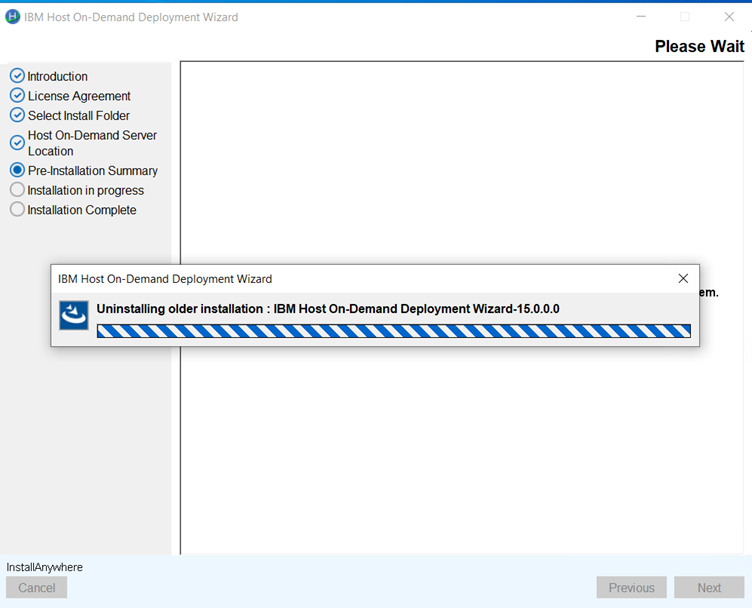 Note:During an upgrade, the installer uninstalls the existing version and installs the latest version.
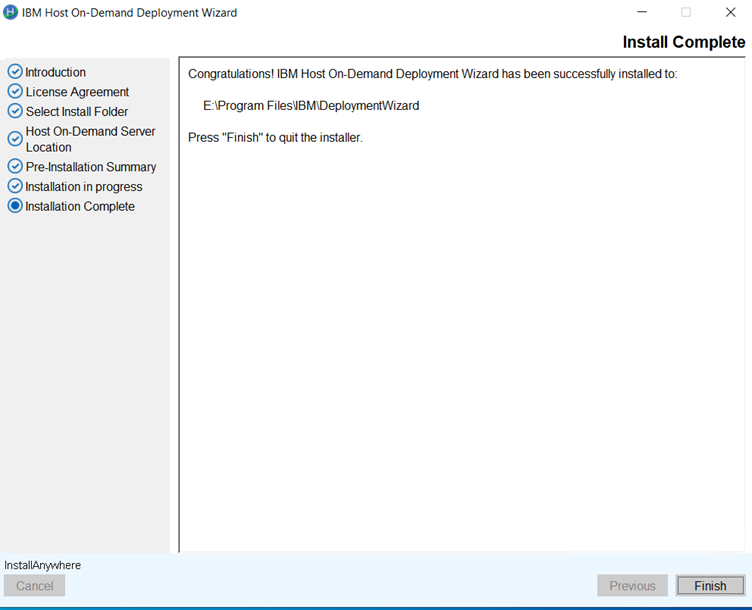
 - After successful upgradation, the Install Complete screen appears.
Click Finish.
Host Access Toolkit Upgrade Installation
IBM Host Access Toolkit supports Upgrade installation from v15.0.3.
Execute the following steps to upgrade IBM Host Access Toolkit from v15 to v16.0.0:
- Launch the v15.0.3 IBM Host Access Toolkit installer.
- The IBM Host On-Demand Deployment Wizard window appears, click
OK.
- The Introduction screen appears, click Next.
- The License Agreement screen appears. Click the I accept the terms
of the License Agreement check box and click Next.
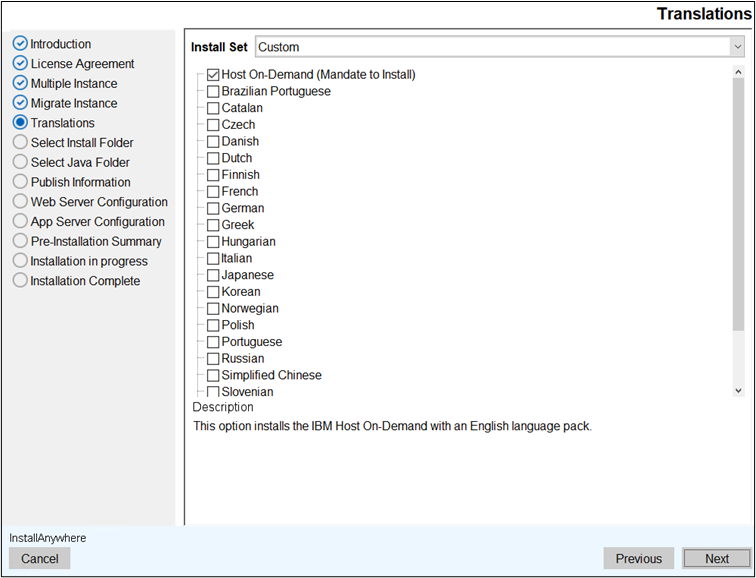
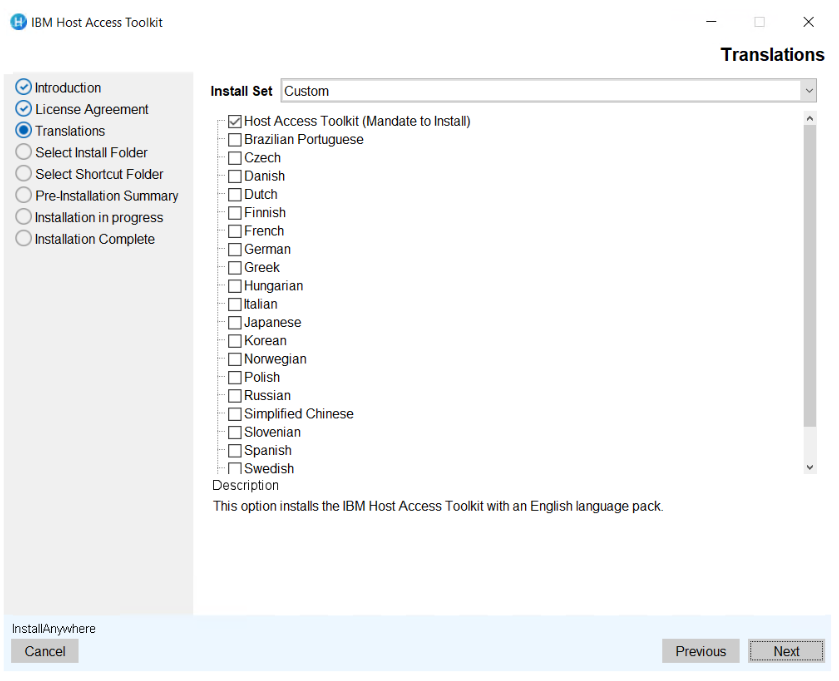
- The Translation screen appears. Select the translations and click
Next.
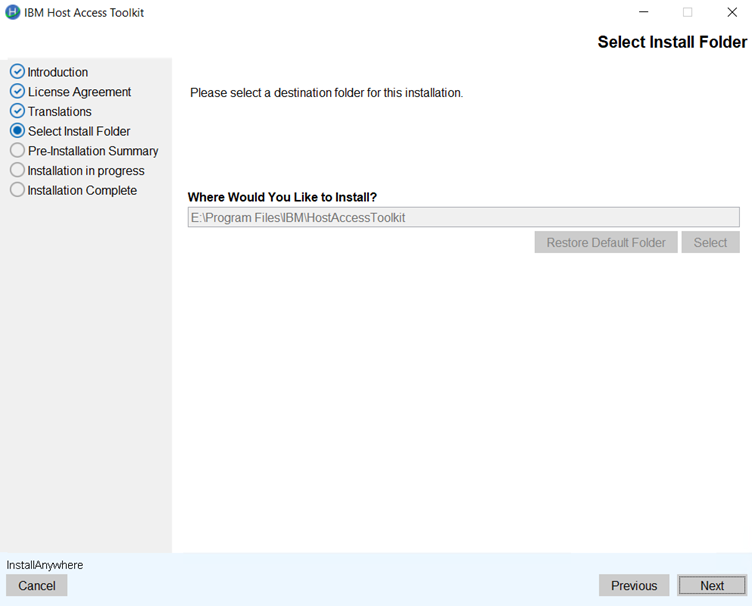
- The Select Install Folder screen appears. Select the required folder
path and click Next.
- The Pre-Installation Summary screen appears. Review the summary
details and click Upgrade.

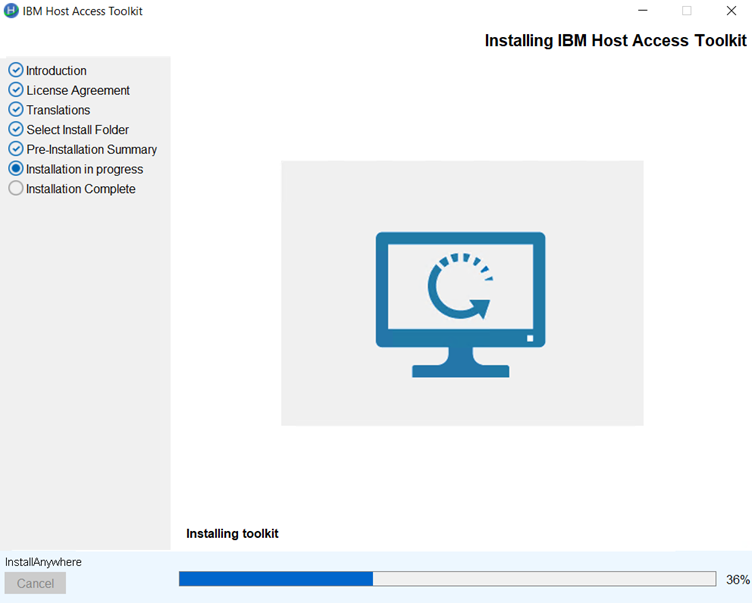
- The upgrade process gets start.
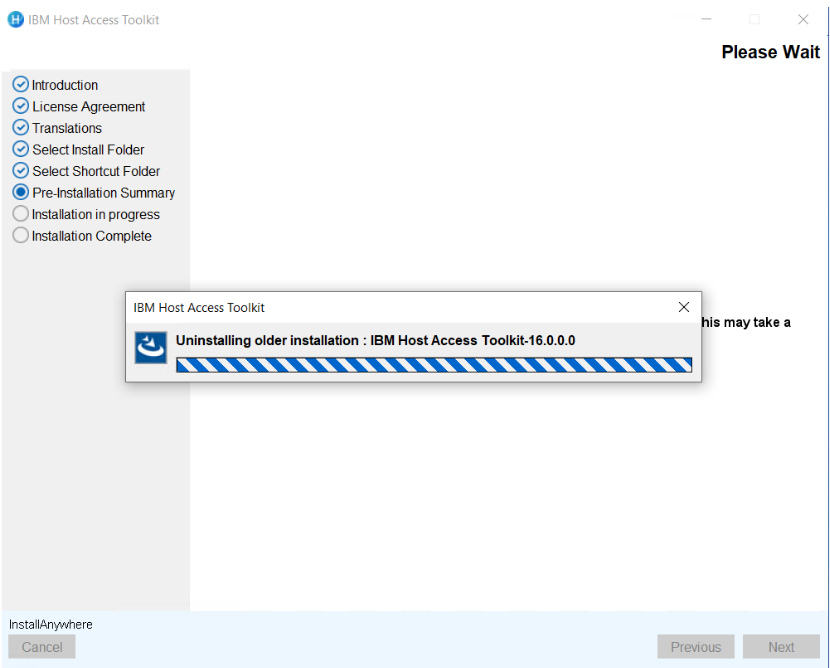
- After successful upgradation, the Installation in Progress screen
appears.
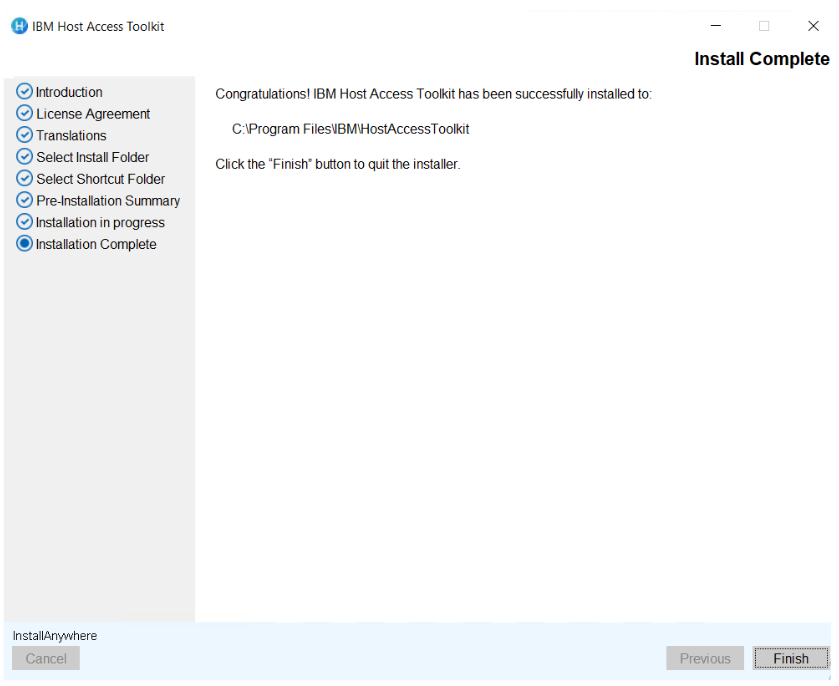
- After successful installation, the Install Complete screen appears.
Click Finish.
- Copy the setup files to the respective operating systems.
- Use the below commands for the respective operating systems to install
the Host On-Demand in silent mode.
Table 5. Silent Mode Commands OS Type Command More Information Windows IBM Host On-Demand HOD_Windows_x64.exe -i silent -f installer.properties
Administrator user Command Prompt Deployment Wizard HOD_DW_Windows_x64.exe -i silent -f installer.properties
Administrator user Command Prompt HACL Tool Kit HOD_HACL_Windows_x64.exe -i silent -f installer.properties
Administrator user Command Prompt
AIX IBM Host On-Demand sh ./setup.bin -i silent -f installer.properties
Root user Terminal client Linux IBM Host On-Demand sh ./setup.bin -i silent -f installer.properties
Root user Terminal client
i5/OS IBM Host On-Demand java -jar setup.jar -i silent -f installer.properties
Root (qsh) shell Prompt z/OS IBM Host On-Demand java -jar setup.jar -i silent -f installer.properties
Root user account OMVS or ISPF shell prompt
Note:To add support for additional language(s), add the addtional language ID to CHOSEN_FEATURE_LIST and CHOSEN_INSTALL_FEATURE_LIST variable in the installer.properties file, before executing the above step 2.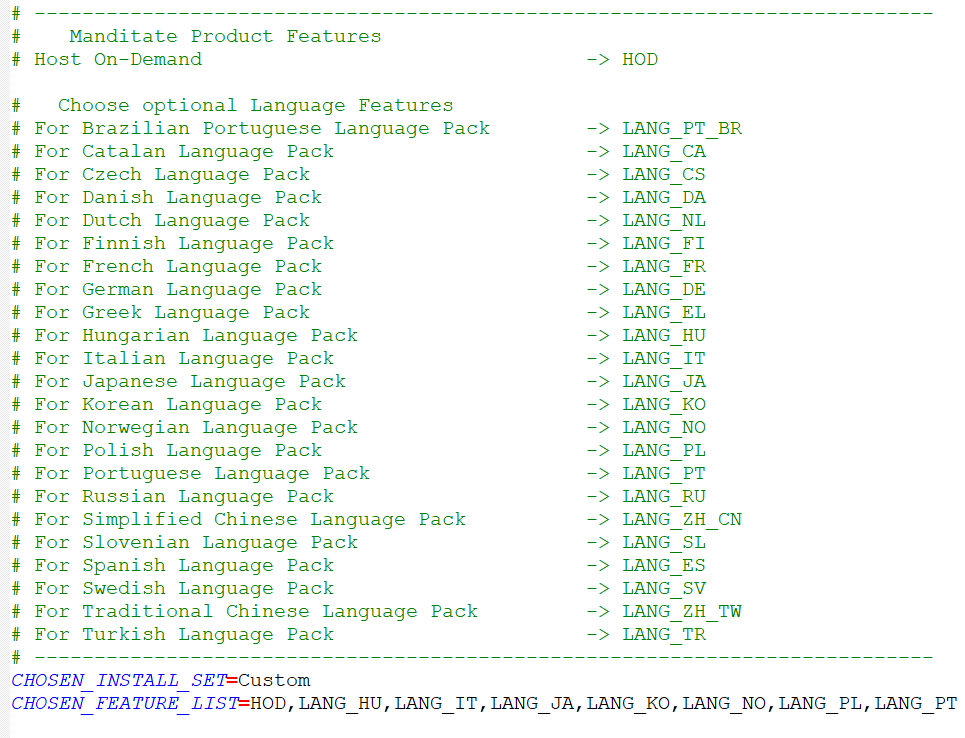
Administrators can use the console-based interface to install Host On-Demand on Linux, AIX, i5/OS and z/OS systems that do not support a graphical user interface (GUI).
- Copy the setup files to the respective operating systems.
- Use the below commands for the respective operating systems to install
the Host On-Demand in console mode.
Table 6. Silent Mode Commands OS Type Command More Information Windows IBM Host On-Demand HOD_Windows_x64.exe -i console
Administrator user Command Prompt Deployment Wizard HOD_DW_Windows_x64.exe -i console
Administrator user Command Prompt HACL Tool Kit HOD_HACL_Windows_x64.exe -i console
Administrator user Command Prompt
AIX IBM Host On-Demand sh ./setup.bin -i console
Root user Terminal client Linux IBM Host On-Demand sh ./setup.bin -i console
Root user Terminal client
i5/OS IBM Host On-Demand java -jar setup.jar -i console
Root (qsh) shell Prompt z/OS IBM Host On-Demand java -jar setup.jar -i console
Root user account OMVS or ISPF shell prompt
- Select the required Language(s) to start the Installation. By default,
system OS language will be selected. Press Enter to
continue.
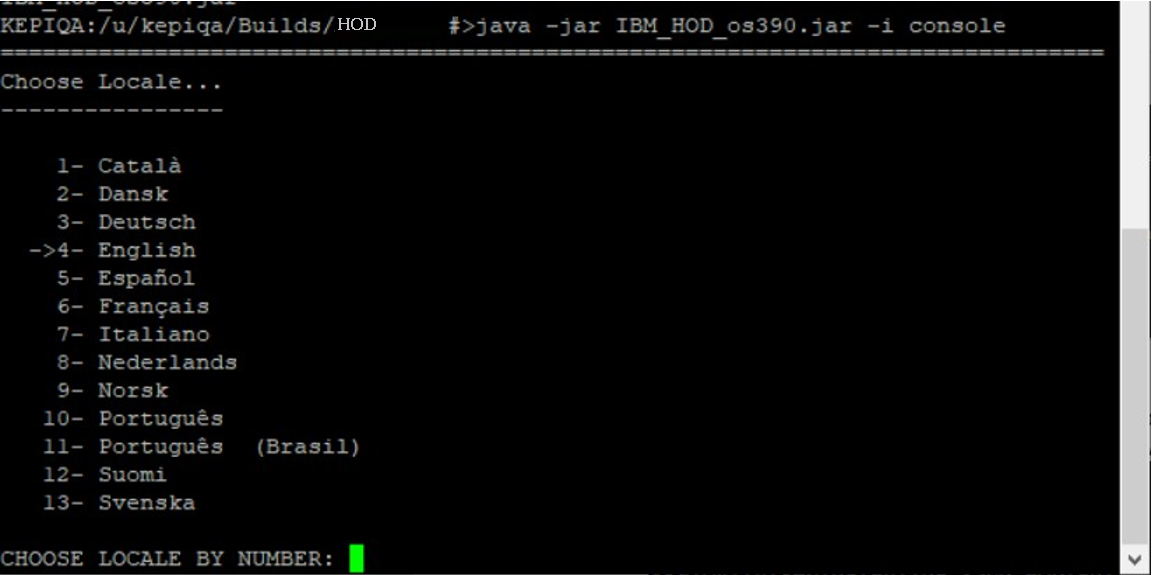
- Press Enterto continue.
- The LicenseAgreement Configuration screen displays. Select “0” to
move to the end of the agreement. Type “Y” to accept the terms of
License Agreement.
- In Multi Instance, select an installed version.
- Select the required language(s) and press Enter to
continue.
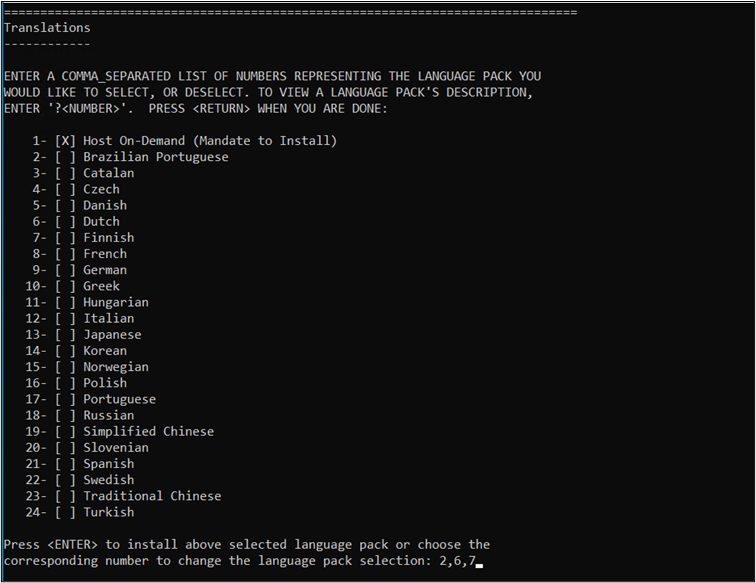 Note:To select multiple languages, enter the required language numbers separated by a comma and press Enter.
Example: For Brazilian Portuguese, Finnish and French enter “1,6,7”.
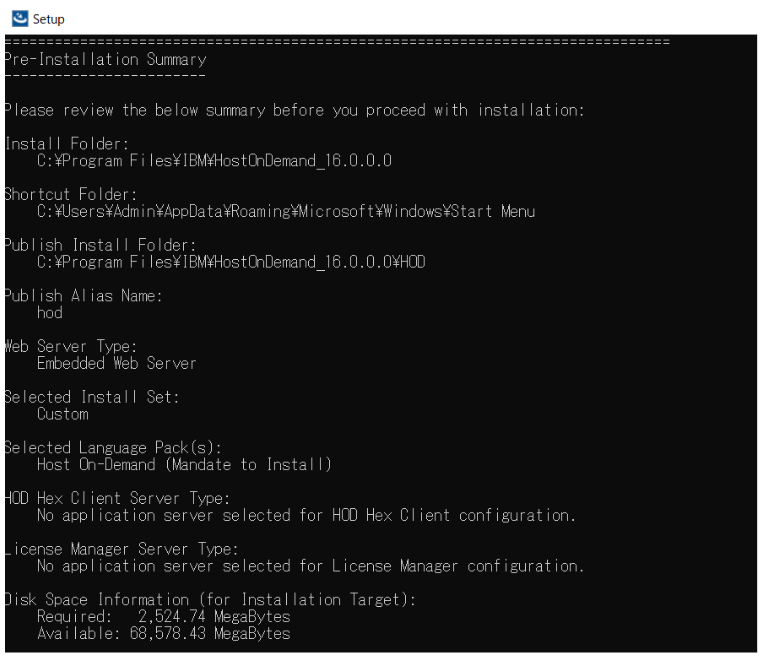
- Review the Pre-Installation Summary panel and press Enter to
start the installation.
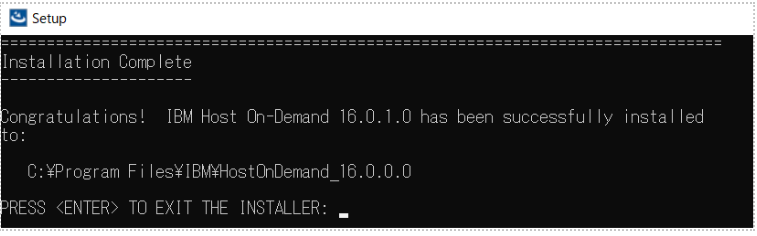
- After successful installation, the installed location for the updated
instance is displayed. Press Enter to exit from the
Installer.
- For more details refer to Installing in the Console Mode using Host On-Demand - IBMDocumentation.