Updating tests by using the guided healing feature
You can update the UI changes in a Web UI test by using the guided healing feature that collects the required data during a test run. When the test run is complete, you can view the status of each step in the edited test. Also, you can verify whether the collected data is appropriate or not to replace the objects that need to be updated, and then make replacements.
Before you begin
- Read about the guided healing feature. See Overview of guided healing and self-healing.
- Recorded a Web UI test. See Recording a Web UI test.
About this task
You must perform this task from the UI Test perspective. This task applies to Web UI tests.
Rational® Functional Tester collects Web UI data during the test run and snapshots taken during the test run are used to update the failed steps. If an object is not identified during the test run, the object whose description matches the best is selected as the possible candidate. The test steps and the images highlighted in the test steps are indicated in different colors to specify the status of each test step.You can set the timeout for each step by selecting the Time out checkbox and entering the value in seconds in the User Action Details view.
| The default color code of step results | Description | Indication of the test result |
|---|---|---|
| Green For example, the description of the test step is displayed as follows: |
During the playback, the target object that matched the actual object was found based on the correlation score. | The test step is passed. |
| Amber For example, the description of the test step is displayed as follows: |
During the playback, the target object that matched with the actual object was not found. Therefore, the next closest image that matched was identified as the target object based on the correlation score. | The test step is partially passed and you must update the step. |
| Red For example, the description of the test step is displayed as follows: |
During the playback, no target object matched the actual object based on the correlation score. | The test step is failed. |
Procedure
-
Click Run Test to run the recorded Web UI test from the
test editor.
The Run Configuration dialog is displayed.
- Select the Collect data to update test steps checkbox if it is cleared.
-
Click Next.
The Advanced playback options page is displayed.
-
Select the options as required for the test run, and then click
Next.
The Performance Measurement page is displayed. The options on this page are applicable only for mobile tests and they are disabled for Web UI tests.
-
Click Finish.
The test run begins with the guided healing feature enabled. After the test run is complete, the Web UI test report is displayed in the browser.
You can click a test step in the Details panel to verify whether the step is passed through the guided healing option or not. The test steps for which the guided healing is applied are indicated with the following message in the report:
Object not found. Action performed on the most appropriate element.
-
Perform the following actions in Rational® Functional Tester to update the test
steps for which the guided healing is applied:
- Click the Scan and mark test with latest
result
 icon in the test editor to view the status of the test steps.
 - Click the step that is in amber color.
The snapshot that is captured during the playback is displayed in the User Action Details view under the Step results tab.
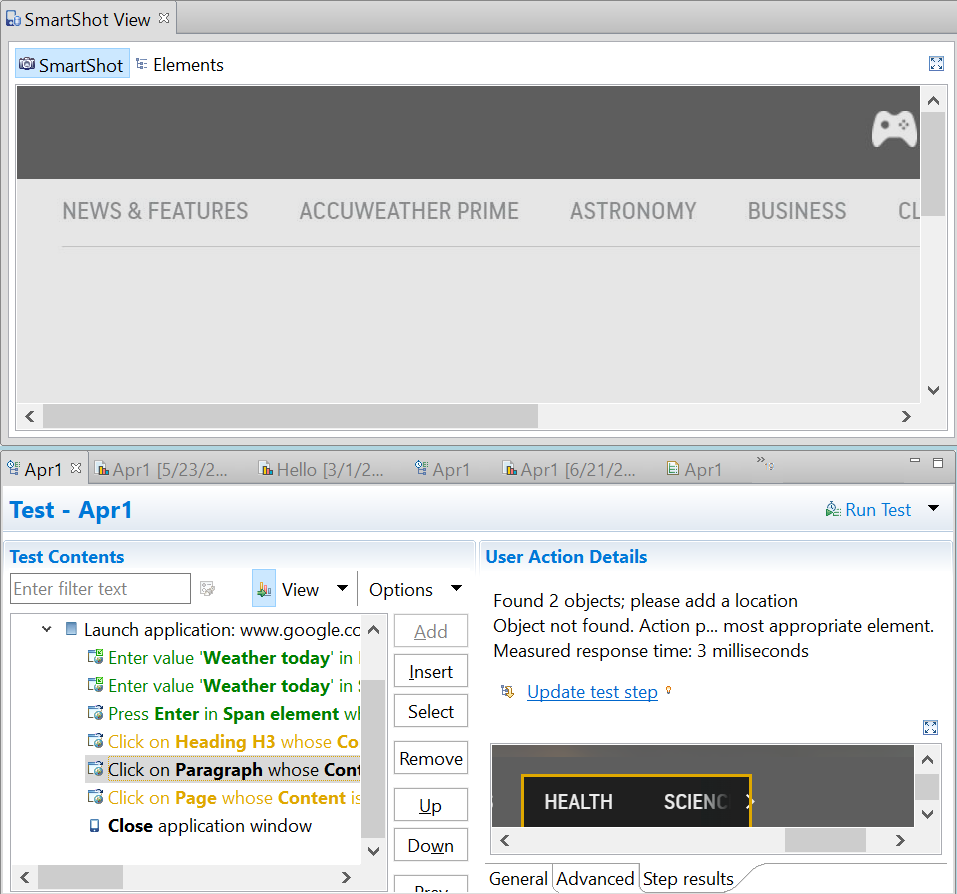
- Click Update test step to update the test.
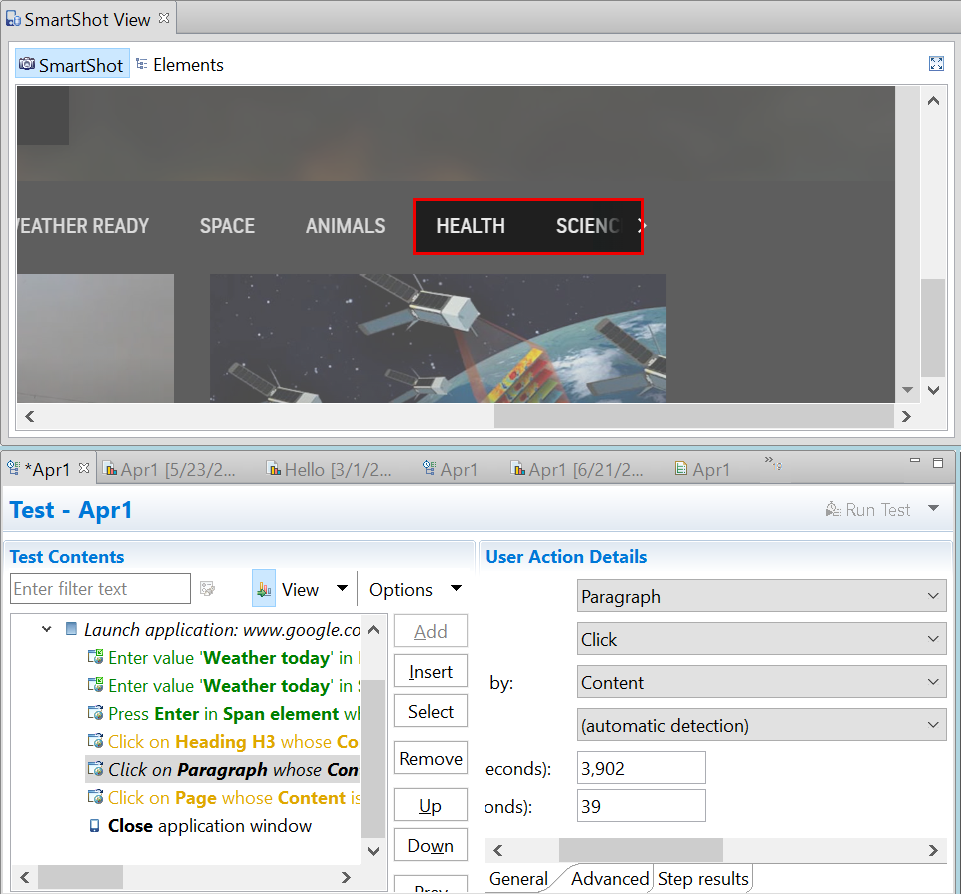
The new captured snapshot is copied to the SmartShot View and is displayed under the SmartShot section. The snapshot includes the control that has a user action for the step.
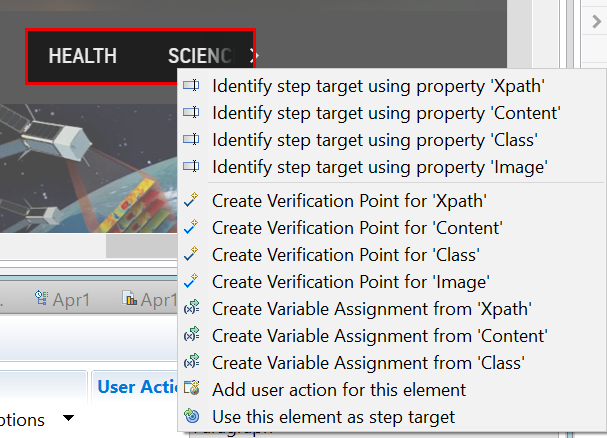
- Right-click the control and select Use this
element as step target to update the test step as shown
in the following example:
- Repeat the steps from 6.a to 6.d for any other test steps in amber color that were caused by changes in the UI of the application under test.
- Click the Scan and mark test with latest
result
- Save the test.
Results
You have updated the test by using the guided healing feature and the updated test can be run with no failures.