Adding an SQL Query action to a test
The SQL Query action queries the selected database to verify that its contents match the selected values. As you add this action, you can validate or store the query results.
Before you begin
Ensure that the database resource is properly configured in the Architecture School perspective. For more information about configuring a database resource, see Database resources, connections, and bindings.
You must have a test. For more information about creating tests, see Test Factory. Tests include steps and actions. For more information about test steps and actions, see Test actions.
About this task
Selecting a test
Procedure
- In the Rational® Integration Tester Test Factory perspective, double-click the test where the SQL Query action is to be added.
- In the Test Editor window, click .
-
To edit the action, double-click the SQL Query action.
The SQL Query dialog opens where you can add the SQL SELECT statement.
Adding an SQL SELECT statement
About this task
To return results against the selected database, add an SQL SELECT statement. Data that is returned from the query can be validated once it is retrieved.
Procedure
-
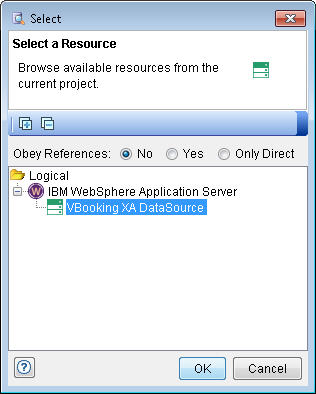
Select a database resource from the available resources in the project by clicking
Browse.
The initial list of databases is derived from the information that is provided in the Architecture School perspective. If the operation that you are creating a test for has a dependency on a database, then that database shows in the list when Obey References is set to Yes. If you want to work with a database where there is no dependency link to the current operation, all databases in the project can be viewed by setting Obey References to No.
-
Enter a query (that is, a
SELECTstatement or stored procedure call) in the Query (SELECT) field.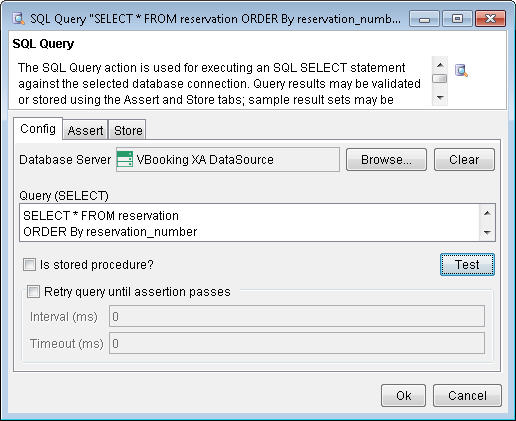
-
If you are entering a stored procedure, click the Is stored
procedure? check box and modify the syntax of the query, for example,
{call procedure (var, var)}.Tip: If you are using a stored procedure call, you might want to use the Stored Procedure action instead (see Adding a Stored Procedure action to a test). This action presents the available functions and input and output parameters more clearly. - To have the test action repeat the validation attempt, click the Retry query until assertion passes check box and set the Interval and Timeout options. A validation attempt might be needed where database writes are performed by another process that is running asynchronously to Rational® Integration Tester, and if the query runs before the data is committed. The query is tried every [Interval (ms)] until [Timeout (ms)] is reached.
- Save the SQL Query action by clicking OK.
Testing an SQL SELECT statement
About this task
Before you run the SQL SELECT statement against a selected database, it might be a good idea to test the SQL SELECT statement.
Procedure
-
To run the query and retrieve the data without running the test, click
Test.
The results of the query are displayed and any returned data is shown in the Preview dialog.
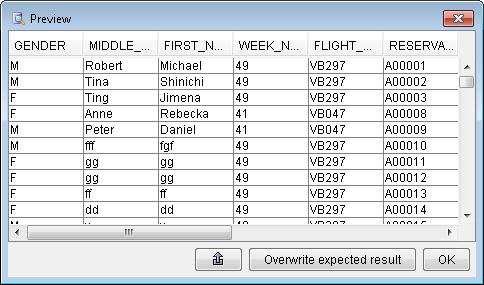 Important: If the query was canceled before it finished, any data that was built before it was canceled is displayed.
 -
The data that is retrieved by running the query now can be reused to validate the data
that is returned by the query when it is run as part of a test. To do this, click
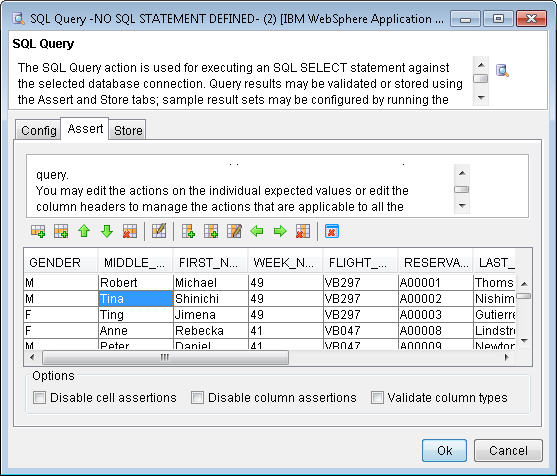
Overwrite expected result; it is then used to fill in data on the
Assert and Store tabs. Otherwise, click
OK to return to the SQL Query action without
copying any data.
Editing the query results or manually adding data
About this task
If you did not run a test query and save the results, you can add data from the Assert tab or Store tab, by using the icons.
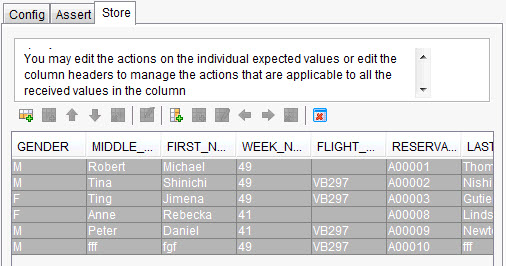
If you ran a test query and saved the results, the column headings (and data) are displayed in the Assert tab and Store tab, and the rows, columns, and cells can be edited and arranged by using these same icons above the data. To see what an icon does, hover over it.
Procedure
- Select any row and append a row to it, insert a row after it, or delete the selected row. You can also move the selected row up or down.
- Select any column and append a column to it, insert a column after it, or delete the selected column. You can also move the selected column left or right.
-
To clear all the data, click Clear Expected Results (
 ).
).
Validating query results
About this task
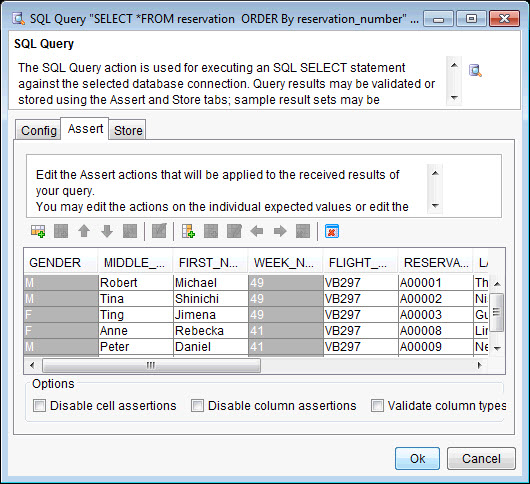
To change the validation rules for a cell or column, use the
Assert tab. Column assertion validates that all cells in a column match
the rule for that column. For example, you might want to assert that all cell values for that
column match a certain regular expression. Cell assertion validates that a specific cell for
that column matches the rule set for that cell. You can use both cell and column validation
rules. For example, you might want to assert that all values in the column contain 4 digits and
that a specific cell contains the value 1234.
Procedure
-
Customize the validation options by using options that are described in the following
table. If assertions are disabled, assertions can still be created and modified, but they are
not used, including the comparison between the number of rows that are expected and the number
received.
Important: Cells with no enabled Assert actions are shown in gray. Cells with enabled assert actions are turned on by default. When you edit a cell, by default the validation is an Action Type of Equality and it is turned on. However, when you edit a column, the default validation, Action Type of Equality is turned off. If you want to use the default column validation or change that validation to another action type, you must turn it on.
Option Definition Disable cell assertions To disable cell assertions, click the Disable cell assertions check box. This selection disables any assertion actions that exist in the cells. When this option is selected, column assertions are used. Disable column assertions To disable column assertions, click the Disable column assertions check box. This selection disables any assertions that are made on any received value, independent of the cell assertions. When this option is selected, cell assertions are used. Validate column types To validate column types, click the Validate column types check box. This selection validates any data types that are made on any received value, independent of the cell types. When this option is selected, column data types are validated. -
To edit a cell, select any cell and click Edit Cell (
 ) or right-click the cell and select Edit Cell.
When you are editing a cell, the field editor opens. You can then change a cells value or validation options. By default the validation is an Action Type of Equality, and the value is set to whatever value is in the database within that field. For more information about the field editor, see The Field Editor.
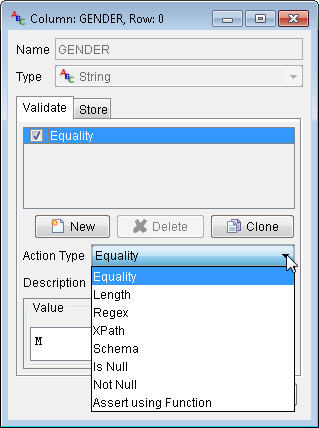
By default, all of the data cells are validated against the data that is shown in them. Therefore, when the test is run, the SQL query must return this exact data.
-
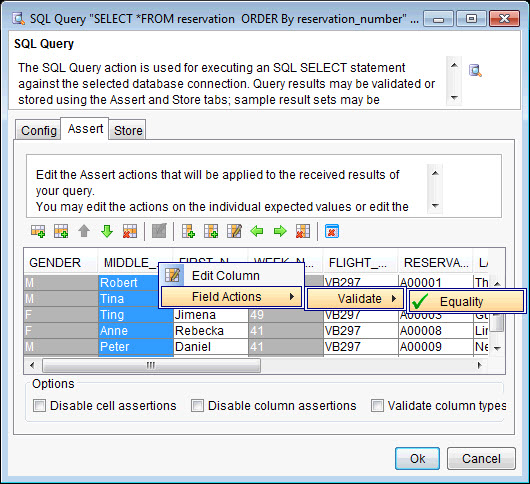
Edit the validation rules for a column. Select any cell within the column and click
Edit Column (
 ) or right-click the column heading and select Edit
Column.
When you are editing a column, the field editor opens. You can then change the validation rules for the column. By default the validation is an Action Type of Equality.
In this example, the check box next to Equality was not selected. Instead, Regex was selected from the Action Type list and enabled by selecting the check box next to Regex. The Expression field contains an expression to validate that the reservation number is in the format
Afollowed byfivedigits. This validation rule can be checked by using the Document field and clicking Test.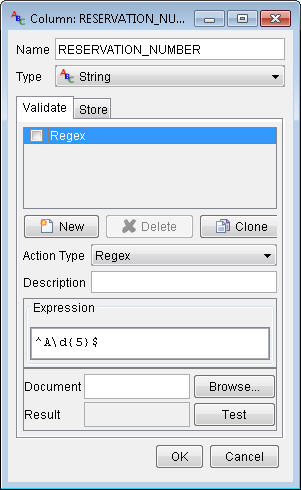
When you edit a cell or column, you can choose other Validate tab options. For more information about each option, see The Field Editor.
By default, all of the data cells are validated against the data that is shown in them. Therefore, when the test is run, the SQL query must return this exact data.
Storing the return value in to a tag
About this task
You can store the values in a tag, either as a list or as a single value. When you edit a column, all the values for that column are stored in the specified tag as a tag list. When you edit a cell, a single value for that cell is stored in the specified tag. For more information about storing data in to a tag, see The Field Editor.
To store the values for a column or the value for a cell in a tag for later use, use the Store tab. For example, you might want to set the value of the tags in the test to the values of each column in the data source.
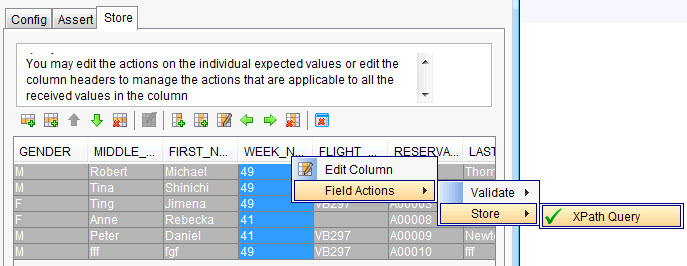
In addition, cells with no enabled Store actions are shown in gray.
Procedure
-
To store a value from a selected cell in to a specified tag, click Edit
Cell (
 ) or right-click the cell and select Edit Cell.
- Click the Store tab.
-
Click New.
The Field Editor opens. By default the value is an Action Type of Copy, and the tag is set to whatever value you set for the tag within that field. For more information about the Field editor and the other Store tab options, see The Field Editor.
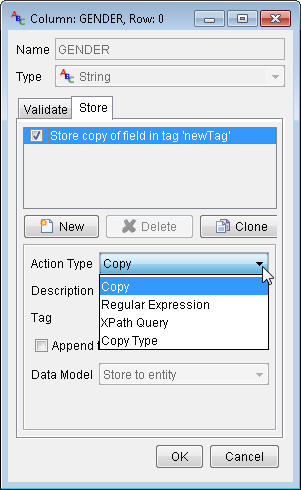
- Type the name of a tag (new or existing) or select a tag from the list, and click OK.
-
To store the values for a column in to a specified tag as a tag list, click
Edit Column (
 ) or right-click the column heading and select Edit
Column.
- Click the Store tab.
-
Click New.
The Field Editor opens. By default the value is an Action Type of Copy, and the tag is set to whatever value you set for the tag within that field. For more information about the Field editor and the other Store tab options, see The Field Editor.
- Type the name of a tag (new or existing) or select a tag from the list, and click OK.
