Creating a logical File resource
You must create and configure a logical File resource and bind it to a File Access resource, if you want to access files as a source of publication and subscription. The File resource can also be used in a stub to consume one or more files in a directory.
Before you begin
- Created at least one environment in your project. See Creating an environment.
- Created the File Access as a physical File resource. See Creating a physical File Access resource.
About this task
Procedure
- Open the Logical View of the Architecture School perspective.
-
Create a file resource in any of the following ways:
- Right-click an existing component or on the empty drawing palette, and then select from the menu.
- Select an existing component or click the empty drawing palette, and then select from the toolbar.
Note: Each file resource can be bound to a unique File Access physical resource that can be selected and configured subsequently.The New File dialog is displayed.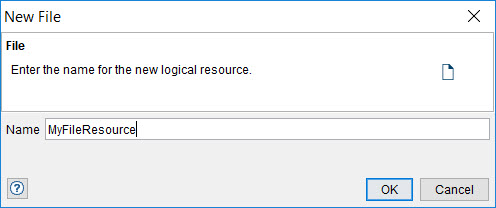
- Enter a name for the logical File resource in the Name field.
-
Click OK.
The logical File resource that you created is displayed on the canvas of the Logical View. The file resource provides read and write access to the contents of a file on the file system.
-
Double-click the logical File resource.
The File resource dialog is displayed.

The name that you entered for the logical File resource is displayed in the Name field.
-
Perform any of the following actions:
- Change or retain the name for the logical File resource in the Name field.
- Change the parent of the File resource by clicking Parent, and then select the logical component that contains the File resource.
-
Perform the following actions in the Settings tab:
-
Enter the path to the folder that contains the files to be written or read or click Browse to locate and select a directory on the local computer in the Directory field.
The field requires the full path to a directory of files to be written (publish) or read (subscribe).Notes:
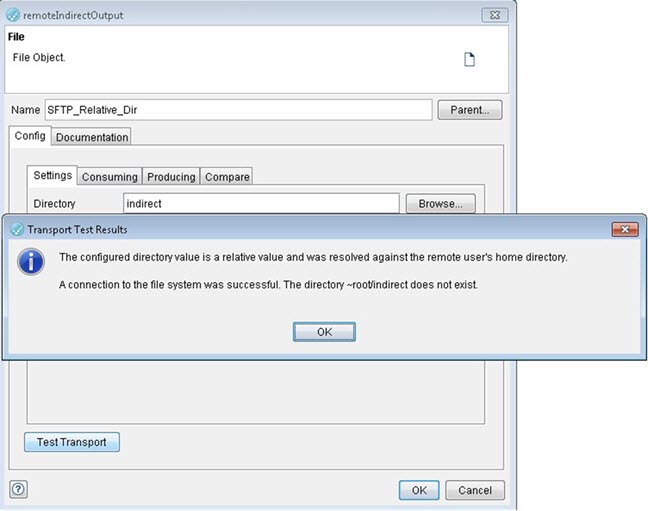
- The directory specified on the logical File for an FTP is always relative to the user home directory.
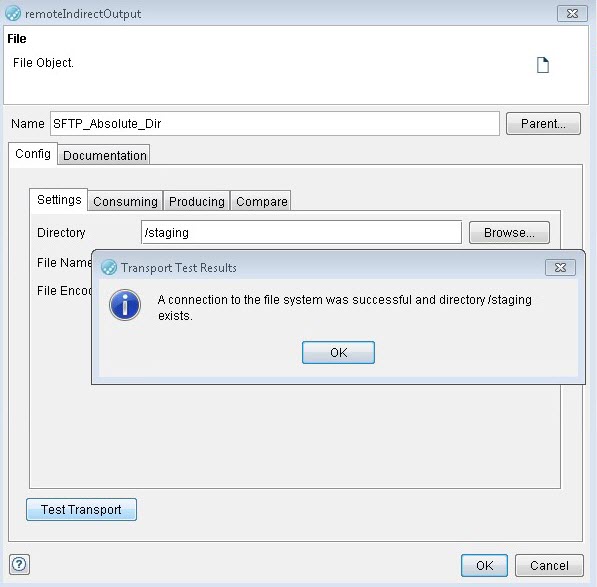
- For an SFTP, the directory can either be relative to the home directory of the user or explicitly described through an absolute path.
- You cannot use wildcard characters in the directory path.
- The directory specified on the logical File for an FTP is always relative to the user home directory.
-
Enter the path to the folder that contains the files to be written or read or click Browse to locate and select a directory on the local computer in the Directory field.
-
Configure the following settings in the Consuming tab to configure how
Rational® Integration
Tester treats the contents of the file:
The configuration options for the transport Consuming tab are described in the following table:
Last Modification Delay Enter the elapsed time in seconds from the time a file was last modified before it is eligible for consumption. Ignore last modification in subscribe Select this option to match files in a subscribe action that are consumed even if they were not modified. The file system is queried without waiting for the next scheduled poll. Content Packetizing Select how you want to packetize the file content. Note: No further information is required if you selected the All available bytes and No Content (Header only) options.The available options are as follows:- Length
- Iterate over the contents of a file to extract multiple records.
Fixed Length Each record is of the same designated size. Token The string of characters that marks the start of each record. Offset Each record starts after the entered number of bytes. Prefix The number of bytes or characters at the start of the record that denote the length of the record. When you use the Token, Offset, or Prefix modes, the following options control how the actual packet length is read from the stream of information.
Size The number of bytes or characters that contain the length information. Format Indicates whether the prefix values are be treated as raw values (Bytes) or translated from their ASCII equivalent (ASCII). Swap Bytes Indicates whether the transport swaps the order of the bytes before it treats the data as the length of the record. Length includes prefix Indicates whether the length includes the prefix (information about the length of the message). Propagate prefix Indicates whether the prefix portion of the message is propagated to subscribers.
- Delimited
- Iterate over the contents of a file to extract multiple records that are designated by start and end tokens.
Start Token A series of characters that denotes the start of a record. End Token A series of characters that denotes the end of a record.
- Token
- Is similar to the Delimited option, but can be used when you need to specify more data after the end token.
Start Token A series of characters that denotes the start of a record. End Token A series of characters that denotes the end of a record. End Token Data Length An optional quantity of data that can be present following the end token.
- Split
- Packetize (split) the contents of files that are based on a user-defined delimiter.
You can select one of the existing delimiter types (New Line, Tab, Space), or select Other and enter the delimiter characters in the field provided.
When reading records, you must enable the Process last empty packet option if the record ends with your delimiter and you want to process one more packet as an empty string (that is, ""). Disable this option if the delimiter indicates that there are no more packets.
When you are writing to a record, the packetizer writes out the delimiter as the last character as the default action, so that the record ends with a delimiter. For example: "…|myfieldvalue|".
-
Select the new line character settings in the Producing tab:
The configuration options for the transport Producing tab are described in the following table:
New Line
For publishing actions (writing), select the new line character to use as follows:- Native (uses the default option based on the platform)
- Unix-like (line feed)
- Windows™ (carriage return - line feed)
- Mac (carriage return)
- Binary
-
Perform the following steps in the Compare tab to specify the file schema to be applied when comparing files:
- Click Browse in the File Schema field to locate and select a file that contains the schema to compare.
- Click OK to select the resource.
-
Bind the logical File to the physical File Access by performing the following steps:
Results
The logical File resource is added to the project and displayed in the Logical View, with the name that you entered.
What to do next
You must create a service component and operation. See Creating a service component and Creating an operation.