This example shows how to change the HATS Enhanced grid widget
to add a single-selection radio button for each row in the
table.
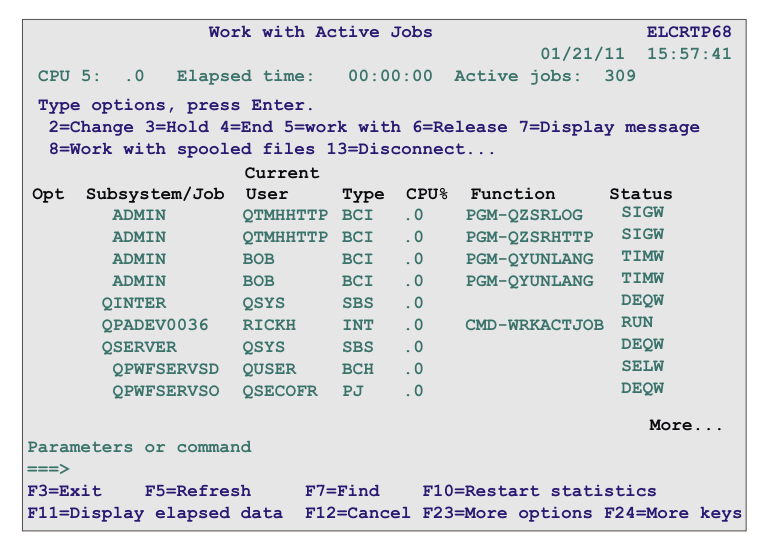
Start by creating an Enhanced grid widget, for example, for a table
similar to the one shown on the following host screen.
Figure 1. Work with Active Jobs host screen
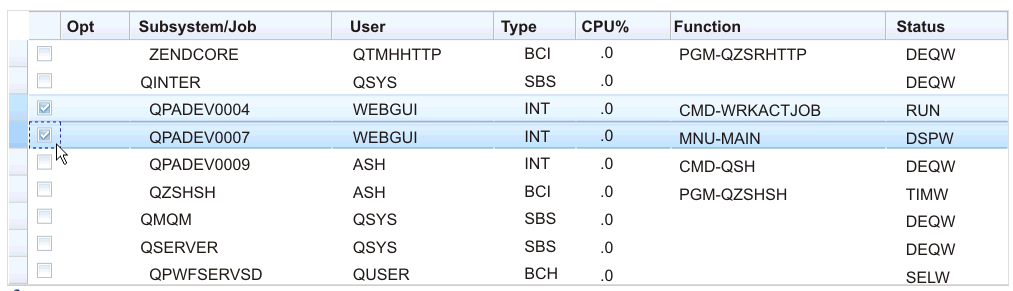
After you create a Table component rendered with an Enhanced grid
widget, the widget appears on the transformation .jsp file as shown
below.
Note:
This figure shows the widget appearance when using the Dojo
Claro theme. The widget might appear differently when using a different
Dojo theme.
Figure 2. Dojo
Enhanced grid widget
To change the indirectSelection plug-in to provide a single-selection
radio button for each row, edit the transformation .jsp file and perform
the following steps:
Locate the <HATS:Component> tag in the transformation .jsp
file. Select the tag, then right-click and select HATS Tools > Transform for Dojo Editing.
This transforms the <HATS:Component> tag to a <HATS:Render>
tag.
Locate and change the grid variable as shown below:
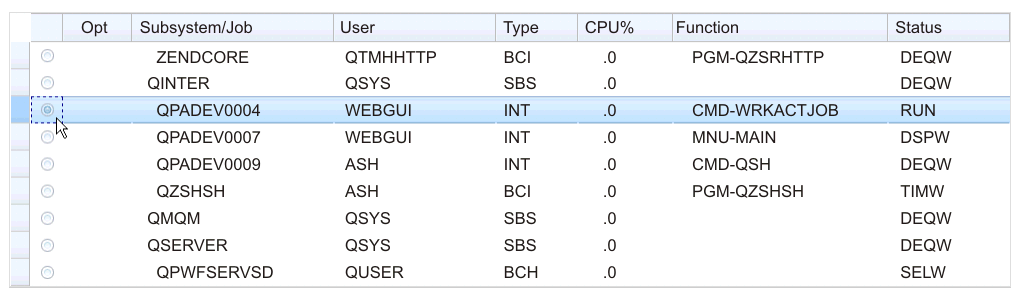
The Enhanced grid widget now appears on the transformation .jsp
file as shown below. In this example, single-selection radio
buttons are added to each row in the table. The selected row can be
dragged to another location in the table.
Figure 3. Dojo Enhanced grid widget
with single row select