Configuring virtual IPs in tests
After you configure a virtual IP address, you can then configure the virtual IP address as the virtual client address for the HTTP transport in tests.
Before you begin
You must have completed the following tasks:
- Created the virtual IP address that you want to use in tests.
- Created a logical connection and a physical resource. See Creating logical HTTP connections and Creating physical web server resources.
- Configured the relevant settings for the logical connection and physical resource.
Procedure
-
Open the physical resource by using any of the following methods:
- Right-click the logical resource or connection, and then click Physical Resource in the Logical View.
- Click the physical HTTP transport in the Physical View.
The Web Server dialog is displayed.
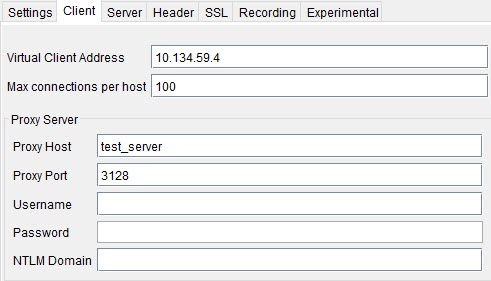
- Click the Client tab.
-
Enter the virtual IP address in the Virtual Client Address field.
For example, if you configured 10.134.59.4 as the virtual IP, enter 10.134.59.4 in the Virtual Client Address field.

- Provide the details in the relevant fields that apply to your test.
- Click OK.