Creating agents in the project
The following topic explains how to create agents.
About this task
To create agents:
Procedure
- In Physical View, click on
the main toolbar, or right-click the Physical folder
and click on the menu.
The new agent will be created under the Unconnected Resources node because no host for the agent has yet been defined.
- Double-click the new agent (or an existing
one) to edit it.
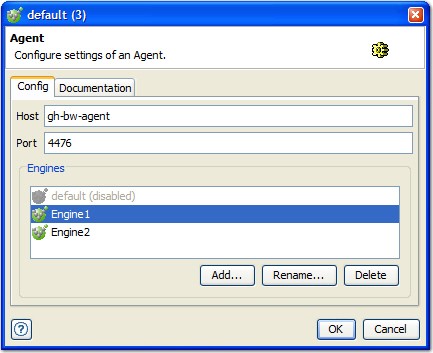
- In the Host field, enter the host name or IP address of the computer where the Rational® Integration Tester Agent is installed.
- In the Port field, enter the port
number where the agent is listening. Note: Host names are preferred because an IP address is more likely to change. You should also avoid using
localhostbecause problems could arise if the agents test is run from a different computer.Each agent includes a default test engine (named
default) that cannot be renamed or deleted. To add another test engine, click Add. To rename an existing engine, select it and click Rename. To delete an existing engine, select it and click Delete.Note: For information about configuring multiple test engines, refer to Creating multiple test engines (optional). - To view or modify additional notes or information about the agent, click the Documentation tab.
- When you are finished configuring the agent, click OK.
Results
The agent is displayed under an appropriate subnet and host in the Physical View. If the host cannot be resolved, the agent will remain under Unconnected Resources.