Adding a Stored Procedure action to a test
The Stored Procedure action runs a stored procedure against the selected database. As you add this action, you can view the code of the stored procedure, specify input values, specify expected return values, or tag return values.
Before you begin
Ensure that the database resource is properly configured in the Architecture School perspective. For more information about configuring a database resource, see Database resources, connections, and bindings.
You must have a test. For more information about creating tests, see Test Factory. Tests include steps and actions. For more information about test steps and actions, see Test actions.
About this task
Selecting the test
Procedure
- In Rational® Integration Tester Test Factory perspective, double-click the test where the Stored Procedure action is to be added.
- In the Test Editor window, click .
-
To edit the action, double-click Stored Procedure action.
The Stored Procedure dialog box opens where you can select the stored procedure.
Selecting the stored procedure
Procedure
-
Select a database resource from the available resources in the project by clicking
Browse.
The initial list of databases is derived from the information that is provided in the Architecture School perspective. If the operation that you are creating a test for has a dependency on a database, then that database shows in the list when Obey References is set to Yes. If you want to work with a database where there is no dependency link to the current operation, all databases in the project can be viewed by setting Obey References to No.
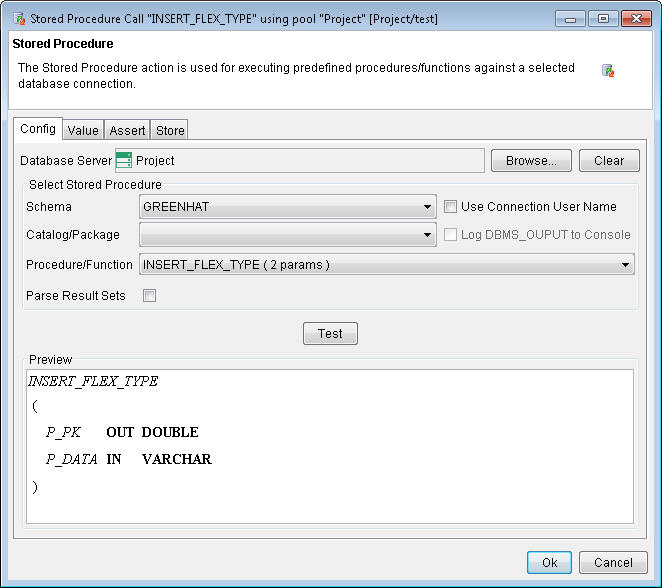
- Narrow the procedures available by selecting a schema, or a catalog or package if available.
- Select the procedure or function to run when the stored procedure action runs.
-
For Oracle database connections, if you use
DBMS_OUTPUT.PUT_LINE()in your stored procedure code, specify that its output is sent to the console when you are running tests by clicking the Log DBMS_OUTPUT to Console check box. -
To retrieve procedures only from the users schema (based on the user name and password
that is supplied under the Settings tab of the physical database resource),
click the Use Connection User Name check box. If you used tags for the user
name and password when you set up the database connection settings, you can easily retrieve
procedures from each user's schema.
Tip: If you do not see the procedures that you are expecting, check the connection settings and the Stored Procedure filters that are configured on the physical database resource.
- To parse implicit result sets returned by the selected procedure, click the Parse Results Set check box.
- Save the Stored Procedure action by clicking OK.
Testing the stored procedure
About this task
Before you run the stored procedure against a selected database, it might be a good idea to test the procedure.
Procedure
-
To run the stored procedure and retrieve the data without running the test, click
Test.
The results are displayed and any returned data is shown in the Preview dialog box.

-
To manually add data instead of changing the sample results sets that are returned from the
stored procedure, click Close to return to the Stored Procedure dialog box
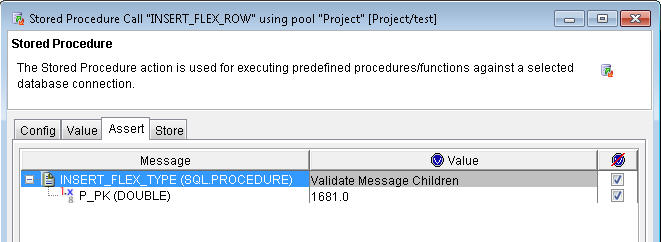
without copying the results. To configure the sample results, click Overwrite expected
result to copy the results into the Assert tab of the Stored
Procedure dialog box. This data is the data that is compared with the stored procedure during test
execution.
Specifying inputs
About this task
You can specify values or tags to supply as inputs to a stored procedure.
Procedure
-
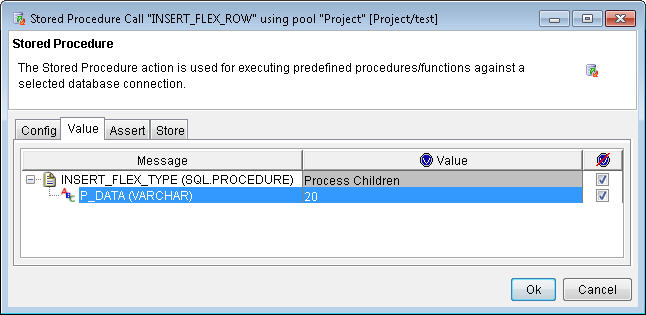
Click the Value tab.
-
Enter the values to supply as inputs for each message in the message structure. You can enter
the value in to the Value field or you can right-click the
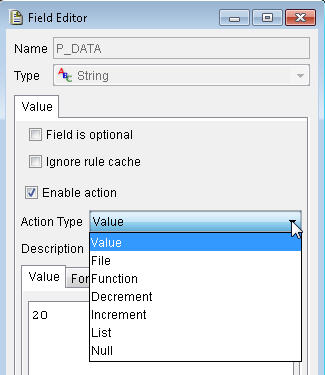
Value field and select .
With the menu option, the Field Editor opens. By default the value is an Action Type of Value, and the value is set to whatever value you want to supply as an input to that field. For more information about the field editor, see The Field Editor.
- If you are supplying different inputs each time, disable validation on the Assert tab.
Specifying expected return values
About this task
You can specify expected return values from the stored procedure. For example, you might want to validate what each message in the message structure returns.
Procedure
-
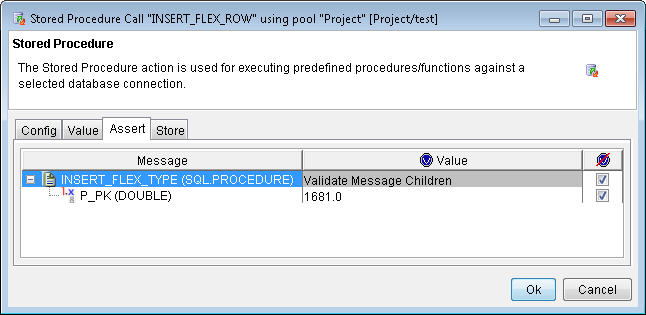
Click the Assert tab.
-
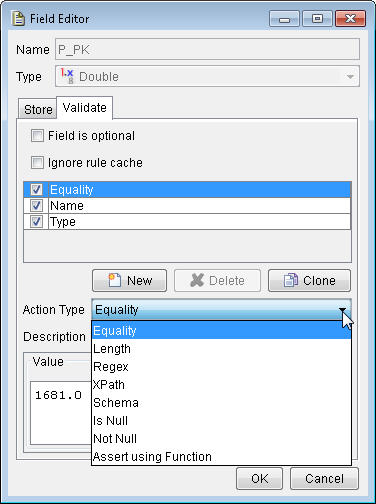
Enter a value for each message in the message structure. You can enter the value in to the
Value field or you can right-click the Value field and
select .
With the menu option, the Field Editor opens. By default the value is an Action Type of Equality, and the value is set to whatever value is in the database within that field. For more information about the field editor, see The Field Editor.
-
The test fails if the stored procedure does not return the expected values. If you want to skip
validation for any row, you must disable the validation check box
 directly to its right.
Tagging return values
About this task
You can tag any of the return values from the stored procedure for later use. For example, you might want to set the value of tags in the test to the values of each column in the data source.
Procedure
-
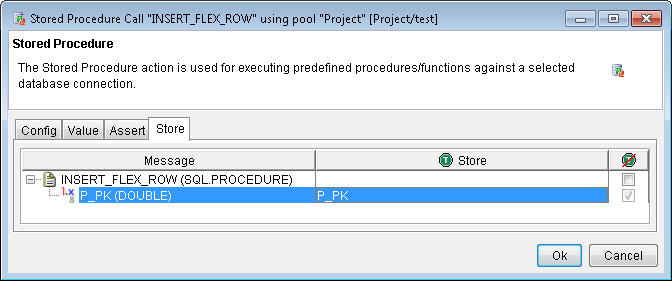
Click the Store tab.
-
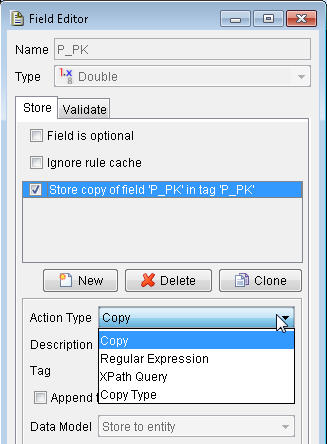
Type the name of a tag (new or existing), or right-click the field name and select to create a tag of the same name or right-click the field name and select .
With the menu option, the Field Editor opens. By default the value is an Action Type of Copy, and the tag is set to whatever value you set for the tag within that field. For more information about the field editor, see The Field Editor.
- If you are expecting different values each time, disable validation on the Assert tab.