Validating signatures

You can validate signatures in the incoming SOAP messages by using the signature validation option.

Before you begin

You must have enabled signing of the outgoing messages that use the asymmetric or symmetric key-based signature algorithms before you can use the signature validation option to validate the incoming messages. See Adding signatures.

About this task

You can configure the options that must be checked in the incoming messages that validate the authenticity of the signatures in the messages. Incoming messages that match the configured options are passed while the messages that do not match the options are rejected in the tests.

Procedure

  1. Open a SOAP message for editing.

    The message editor is displayed.

  2. Right-click the message node, and then click Properties.

    The Field Properties dialog box is displayed.

  3. Click the WS-Security tab.
  4. Select the Enable check box.
  5. Select Validate Signature from the list.

    The Validate Signature dialog box is displayed.

  6. Perform any of the following actions:
    • To validate messages that used the asymmetric key-based signature algorithms to sign messages, go to Step 7.
    • To validate messages that used the symmetric key-based signature algorithms to sign messages, go to Step 8.
  7. Perform the following steps to configure the validate signature action if the asymmetric key-based signature algorithms was used to sign messages:
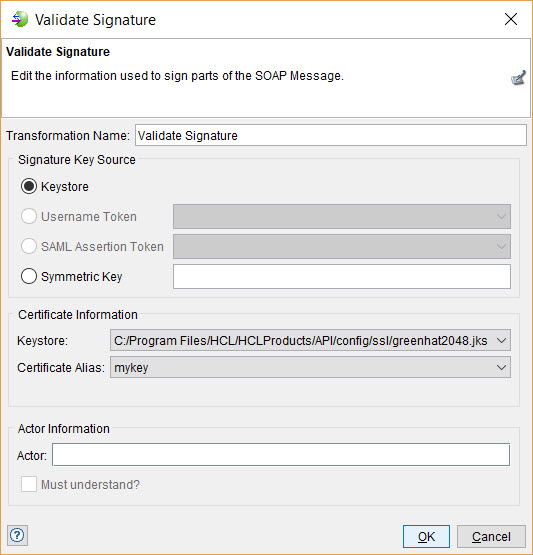
    Image of the validate signature dialog box.
    1. Perform the actions indicated in the following table:
      Option Description Action
      Transformation Name Specifies a user-defined name for the security action. The name helps you to identify the action in the main list. Enter a name for the action or continue to use the default name listed as Validate Signature.
      Signature Key Source panel
      Keystore Specifies whether the incoming messages were signed with asymmetric key-based signature algorithms.
      Note: This is the default option that is selected.

      Retain this default option as selected.

      Username Token Specifies whether the incoming messages were signed with a user token that created by using Digest or Nonce.
      Note: These fields are enabled only if the user tokens were used.
      Enter the user token and the assertion token.
      Note: Alternatively, you can configure the SAML assertion action by using the SAML Token option on the WS-Security tab in the Field Editor dialog box.

      SAML Assertion Token

      Symmetric Key Specifies whether the incoming messages were signed with symmetric key-based signature algorithms. Do not select this option if you want to use asymmetric key-based signature algorithms.
      Certificate Information panel
      Keystore Specifies the keystore that contains the digital certificates and keys. Select the keystore to use.
      Certificate Alias Specifies the public key alias to use that is defined in the selected keystore. Select the certificate alias to use.
      Actor Information panel
      Actor Specifies a specific message receiver (either the ultimate receiver or an intermediary). Specify a message receiver.
      Must understand Specifies the following action:
      • When enabled, checks for the SOAP header for the specified actor.
      • When not enabled, ignores the SOAP header for the specified actor.
      Perform any of the following actions:
      • Select this option, if the SOAP header is present for the specified actor.
      • Clear the selection, if the headers are to be ignored.
    2. Continue to Step 9.
  8. Perform the following steps to configure the validate signature action if the symmetric key-based signature algorithms was used to sign messages:
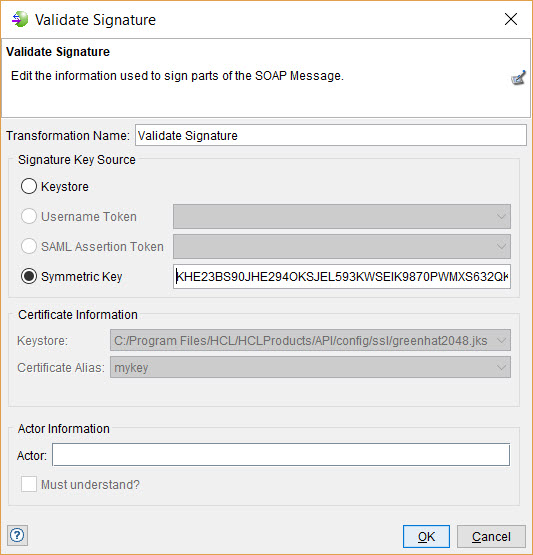
    Image of the validate signature dialog box.
    1. Perform the actions indicated in the following table:
      Option Description Action
      Transformation Name Specifies a user-defined name for the security action. The name helps you to identify the action in the main list. Enter a name for the action or continue to use the default name listed as Validate Signature.
      Signature Key Source panel
      Keystore Specifies whether the incoming messages were signed with asymmetric key-based signature algorithms.
      Note: This is the default option that is selected. Do not select this option if you want to use symmetric key-based signature algorithms.

      Select the Symmetric Key option to clear this default selection.

      Username Token

      SAML Assertion Token

      Specifies whether the incoming messages were signed with a user token that was created by using Digest or Nonce.
      Note: These options are not enabled when you select the Symmetric Key option.
      Symmetric Key Specifies whether the incoming messages were signed with symmetric key-based signature algorithms. Perform the following steps:
      1. Select this option if you want to validate symmetric key-based signature algorithms.
      2. Enter the hexadecimal key that validates the signature in the incoming messages.
      Certificate Information panel
      Keystore Specifies the keystore that contains the digital certificates and private keys.
      Note: These options are not enabled when you select the Symmetric Key option.
      Certificate Alias Specifies the public key alias to use that is defined in the selected keystore.
      Actor Information panel
      Actor Specifies a specific message receiver (either the ultimate receiver or an intermediary). Specify a message receiver.
      Must understand Specifies the following action:
      • When enabled, checks for the SOAP header for the specified actor.
      • When not enabled, ignores the SOAP header for the specified actor.
      Perform any of the following actions:
      • Select this option, if the SOAP header is present for the specified actor.
      • Clear the selection, if the headers are to be ignored.
    2. Continue to Step 9.
  9. Complete the following steps:
    1. Click OK to save and close the Signature dialog box.
    2. Click OK to save and close the Field Properties dialog box.
    3. Click OK to save and close the Message Editor dialog box.