You can specify the stubbing settings depending on the Message Exchange Pattern defined
for the RabbitMQ
transport.
Procedure
-
To create a stub, you must have an operation defined with
the corresponding transport. See Creating an operation.
-
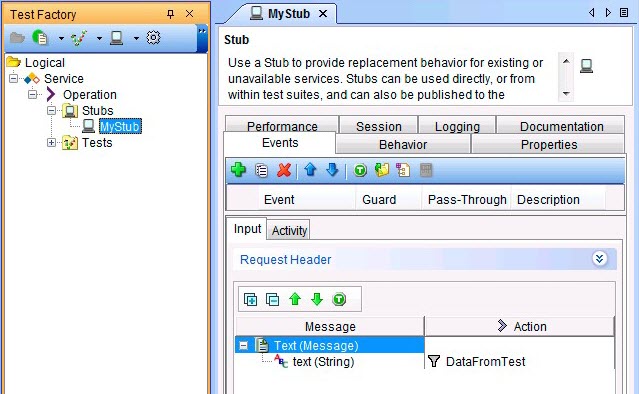
By using the Stub tab on the corresponding operation, specify the
stubbing settings used to create a Stub using MEP menu item from
Test Factory perspective.
-
Depending on Message Exchange Pattern defined for the operation for example,
Publish/Subscribe, Publish, Subscribe, Request or Reply, the
Stub panel is defined with different sub-panels. In these panels select
RabbitMQ
as the transport and then update the corresponding RabbitMQ
settings.
For example, the following screens show the settings for a
Publish/Subscribe scenario:
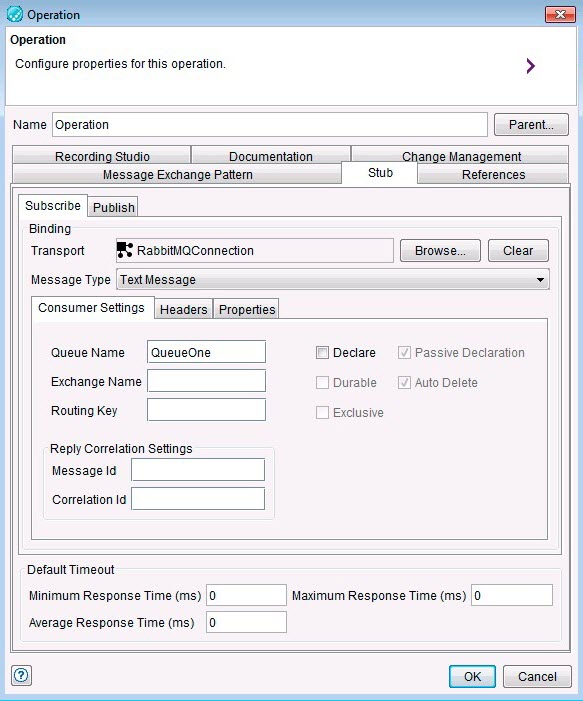
You can change the Consumer Settings that were defined for the RabbitMQ
transport.
-
Change the Consumer Settings fields in the
Subscribe panel for the following fields:
-
Enter the proxy queue that is used by the stub as input, the one which will be listened by the
stub in the Queue Name field.
-
Enter the exchange name to which the queue is bound to by using the routing key (if this is
required) in the Exchange Name field.
-
Enter the routing key value to be used if this is required in the Routing
Key field.
-
Select any of the following options:
| Option |
Description |
Declare |
This option enables this Exchange to be created dynamically or use the one that already
exists. |
Passive Declaration |
This option enables the API to check if this Exchange object already exists and display an error
if the object does not exist. |
Durable |
This option specifies the Exchange to be a durable Exchange as defined by the RabbitMQ
specification. |
Auto Delete |
This option specifies the Exchange to be an auto-deleted Exchange as defined by the RabbitMQ
specification. |
Exclusive |
This option specifies the Exchange to be an exclusive Exchange as defined by the RabbitMQ
specification. |
-
Enter the ID for the message in the Message ID field in the
Reply Correlation Settings section.
-
Enter the correlation ID in the Correlation ID field in the
Reply Correlation Settings section.
No change is required by you in the Default Timeout section that
contains common settings for stub replies. The response time is managed by the stubs execution
engine in
Rational® Integration
Tester.
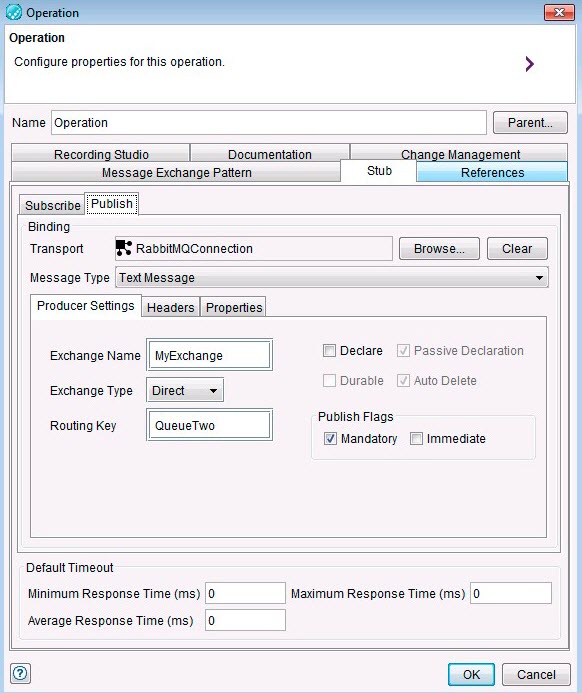
You can change the
Producer Settings under the
Publish tab that were defined for the
RabbitMQ
transport, as shown in the following screen.
-
Change the Producer Settings fields in the Publish
panel for the following fields:
-
Enter the exchange name to be used for the publication in the Exchange
Name field.
This exchange corresponds to the exchange to which queues are supposed to be bound using the
routing key.
-
Select Exchange Type from the list.
Select from the following options:
- Direct
- Fanout
- Topic
- Header
-
Enter the routing key value to be used in the Routing Key field.
When the default direct exchange type is selected, this routing key by convention would
correspond to a queue name.
-
Select any of the following options:
| Option |
Description |
Declare |
This option enables this Exchange to be created dynamically or use the one that already
exists. |
Passive Declaration |
This option enables the API to check if this Exchange object already exists and display an error
if the object does not exist. |
Durable |
This option specifies the Exchange to be a durable Exchange as defined by the RabbitMQ
specification. |
Auto Delete |
This option specifies the Exchange to be an auto-deleted Exchange as defined by the RabbitMQ
specification. |
-
Select from the following publishing options in the Publish Flags
section:
| Option |
Description |
Mandatory |
This option enables the broker to double-check that the message is routed to queues. When the
mandatory field is not selected, the broker silently drops the message if it cannot be routed. |
Immediate |
This option enables the broker to immediately deliver the message to the consumer which can
receive the message. |
-
You do not have to change the Default Timeout section that contains
common settings for stub replies. The response time is managed by the stubs execution engine in
Rational® Integration
Tester.
-
Add a header to a message by clicking the Headers tab and entering
appropriate values in the fields.
-
Add a property to the message by clicking the Properties tab and
entering appropriate values in the fields.