Creating a custom JavaScript code in a Web UI test
You can use the JavaScript Custom Code option to create your own code and add that as a step in the Web UI test.
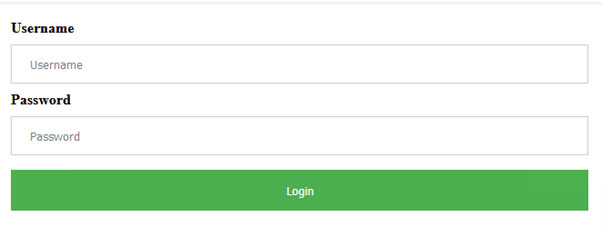
First, you must add a JavaScript file in the Web UI project and enter the code in the file. Refer to the following sample code created for the simple login form.
//Simple JS function to fill up login page data
function simpleUserLogin(){

    console.log("Signing In...");
    //Click At User Name Edit Box
    document.getElementById("uname").click();

    //Enter the UserName
    document.getElementsByName("username")[0].value="billy";

    //Click on Password Field and Enter the password
    document.getElementsByClassName("form-control-passwd")[1].click();
    document.getElementById("password").value="Cuper@tino";

    //Click on Login button
    document.getElementsByTagName("input")[3].click();
}
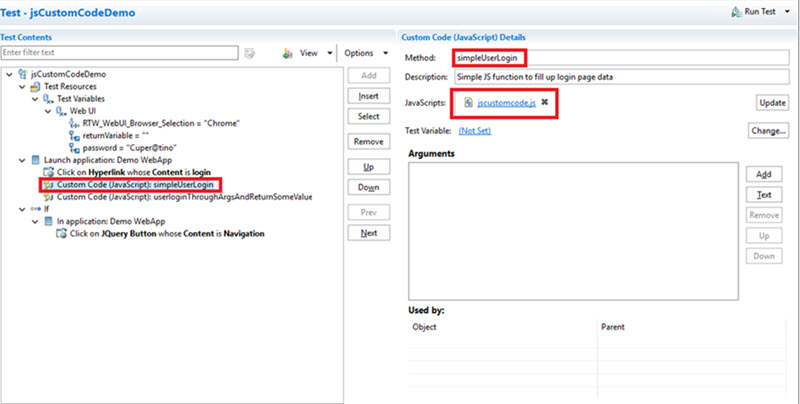
In the Web UI project, you can update the details of the JavaScript file that you created. You have to provide the method name and update the JavaScript file as shown in the following image..
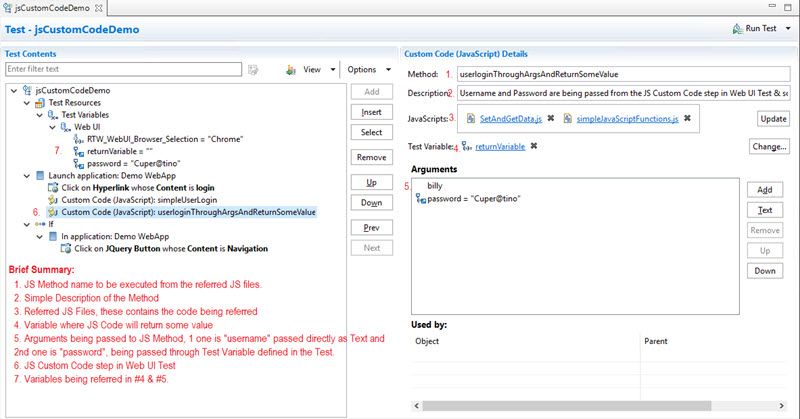
In the preceding example code, the input values such as user name and password are already hard coded. But, if you want to pass the input values from the WebUI test to the JavaScript code for which you want to get some return values, you have to create another JavaScript file and call the method in the Custom Code step as shown in the following image.
This is the sample code for defining the method that can accept values from WebUI and return values.
//username and password are being passed from the JS Custom Code step in Web UI Test & some value is being returned which would be stored in the variable defined in JS Custom Code step
function userloginThroughArgsAndReturnSomeValue(username, password){

    var returnVar = "false";
    var userName = username;
    var pwd = password;
    console.log("Waiting for the browser load...");
    //sample code - wait for document to load based on browserState
    var myVar = true;
    while(myVar === true){
        var browserState = document.readyState;
        if(browserState.indexOf("complete") !== -1){
            myVar = false;
        }
    }

    console.log("Signing In...");
    //Enter the UserName
    document.querySelectorAll("*[name='username']")[0].click();
    document.querySelectorAll("*[id='uname']")[0].value = userName;

    //Enter the password
    document.querySelectorAll(".form-control-passwd")[1].click();
    document.getElementById("password").value=pwd;

    //Click on Login button
    var submitButtonOccurances = document.querySelectorAll("*[type='submit']").length;
    document.querySelectorAll("*[type='submit']")[0].click();

    //return some value which can be stored in a variable in JS Custom Code step in Web UI Test
    console.log("Returning some value...");

    if(submitButtonOccurances >= 1){
        returnVar = "true";
    }
    return returnVar;

}
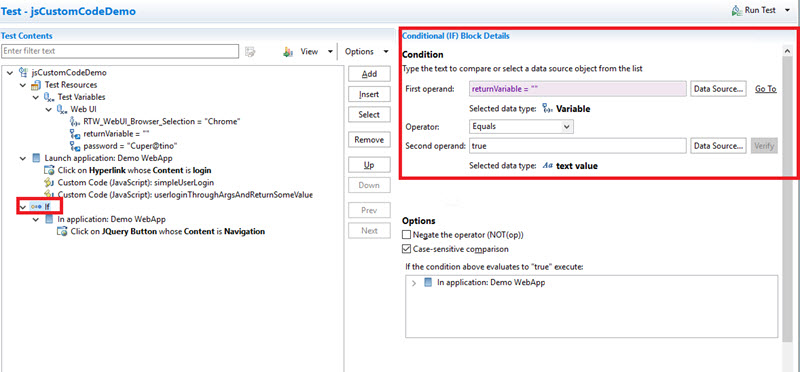
Based on the return value, the if condition will be executed.