Installing Host On-Demand on Console Mode
This section describes the procedure to install the IBM Host On-Demand using console mode.
Execute the following steps to install the Host On-Demand:
- Open the Command Prompt.
- Type Builds>HOD_Windows_x64.exe -i console in the Command
Line to configure the console mode.

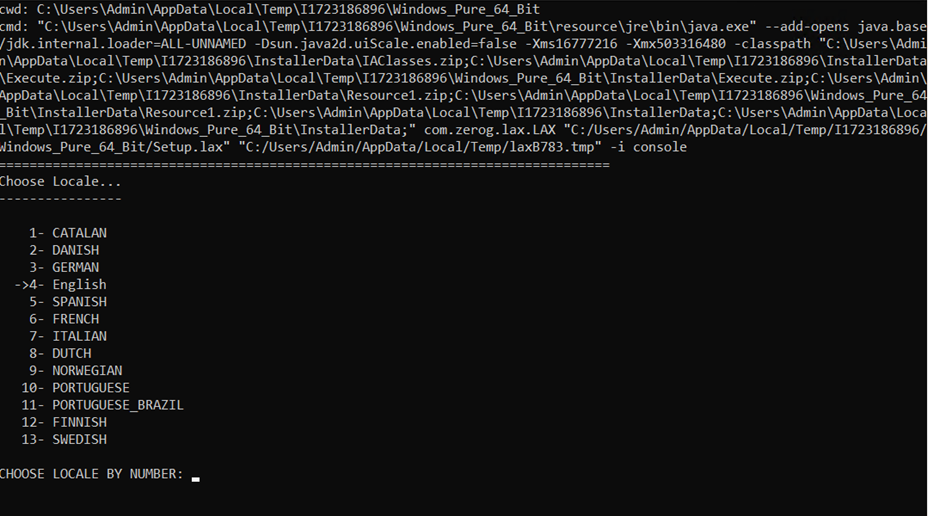
- The Choose Locale screen appears.
- Type the required locale number in the CHOOSE LOCALE BY
NUMBER field and press Enter.
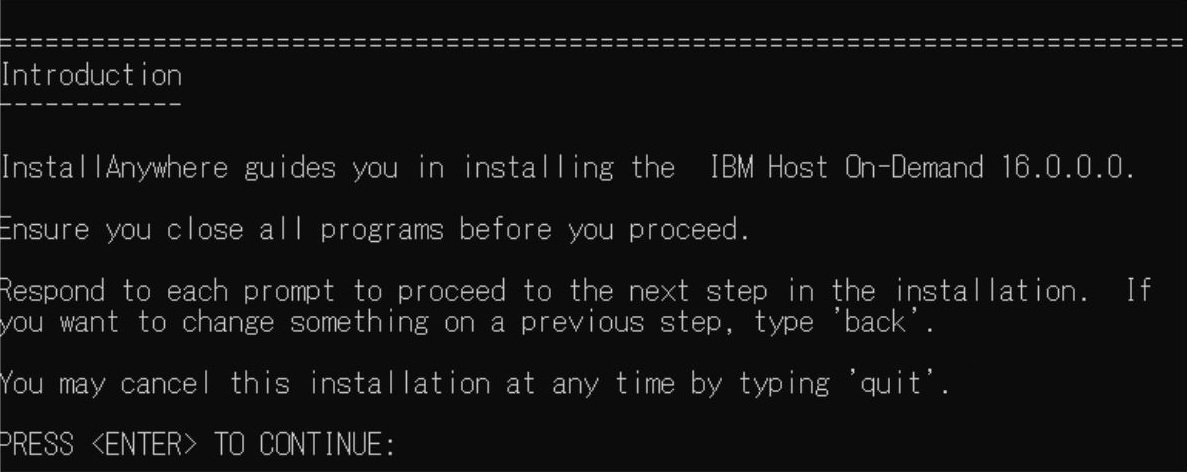
- The Introduction screen appears.
- Read the instructions carefully, and press Enter to
continue.
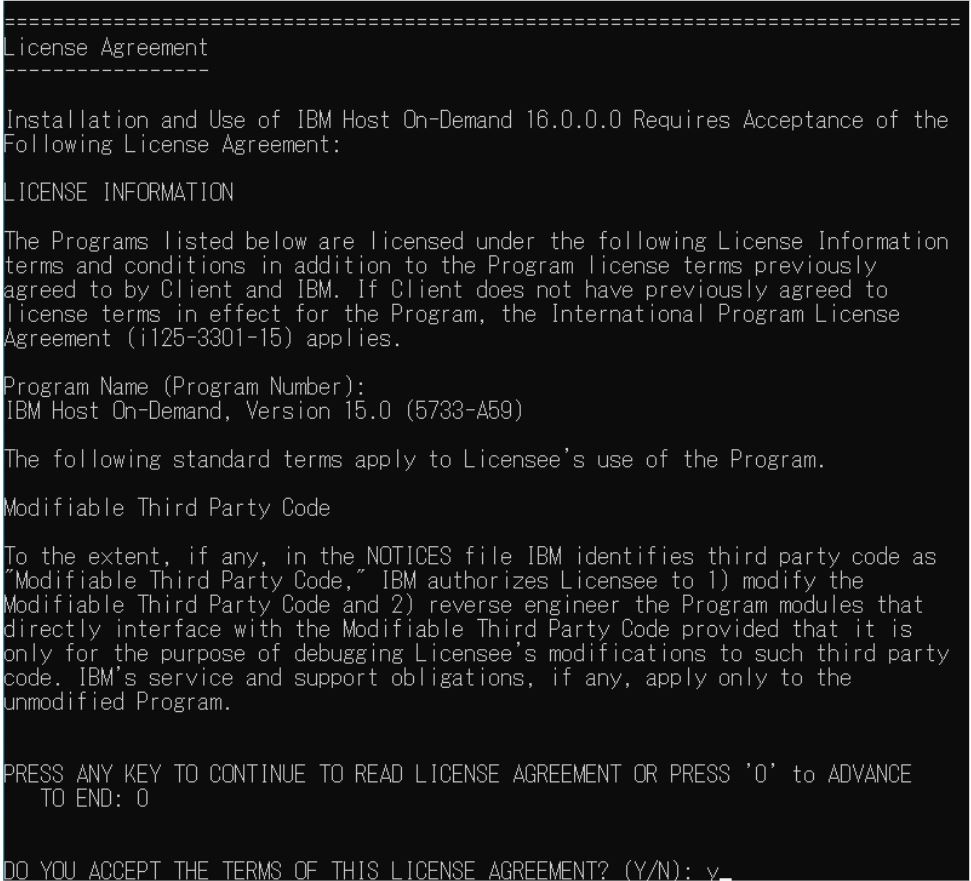
- The License Agreement screen appears.
- Read the license agreement carefully and type "Y" to accept the conditions.
- Press Enter to continue.
 Note:For IBM Host-on Demad multiple instance or upgrade, refer to Muliple Instance or Upgrade Installation.
 - The Multi Instance screen appears.
- Type the required instance number in the Select the Instance
to proceed installation field and press
Enter.
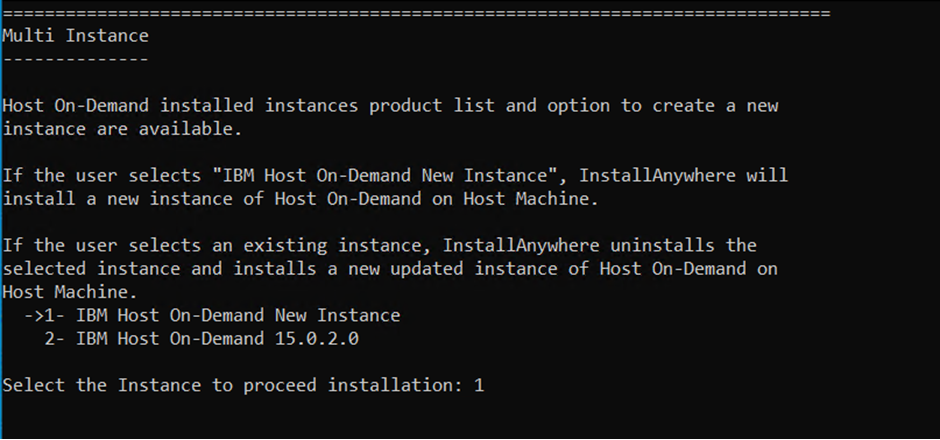 Note:The Multiple Instance panel appears when an earlier version of InstallAnywhere Host On-Demand is installed.
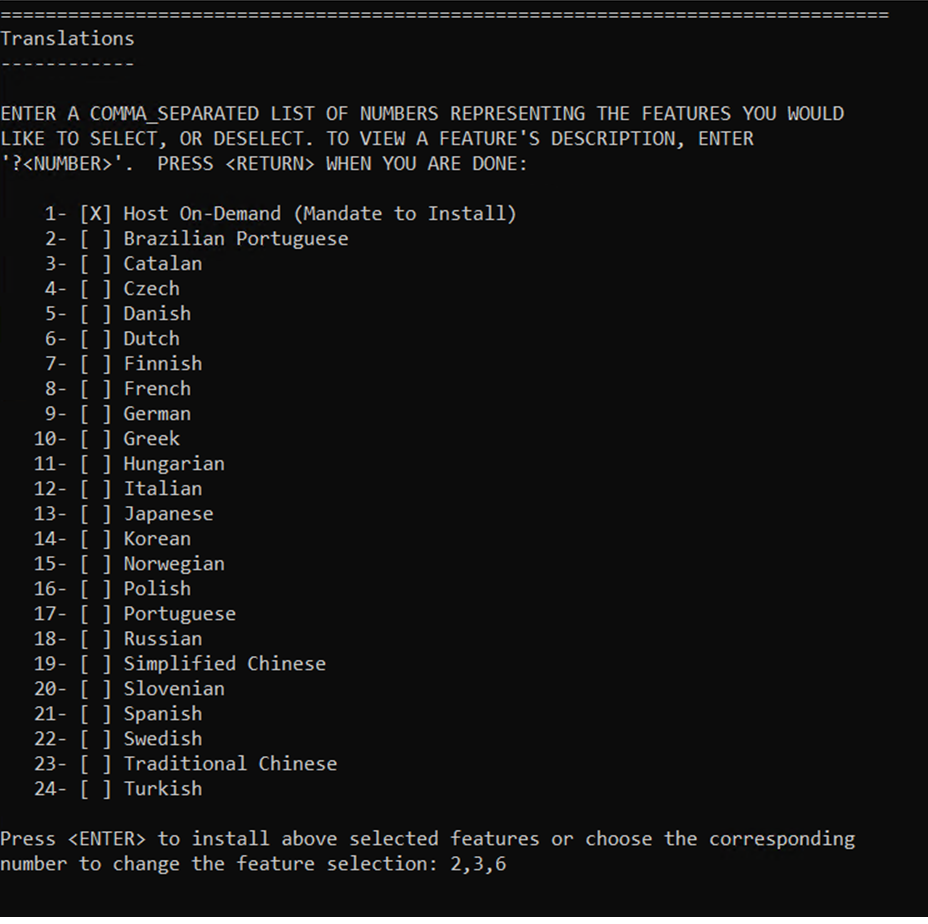
 - The Tanslations screen appears.
- Type the required language pack number and press
Enter.
 Note:
Note:- The de-selected language pack(s) will be removed.
- To remove multiple language packs, enter the numbers separated by comma(,).
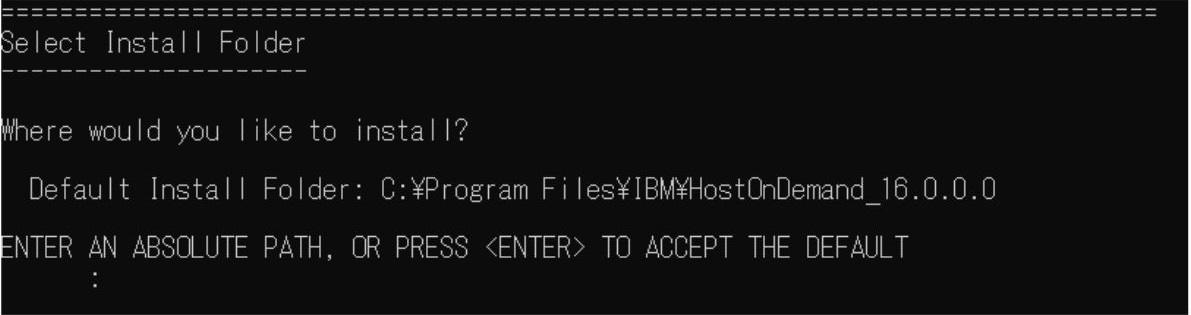
- The Select Install Folder screen appears.
- Type the required folder and press Enter to continue.
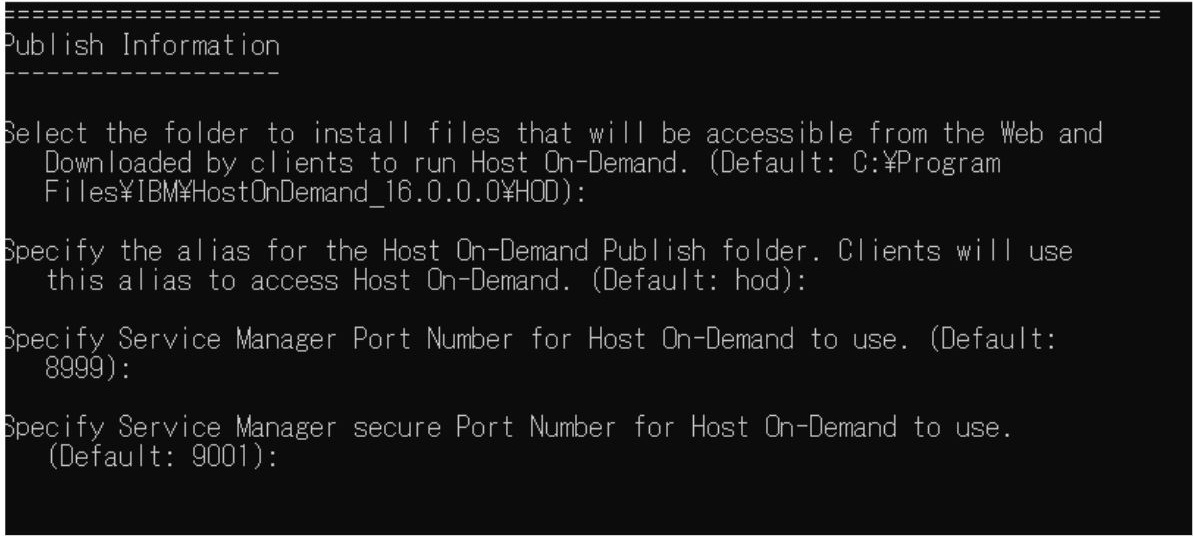
- The Publish Information screen appears.
- Type the required information in fields and press
Enter.
- The Web Server Configuration screen appears.
- Select the required configuration option and enter the required information.
- Press Enter to continue.
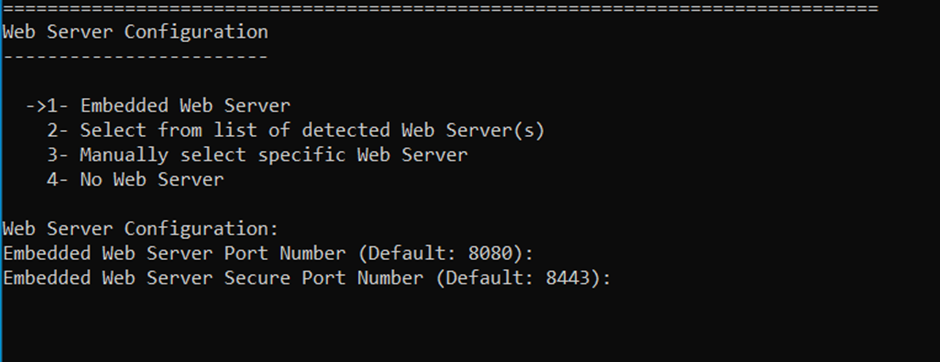 Note:If no web server is selected, the HOD HEX Client and License Manager will not be configured.
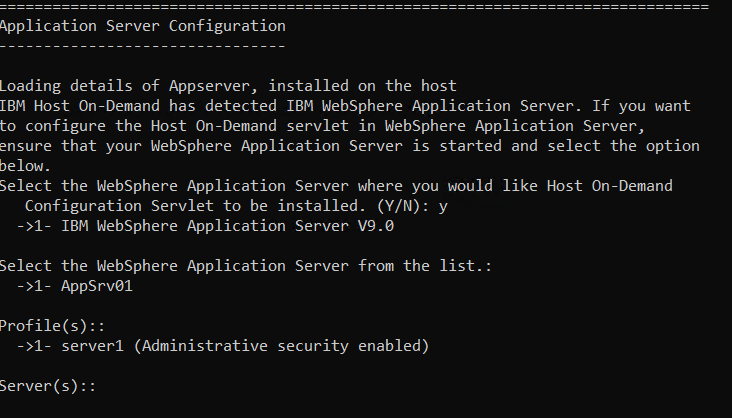
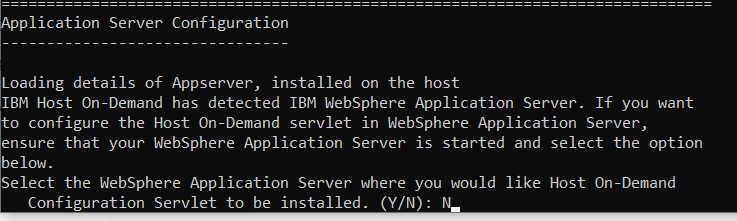
 - The Application Server Configuration screen appears.
- Type "Y" to configure Host On-Demand configuration servlet.
- Enter the required information in the following field and press
Enter:
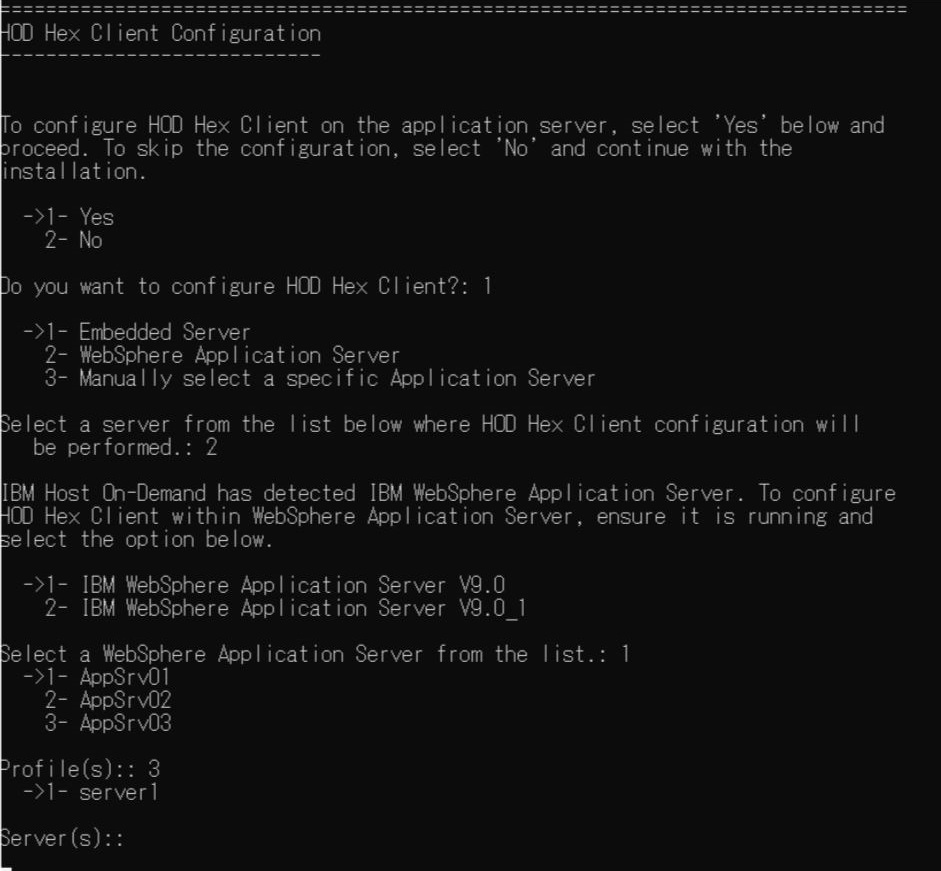
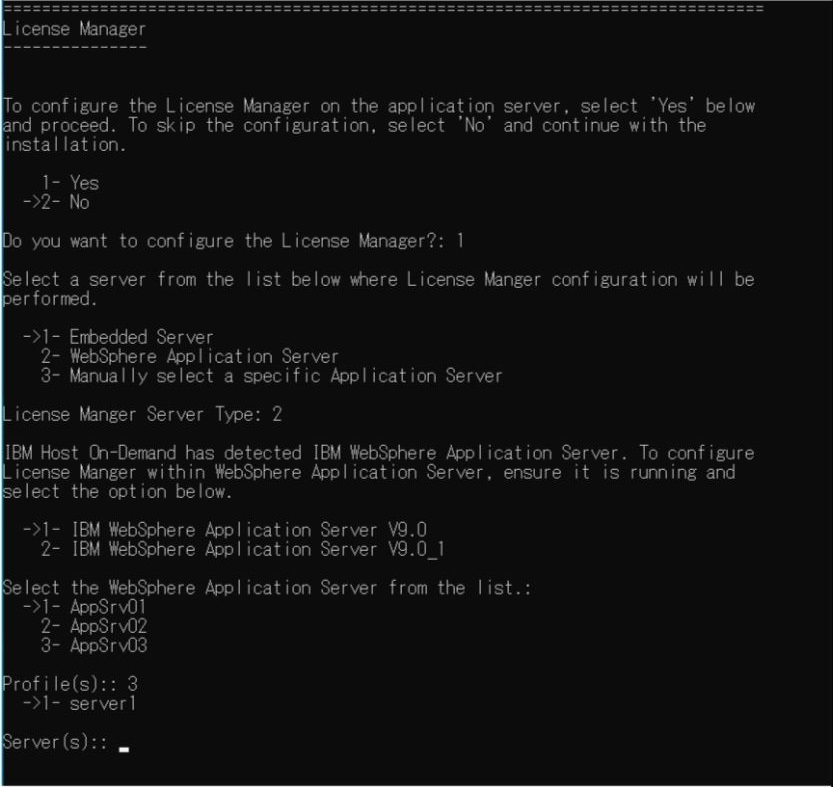
- Select the WebSphere Application Server from the list
- Profie(s)
- Server(s)
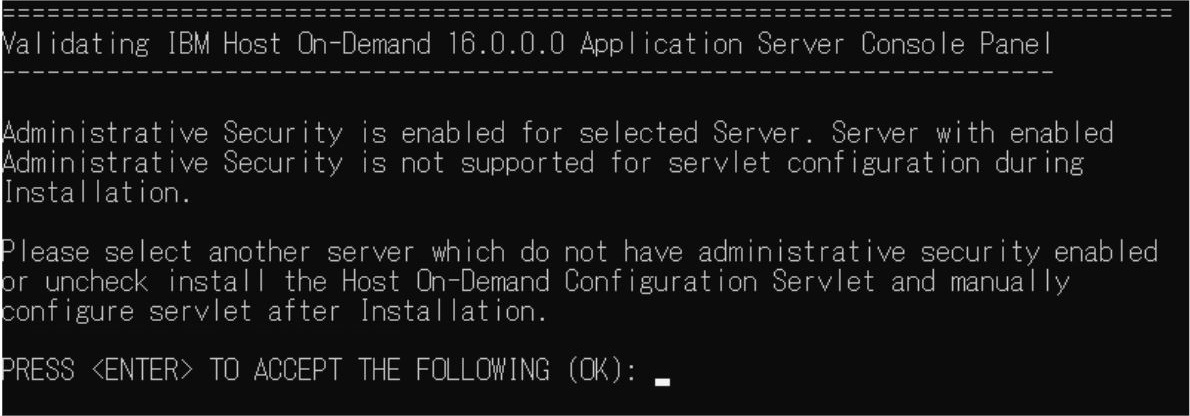
- The Validating IBM Host On-Demand 16.0.0.0 screen appears.
- Press Enter to continue.
- The Application Server Configuration is configured based
on the selected application server.
- The HOD Hex Client Configuration screen appears.
- Select the Yes option under HOD Hex Client
Configuration, if you want to install HOD Hex
Client during HOD installation. Note:
- If the Embedded Web Server option is not selected in the Web Server Panel, the Embedded Server will not be displayed on the HOD Hex Client panel.
- If the Embedded Web Server option is not selected in the Web Server Panel, the Web Server Port, Application Server Port, and Application Server Secure Port fields will be displayed on the HOD Hex Client panel.
- If the Embedded Web Server option is selected in the Web Server Panel but not selected in the HOD Hex Client, the Application Server Port and Application Server Secure Port fields will be displayed on the HOD Hex Client panel.
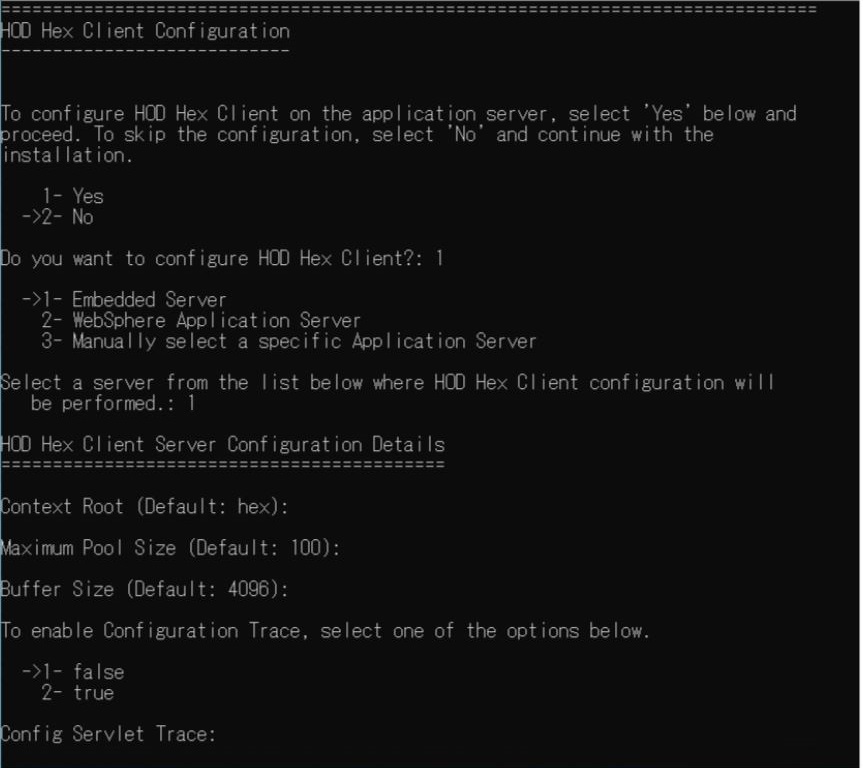
- Select the required configuration details, and press
Enter to continue.
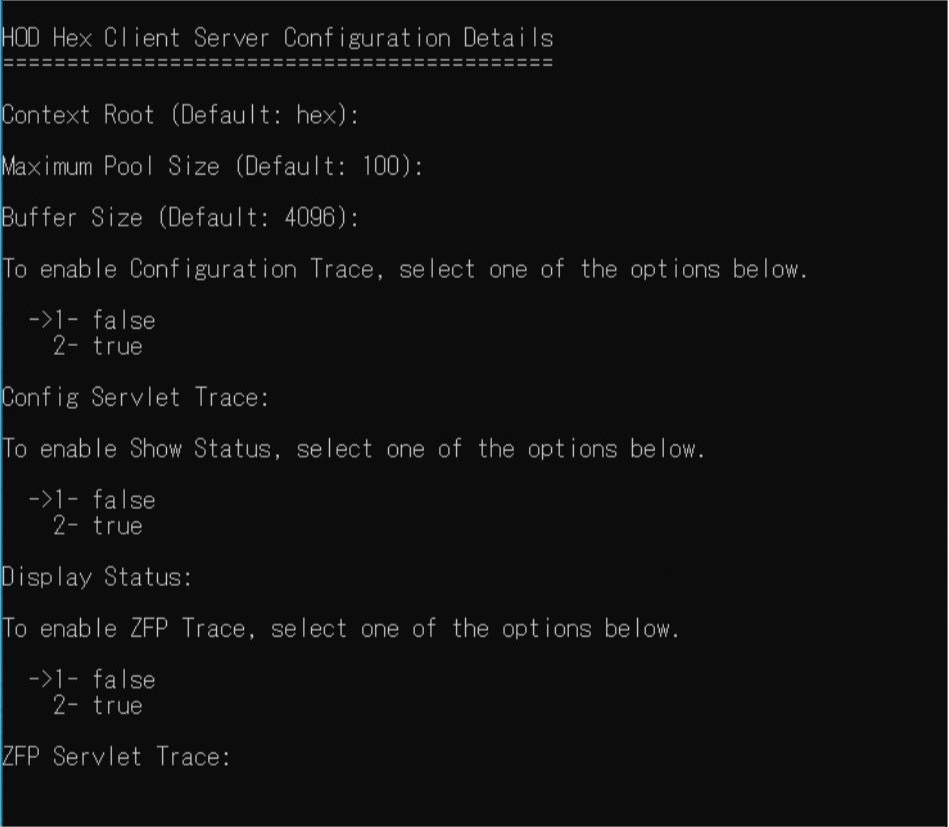
- Select the required server and enter the required details.
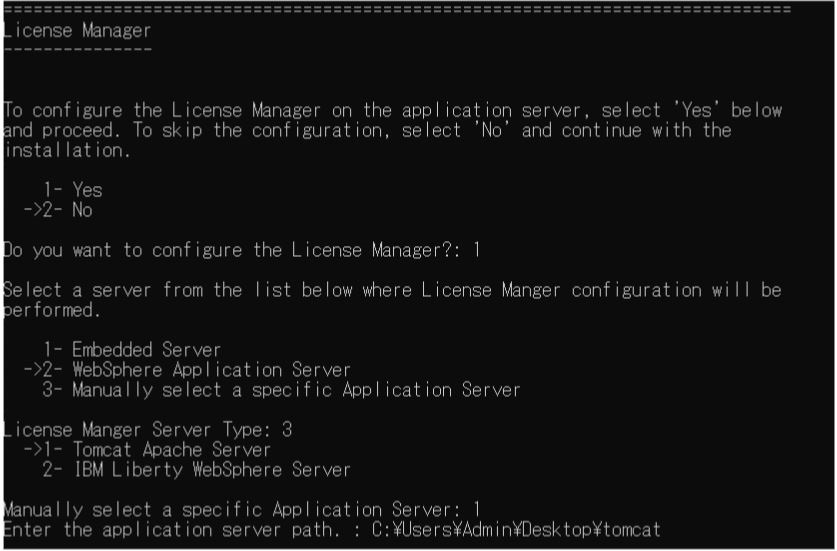
- To configure on Tomcat or Liberty application server, select the
Manually select a specific Application server
option.
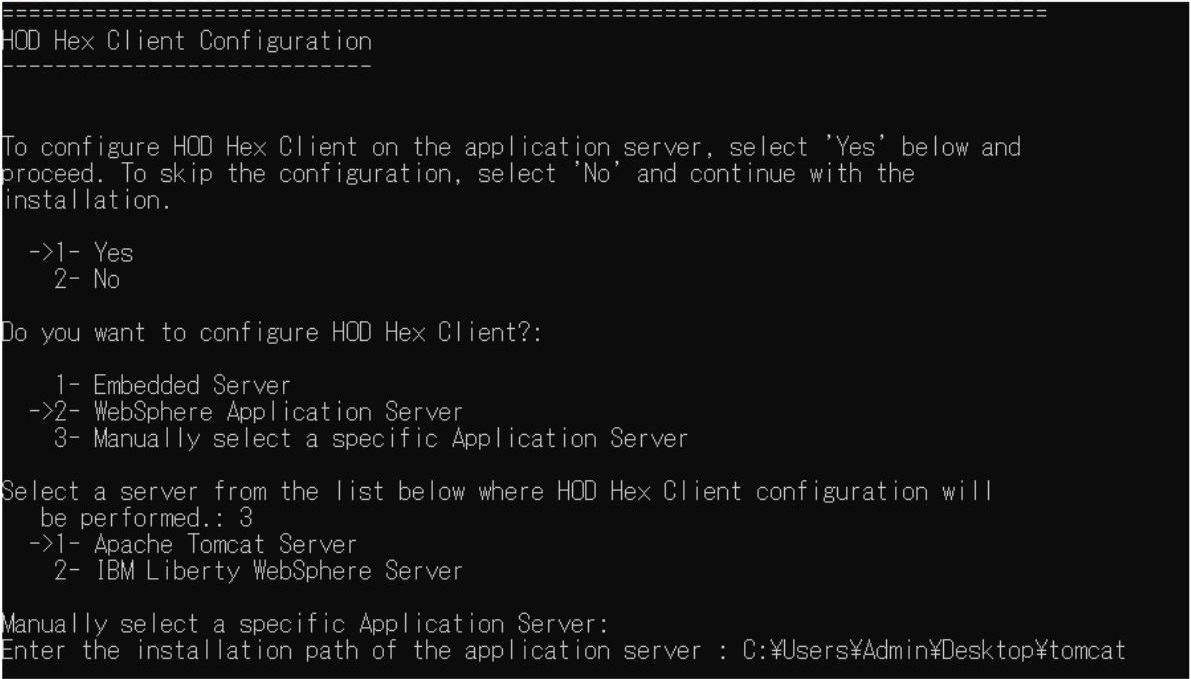 Note:
Note:-
For Apache Tomcat, specify the server installation path up to the root folder of webapps.
-
For IBM Liberty, specify the server path up to the Web Server configuration directory.
-
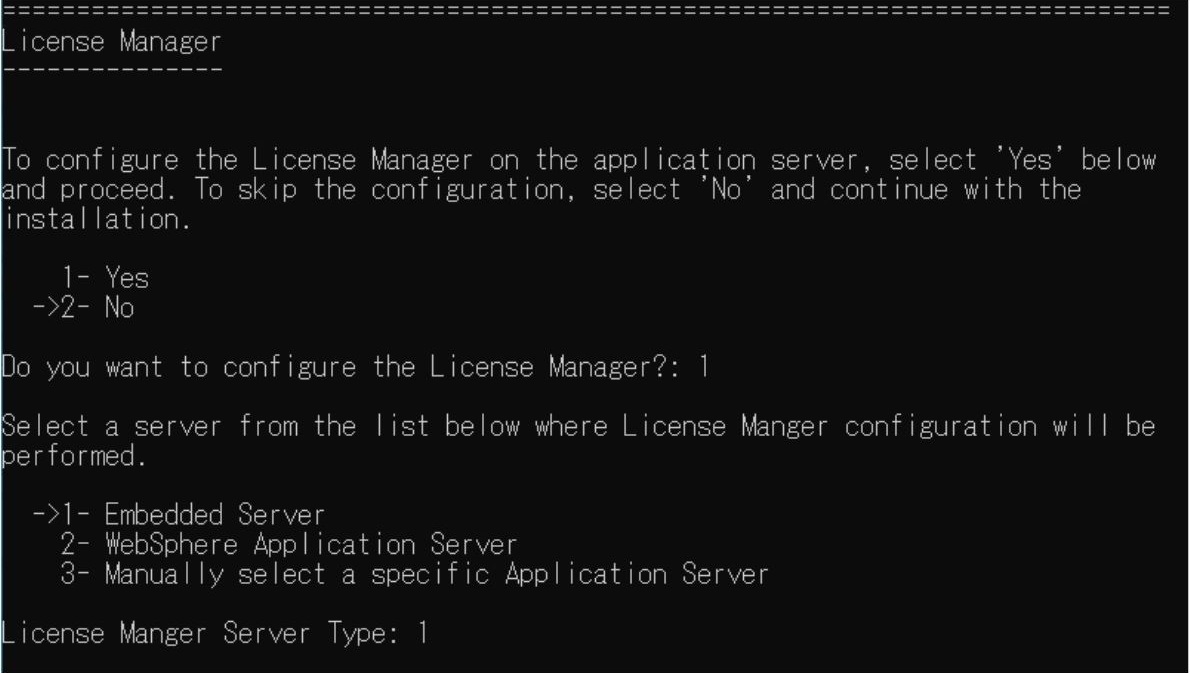
- Select Yes option under License Manager, if you
want to install the License Manager during HOD
installation.Note:
- If the Embedded Web Server option is not selected in the Web Server Panel, the Embedded Server will not be displayed on the License Manager panel.
- If an external application server is selected, the Application Server Port and Application Server Secure Port fields are displayed on the License Manager panel.
- Select the reuqired server and enter the required details.
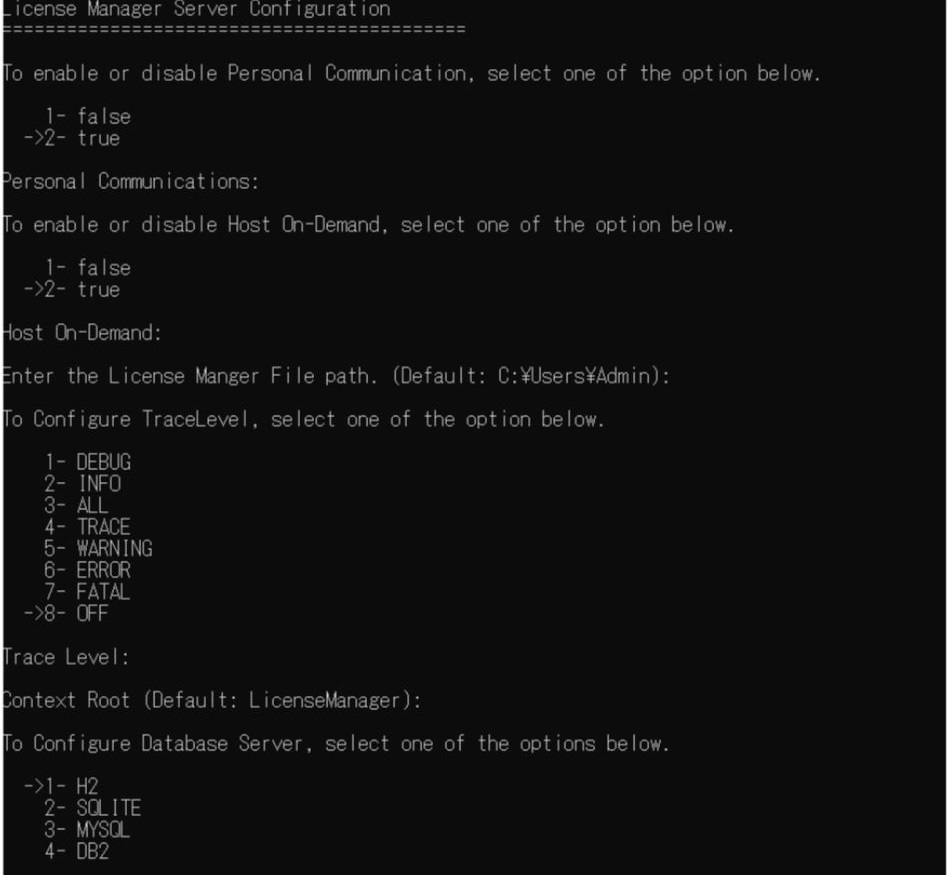
- Under Database Configuration select any one of the following
option for Database Server:
- H2: For H2 Database Server, enter the
Database Username and Database Password.Note:For OS 400, the Password will remain unmasked.
- SQLITE
- MYSQL: For MYSQL Database Server, select
any one of the following option:
-
- Database Driver
- Database Username
- Database Password
- Database URL
-
- DB2: For MYSQL Database Server, select
any one of the following option:
- Database Driver
- Database Username
- Database Password
- Database URL
- H2: For H2 Database Server, enter the
Database Username and Database Password.
- To configure on Tomcat or Liberty application server, select the
Manually select a specific Application server
option.
- Press Enter to continue.
- The Pre-installation Summary screen appears.
- Review the installation summary carefully and press Enter
to continue.

- The Installing screen appears, which displays the
installation progress.
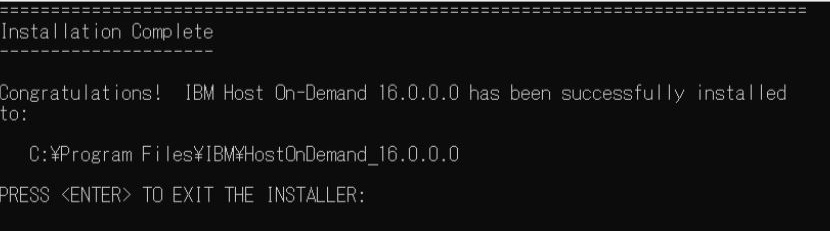
- After successful configuration, the Installation Complete screen appears.
- Press Enter to exit.