Results publishers
To automatically publish the results of a test suite after it is run, use Results Publishers, which is created under Project Settings. Specify the publishers to use and the details of the results to publish and how to publish them on the Results Publishers tab.
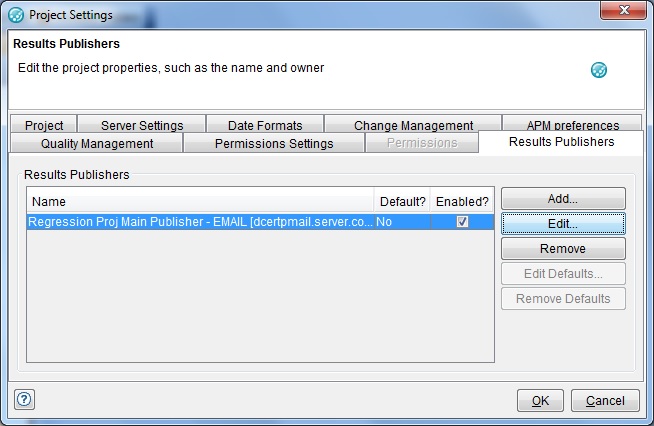
Suite execution results are published by all publishers added to the suite if the following two conditions are met:
Publishers are enabled under Project Settings. Results publishing is enabled in the project.
- To add a publisher to the suite, click Add.
To modify an existing publisher, select it and click Edit (see Results publisher settings).
- To delete the selected publisher from the suite, select it and click Remove.
-
To set a publisher as a default for all test suites (that is, the selected publisher and its settings are applied to all new test suites when they are created), select the wanted publisher and click Edit Defaults. To remove the defaults from the settings, select the publisher and click Remove Defaults.
Results publisher settings
When you add a publisher to a test suite or edit the settings for an existing publisher, the Add/Edit Result Publisher dialog is displayed.
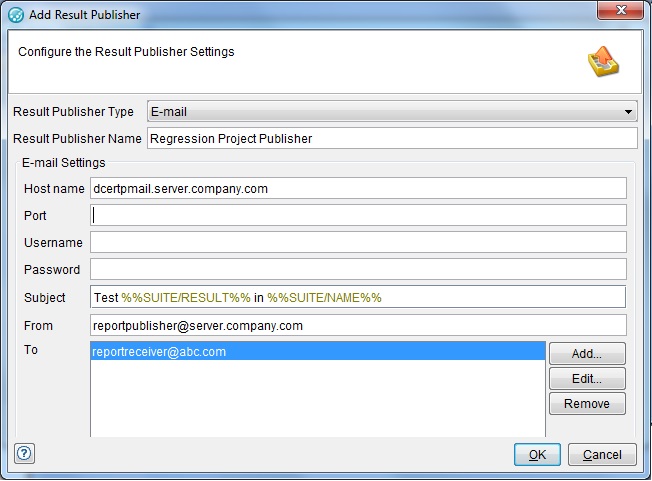
Select the type of the publisher that you want to create from the Result Publisher Type drop-down list. Depending on the Publisher Type that you choose, the configuration settings change. If you are editing the settings for an existing publisher, the publisher type cannot be changed.
Custom reports
You can manage custom reports in the Custom Reports Manager that is accessible from .
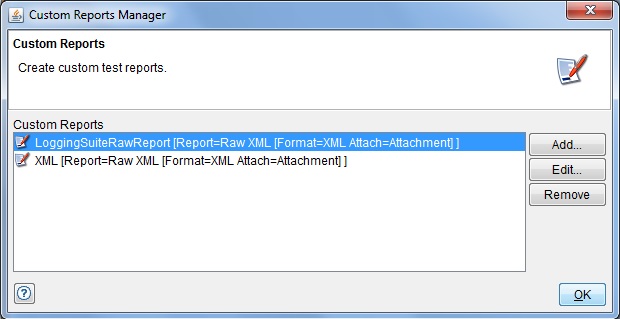
A custom report is a report that you define. This report contains one or more of the reports that are available in Rational® Integration Tester Results Gallery (report segment). Each report segment contains a built-in Rational® Integration Tester report and a format and attachment configuration.
To create a custom report, click Add. To modify the settings of a selected custom report, click Edit. To delete a custom report from the list, select it and click Remove.
Add or modify a custom report
To add or modify a custom report, use the Add/Edit Custom Reports dialog.
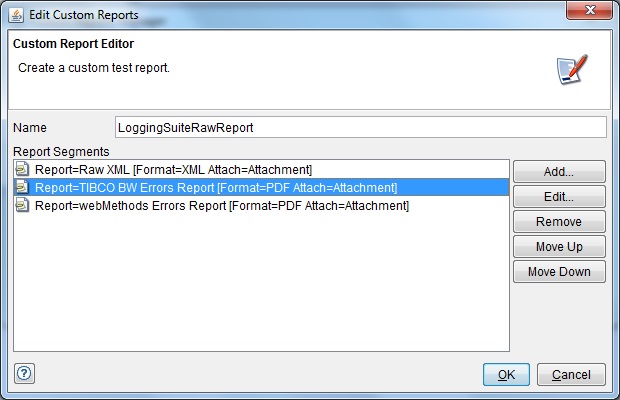
In the Name field, specify a meaningful name or edit the existing name for the report.
- Click Add to create a report segment.
- Click Edit to modify a selected report segment.
- Click Remove to delete a selected report segment.
- Click Move Up or Move Down (when available) to reorder the selected report segment within the list.
Report segments
| Type | Select the type of the segment report. The values are Report and Chart. |
| Report |
Select an existing report. It will become the current segment in the report. |
| Additional Text |
Enter some descriptive text. The contents are printed in the custom report at the beginning of the selected report segment. This field is tag-aware and, therefore, you are shown a default entry. You can modify this entry. |
| Format |
Specify the required format of the selected report segment (PDF, HTML Link, or XML). The Link option is a hyperlink to the report on the Results Server, but is only available for the Suite Summary Report. |
| Attach |
Specify how the selected report segment is to be included in the message, whether Inline (in case of HTML and Link format) or as an attachment (in case of PDF and HTML format). If you select the Separate Attachment option, specify the file name that is assigned to the report segment. The .pdf or .html extension is added automatically to the file when the segment is generated. |